
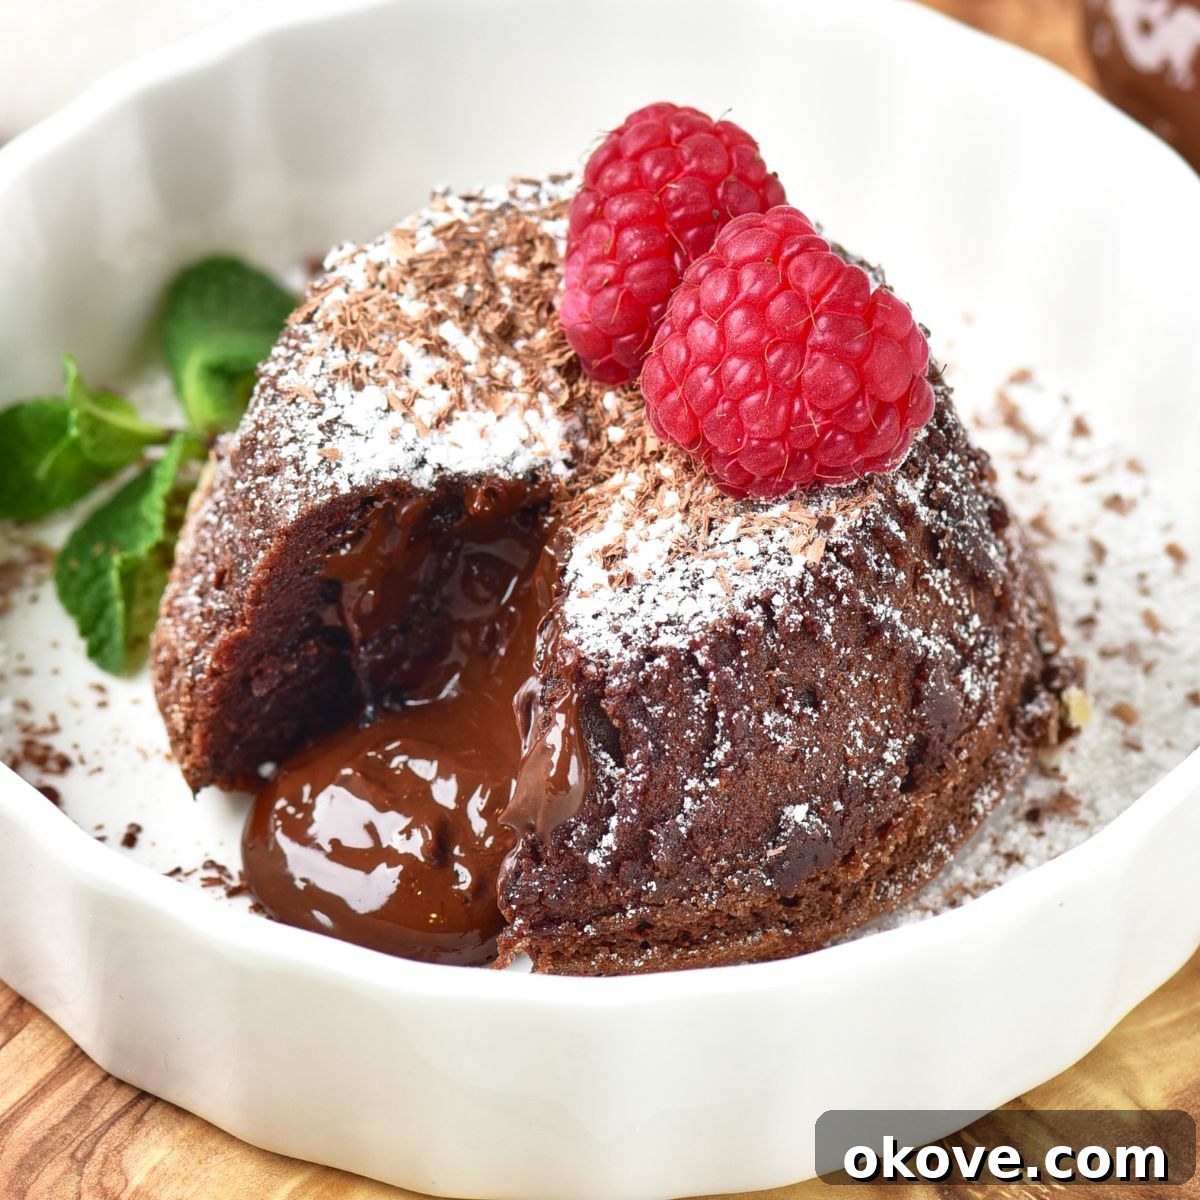
There’s an undeniable magic in a perfectly crafted chocolate lava cake – that moment when you first cut into its delicate crust, revealing a luscious, molten chocolate center that flows like a warm, decadent river. It’s a dessert that screams sophistication yet, surprisingly, is incredibly simple to create right in your own kitchen. This recipe promises not only a show-stopping dessert but also an immensely satisfying baking experience, delivering a rich, gooey delight that melts in your mouth with every exquisite bite. Truly, it’s every chocolate lover’s dream dessert come true.
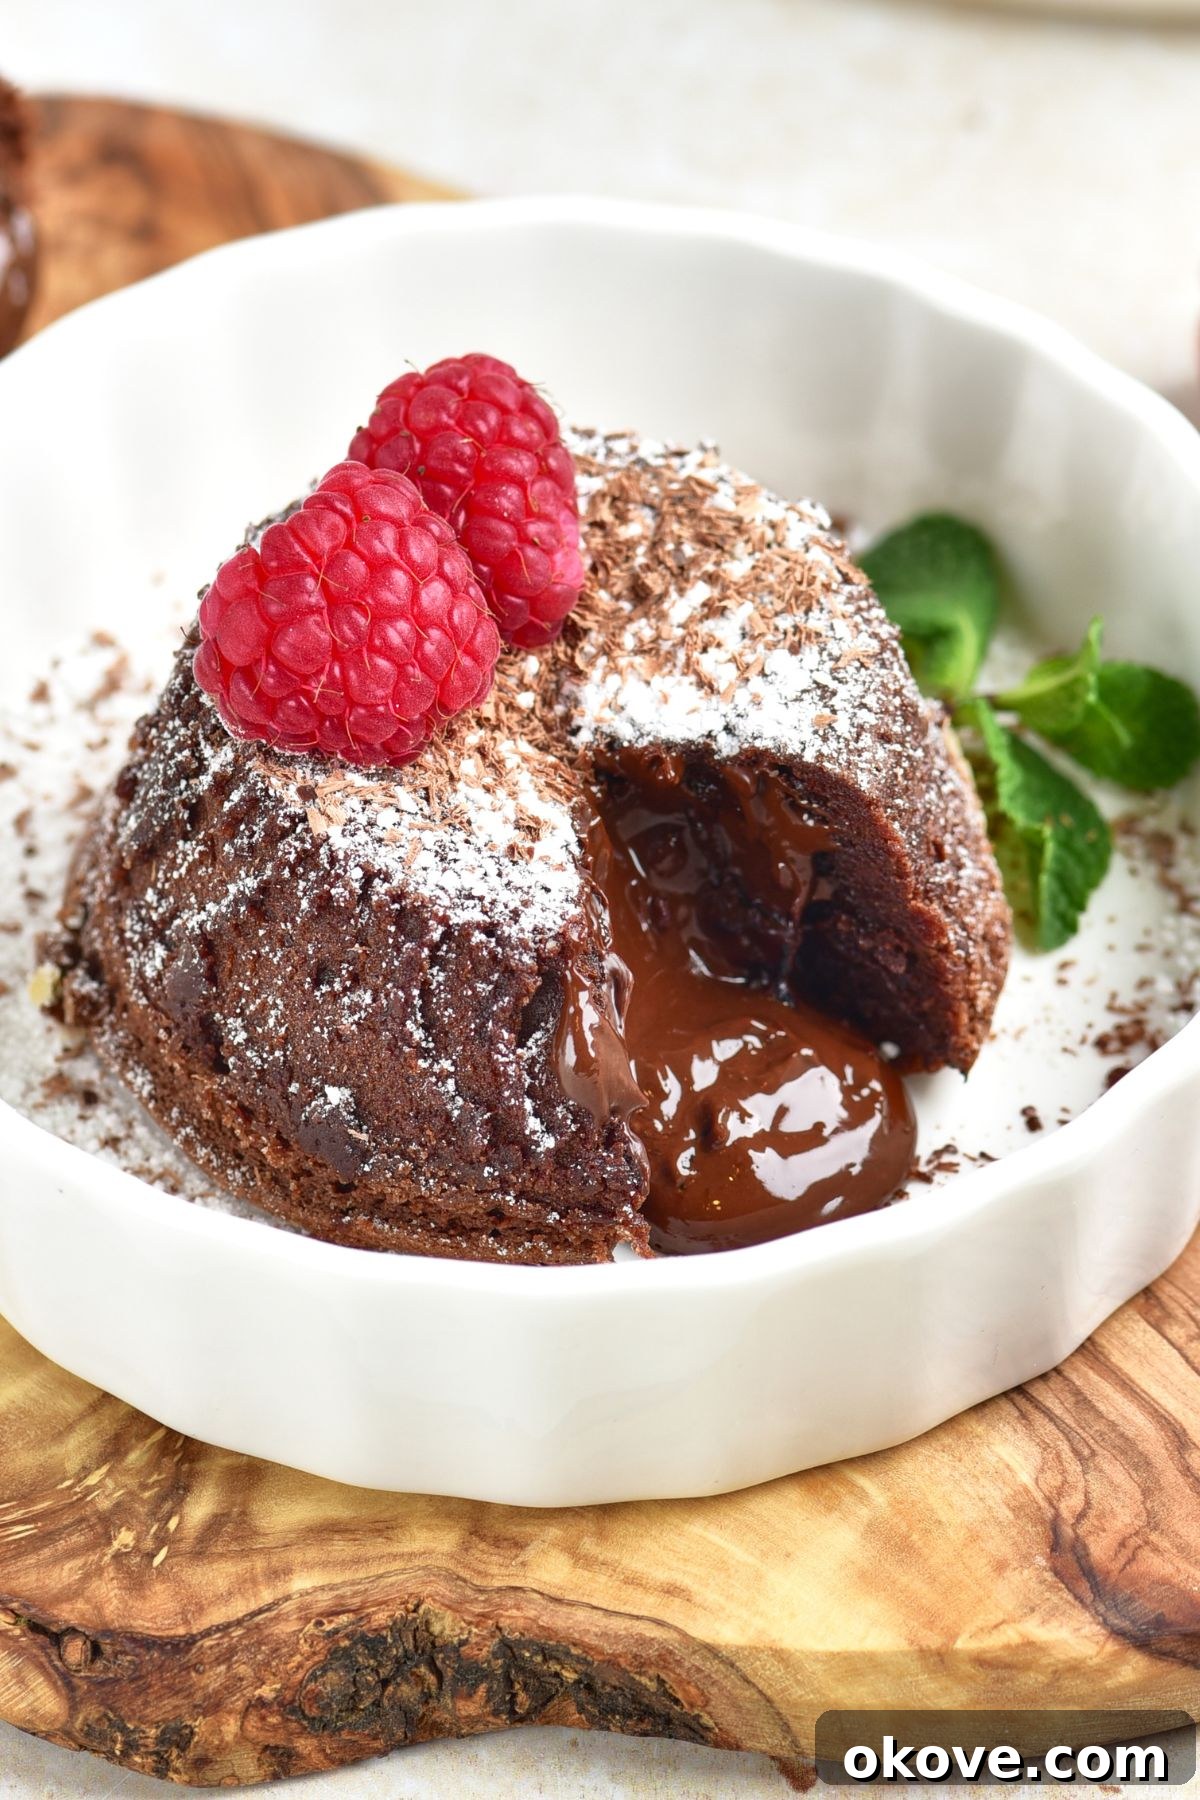
Table of Contents
- The Ultimate Easy Chocolate Lava Cake Recipe
- History of the Molten Chocolate Masterpiece
- Essential Ingredients You Will Need
- Creative Variations and Flavor Enhancements
- How to Make the Perfect Chocolate Lava Cake: Step-by-Step
- Pro Tips for Making the Best Molten Chocolate Lava Cake
- Serving and Pairing Suggestions
- Frequently Asked Questions (FAQs)
- More Irresistible Chocolate Recipes
- Printable Chocolate Lava Cake Recipe Card
The Ultimate Easy Chocolate Lava Cake Recipe
Forget complicated techniques and lengthy ingredient lists. This homemade lava cake is designed for simplicity, making it accessible for even novice bakers, yet it presents as if it were meticulously prepared by a five-star pastry chef. I find myself reaching for this recipe for various special occasions – think intimate Valentine’s Day dinners, celebratory anniversaries, or simply whenever a profound craving for rich, decadent chocolate cake strikes. Its elegance and undeniable deliciousness also make it the perfect grand finale for any meal with out-of-town guests; a dessert that consistently earns rave reviews and happy sighs.
The beauty of this classic dessert lies in its harmonious contrast: a perfectly baked, tender chocolate cake exterior cradling a luscious, gooey, molten chocolate core. This warm, melty chocolate surprise is what makes it a universal crowd-pleaser and an absolute must-try for anyone who adores chocolate. The secret to its simplicity is in the precise balance of ingredients and a quick baking time, ensuring that the edges set beautifully while the center remains delightfully liquid.
History of the Molten Chocolate Masterpiece
The origin of the molten chocolate lava cake is a delightful culinary debate, with both French chef Jean-Georges Vongerichten and American chef Jacques Torres laying claim to its invention in the 1980s. Vongerichten states he first created it in New York City in 1987 when he accidentally undercooked a chocolate genoise. Torres, on the other hand, claims to have invented it in France, bringing the idea to New York later. Regardless of its exact birthplace, this innovative dessert quickly captivated diners worldwide with its unique texture and intense chocolate flavor. It became a staple on high-end restaurant menus and soon made its way into home kitchens, evolving into the beloved classic we enjoy today. Its enduring popularity is a testament to its simple elegance and profoundly satisfying taste experience.
Essential Ingredients You Will Need
Creating an extraordinary chocolate lava cake doesn’t require an arsenal of exotic ingredients. In fact, its magic comes from a few high-quality staples, each playing a crucial role in achieving that perfect texture and flavor. Opting for the best quality ingredients you can find will elevate your dessert from good to truly unforgettable.
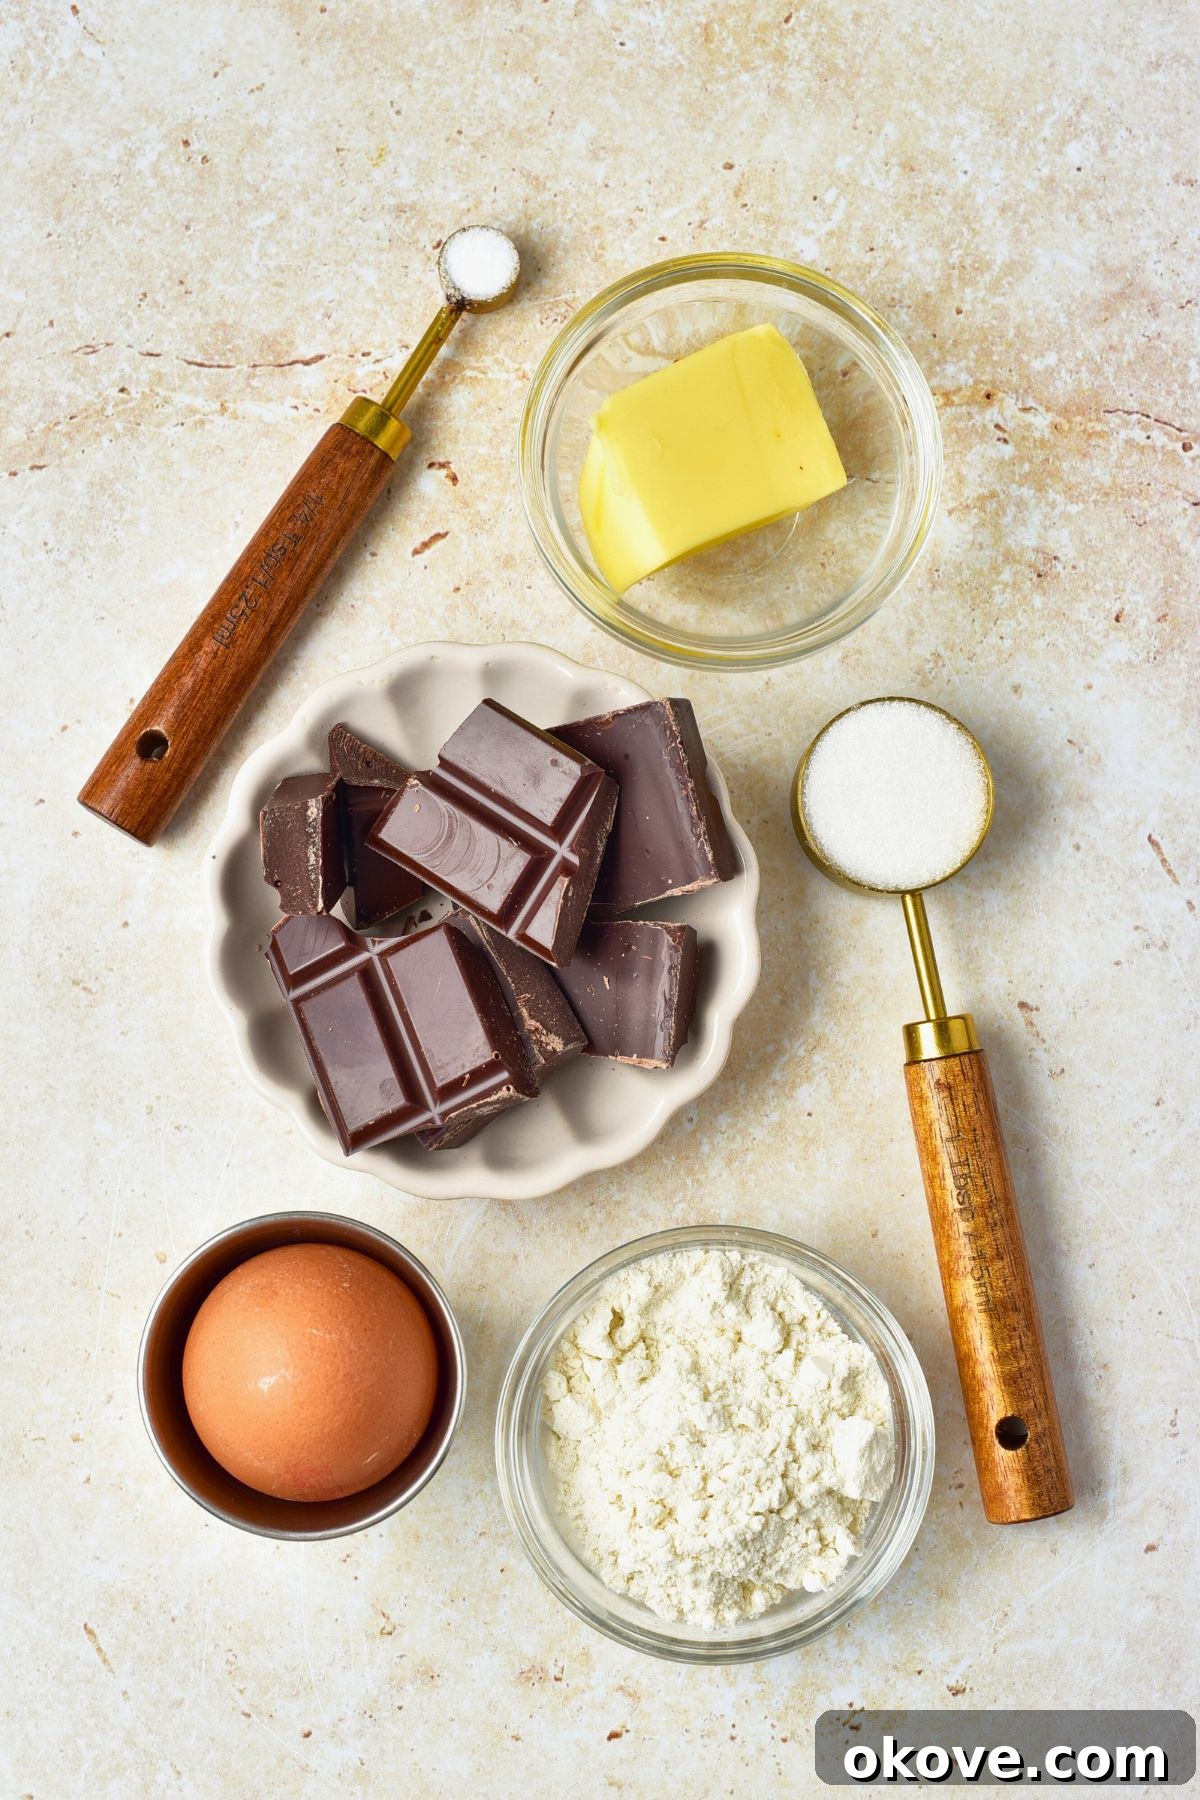
- Unsalted Butter: The foundation of richness and moisture. Using unsalted butter allows you to control the overall salt content of your cake, ensuring a balanced flavor.
- Dark Chocolate: This is where the magic truly happens. For the best flavor, choose a high-quality dark chocolate (around 60-70% cacao). Bittersweet or semi-sweet chocolate works wonderfully, providing a deep, complex chocolate profile that isn’t overly sweet. Avoid chocolate chips if possible, as they contain stabilizers that can affect melting consistency; instead, opt for baking bars.
- Eggs: Eggs provide the essential structure for the cake as it bakes, contributing to its light, airy texture and helping it rise beautifully around the molten center.
- Egg Yolks: These are critical for enhancing the creamy, luscious texture of the molten center. The extra yolks add richness and contribute to the signature gooey consistency that makes a lava cake so irresistible.
- Granulated Sugar: A touch of sweetness is necessary to balance the inherent bitterness of dark chocolate, creating a well-rounded and delightful flavor profile.
- Kosher Salt: A pinch of salt is a secret weapon in baking. It doesn’t just make things salty; it magnificently enhances all the other flavors, particularly deepening the chocolate notes and preventing the cake from tasting flat.
- All-Purpose Flour: You only need a minimal amount of flour. Its purpose is to provide just enough structure to hold the batter together, ensuring the cake forms its outer shell while keeping the interior wonderfully soft and molten. Too much flour will result in a fully baked cake, defeating the “lava” effect.
Creative Variations and Flavor Enhancements
While the classic chocolate lava cake is perfection on its own, its versatility allows for exciting variations. Don’t hesitate to experiment and make this recipe your own!
- Swap Chocolates: For a different flavor experience, experiment with other types of chocolate. Milk chocolate will yield a sweeter, milder cake, while white chocolate will offer a distinct, creamy vanilla note. You could even use a combination, like a blend of dark and milk chocolate, for a nuanced profile.
- Espresso Richness: A teaspoon of instant espresso powder or finely ground coffee added to the melted chocolate can dramatically deepen and intensify the chocolate flavor without making the cake taste like coffee. It’s a classic pairing that truly brings out the best in chocolate.
- Citrus Zest: A hint of orange zest or even a tiny amount of high-quality orange extract can brighten the chocolate flavor beautifully, offering a refreshing counterpoint.
- A Touch of Spice: For an intriguing warmth, add a pinch of cayenne pepper or chili powder to the chocolate mixture. This creates a subtle heat that lingers pleasantly on the palate, a nod to Mexican hot chocolate.
- Nutty Notes: Stir in a tablespoon of finely ground hazelnuts or almonds into the batter for added texture and a delicate nutty flavor.
- Alcoholic Infusions: A tablespoon of your favorite liqueur can add a sophisticated touch. Think Grand Marnier for an orange twist, Kahlúa for coffee, or a good quality rum or whiskey for depth.
How to Make the Perfect Chocolate Lava Cake: Step-by-Step
Follow these detailed steps to achieve a flawless, restaurant-quality molten chocolate lava cake every time. Precision is key, especially with baking times!
STEP 1: Prepare Your Ramekins and Oven. Preheat your oven to a high temperature of 450 degrees F (230 degrees C). This high heat is crucial for ensuring the cake’s exterior bakes quickly while the interior remains molten. Generously grease the interior of your ramekins with unsalted butter, making sure to coat all sides thoroughly. This prevents sticking and ensures easy release. Then, lightly dust the buttered ramekins with all-purpose flour, tapping out any excess. This creates a non-stick barrier, guaranteeing your beautiful cakes slide out perfectly after baking. Place the prepared ramekins on a baking sheet; this makes them easier to transfer in and out of the oven.
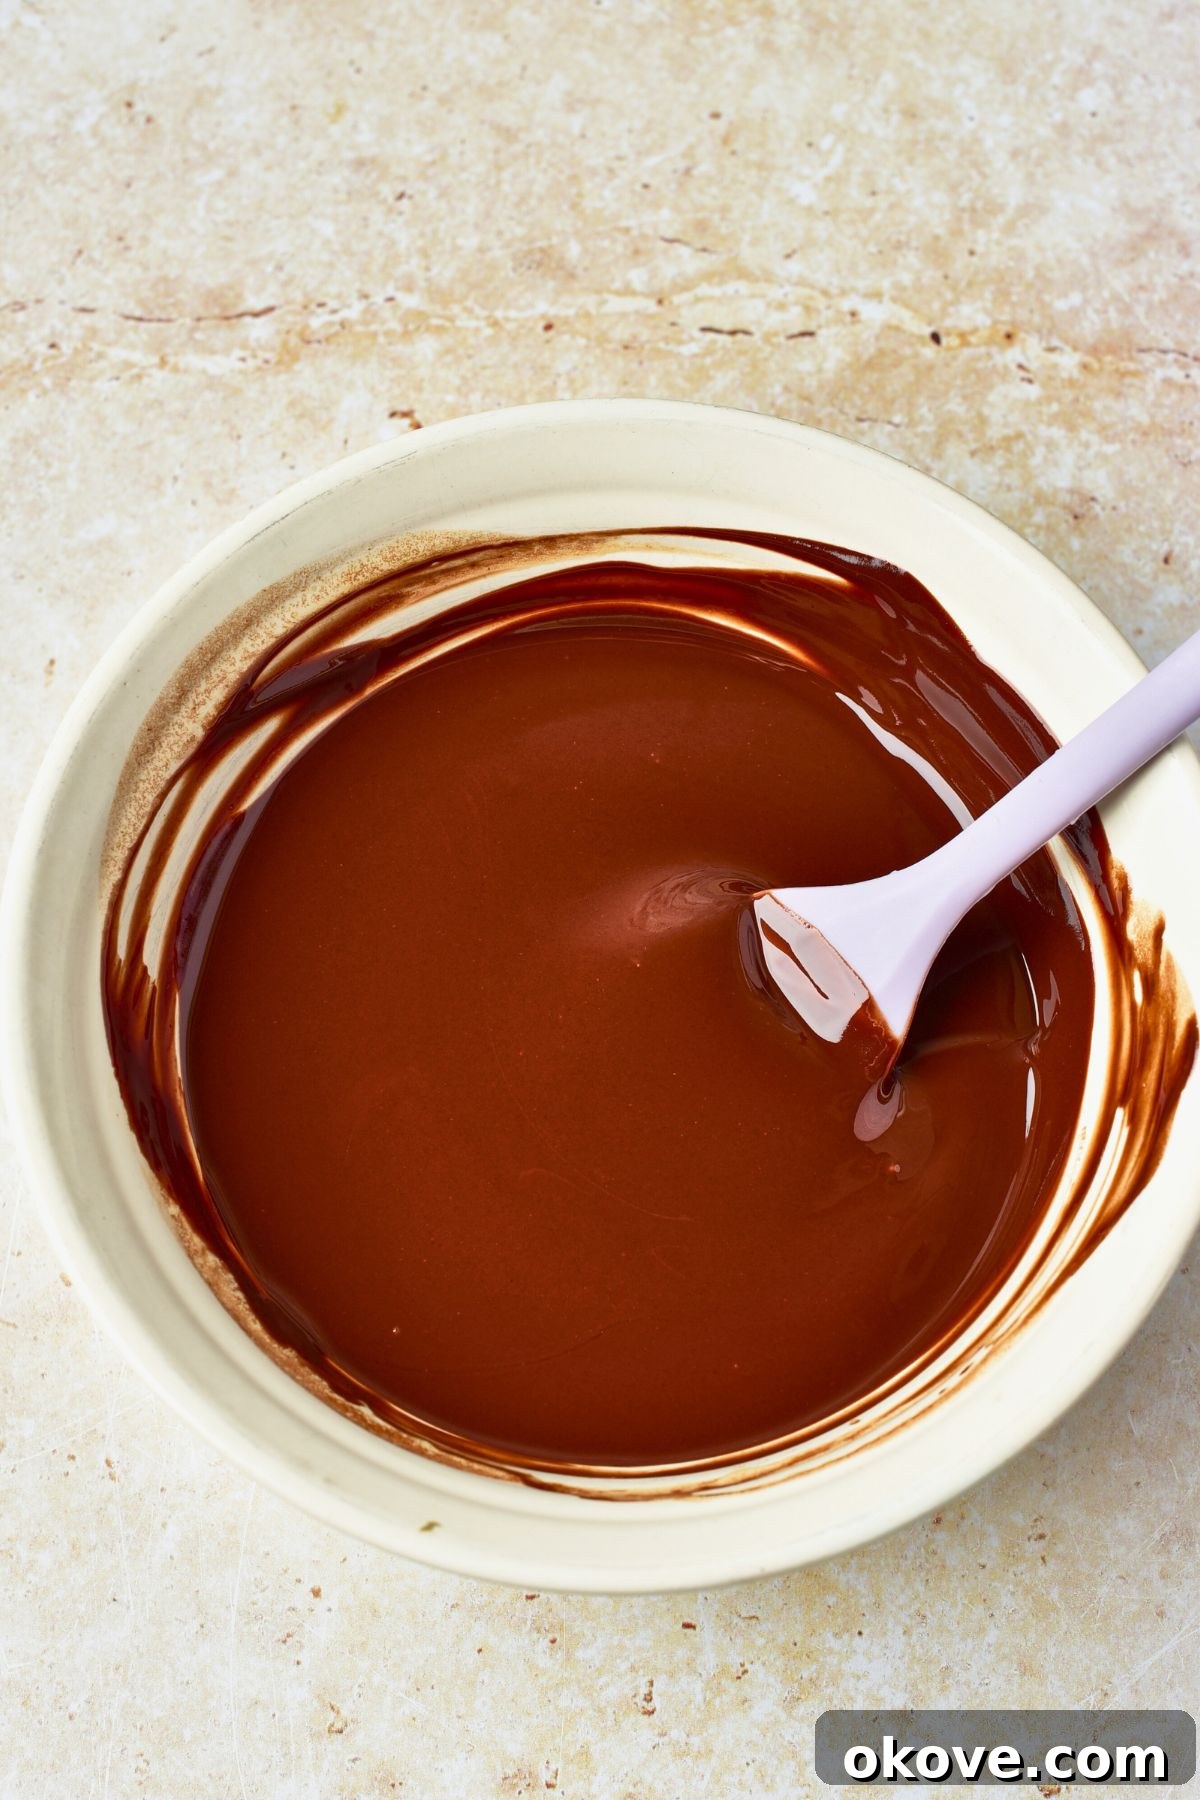
STEP 2: Melt the Chocolate and Butter. In a small, microwave-safe bowl, combine the unsalted butter and chopped dark chocolate. Melt this mixture in 30-second intervals in the microwave, stirring diligently after each interval until the mixture is completely smooth and free of any lumps. Alternatively, you can use a double boiler on the stovetop. Once melted, set the chocolate mixture aside to cool slightly. It’s important that it’s not too hot when combined with the eggs.
STEP 3: Whip Eggs, Yolks, Sugar, and Salt. In a separate medium-sized mixing bowl, combine the whole eggs, egg yolks, granulated sugar, and kosher salt. Using a hand mixer or a stand mixer fitted with the whisk attachment, beat this mixture on medium-high speed for 3 to 4 minutes. The goal is to achieve a pale yellow, thick, and fluffy consistency. This whipping incorporates air into the mixture, contributing to the cake’s light texture and helping it rise.
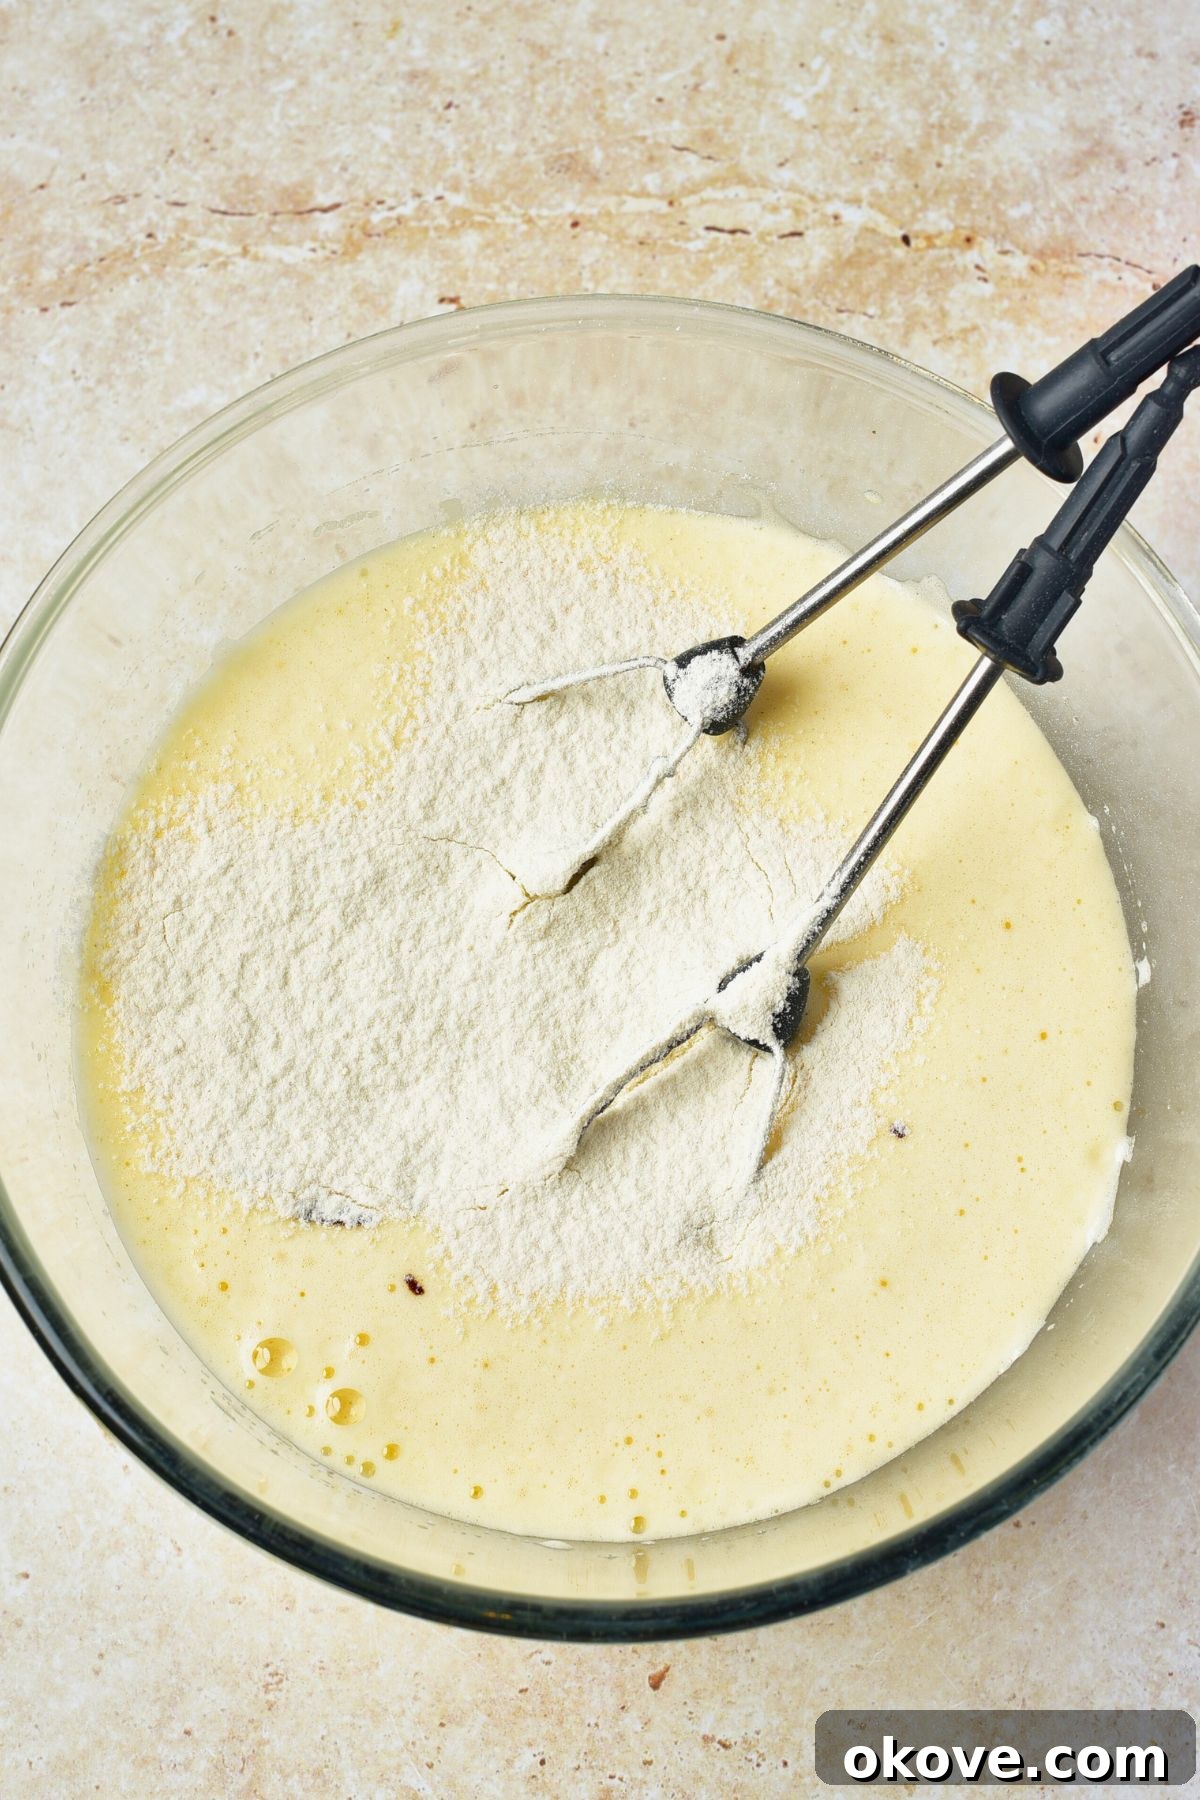
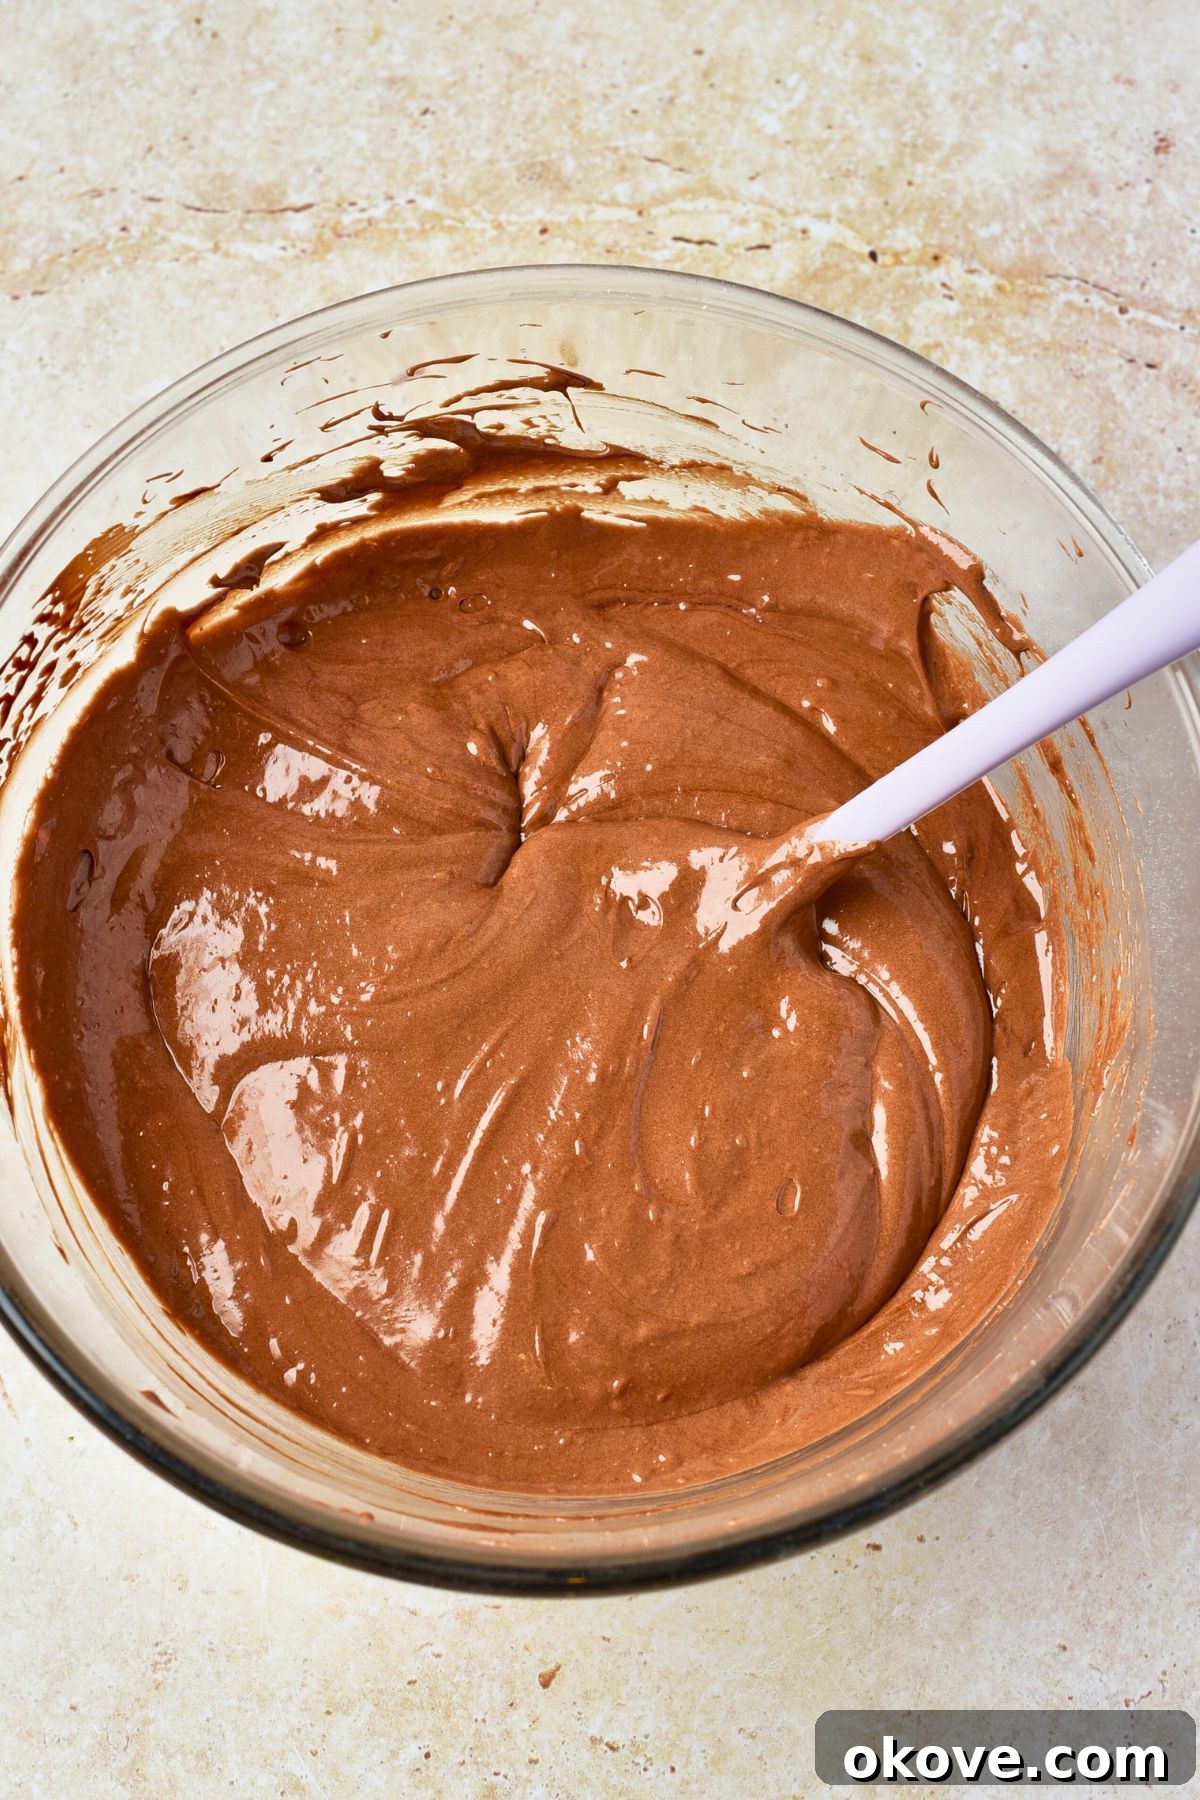
STEP 4: Combine Wet and Dry Ingredients. Gradually pour the slightly cooled melted chocolate and butter mixture into the whipped egg mixture. As you pour, continue stirring gently with your mixer on a low speed or fold with a spatula to keep the batter airy and prevent it from deflating. Once combined, sift the all-purpose flour directly into the bowl. Gently fold the flour into the chocolate mixture with a spatula until just combined. Be careful not to overmix, as this can develop the gluten in the flour and lead to a tough cake. You want a smooth, light batter with no streaks of dry flour.
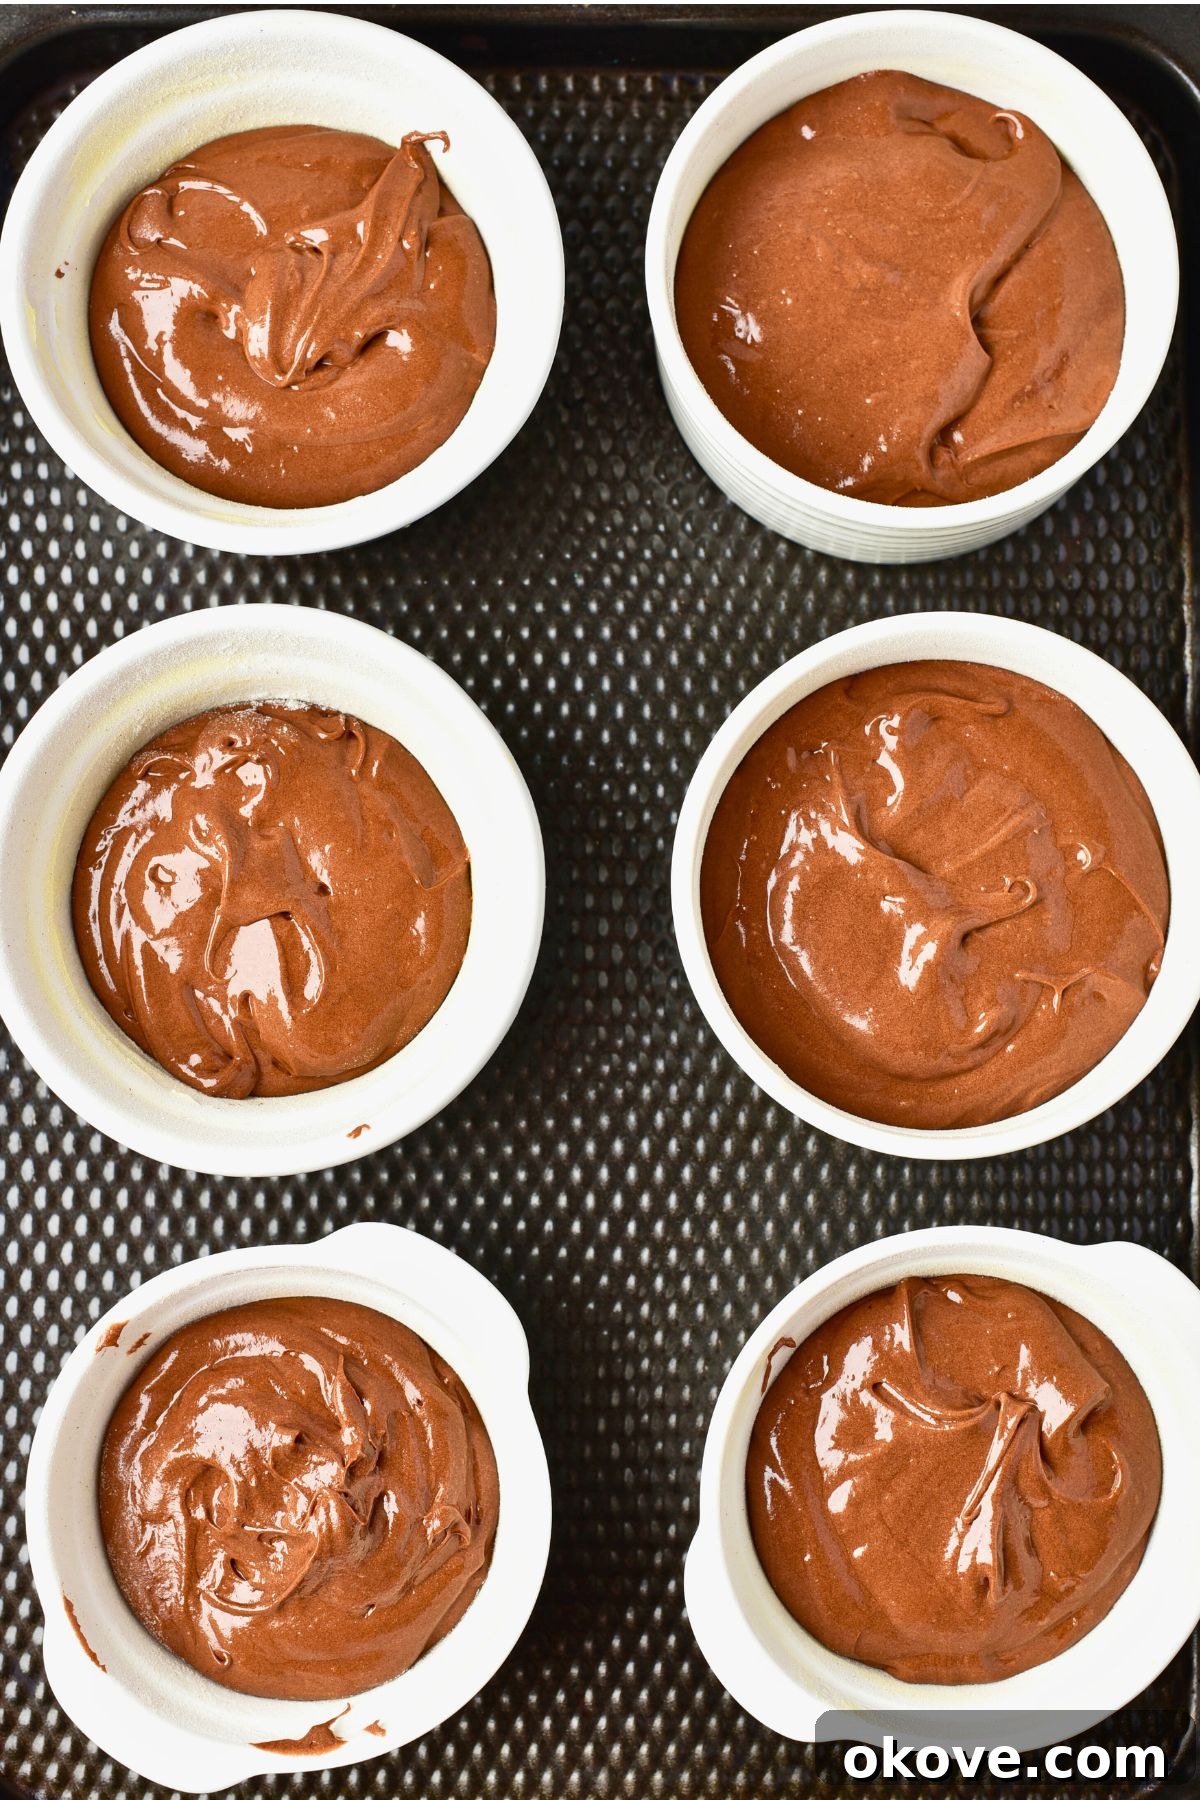
STEP 5: Fill Ramekins and Bake. Divide the chocolate batter evenly among your prepared ramekins. Fill them just below the rim, leaving a small space for the cake to rise. Place the ramekins back on the baking sheet. Bake for exactly 8-10 minutes. The key here is precise timing to achieve the molten center. The cakes are done when the edges appear firm and set, but the center still has a distinct jiggle when you gently shake the ramekin. If the center doesn’t jiggle at all, you’ve likely overbaked it, and the “lava” effect will be diminished.
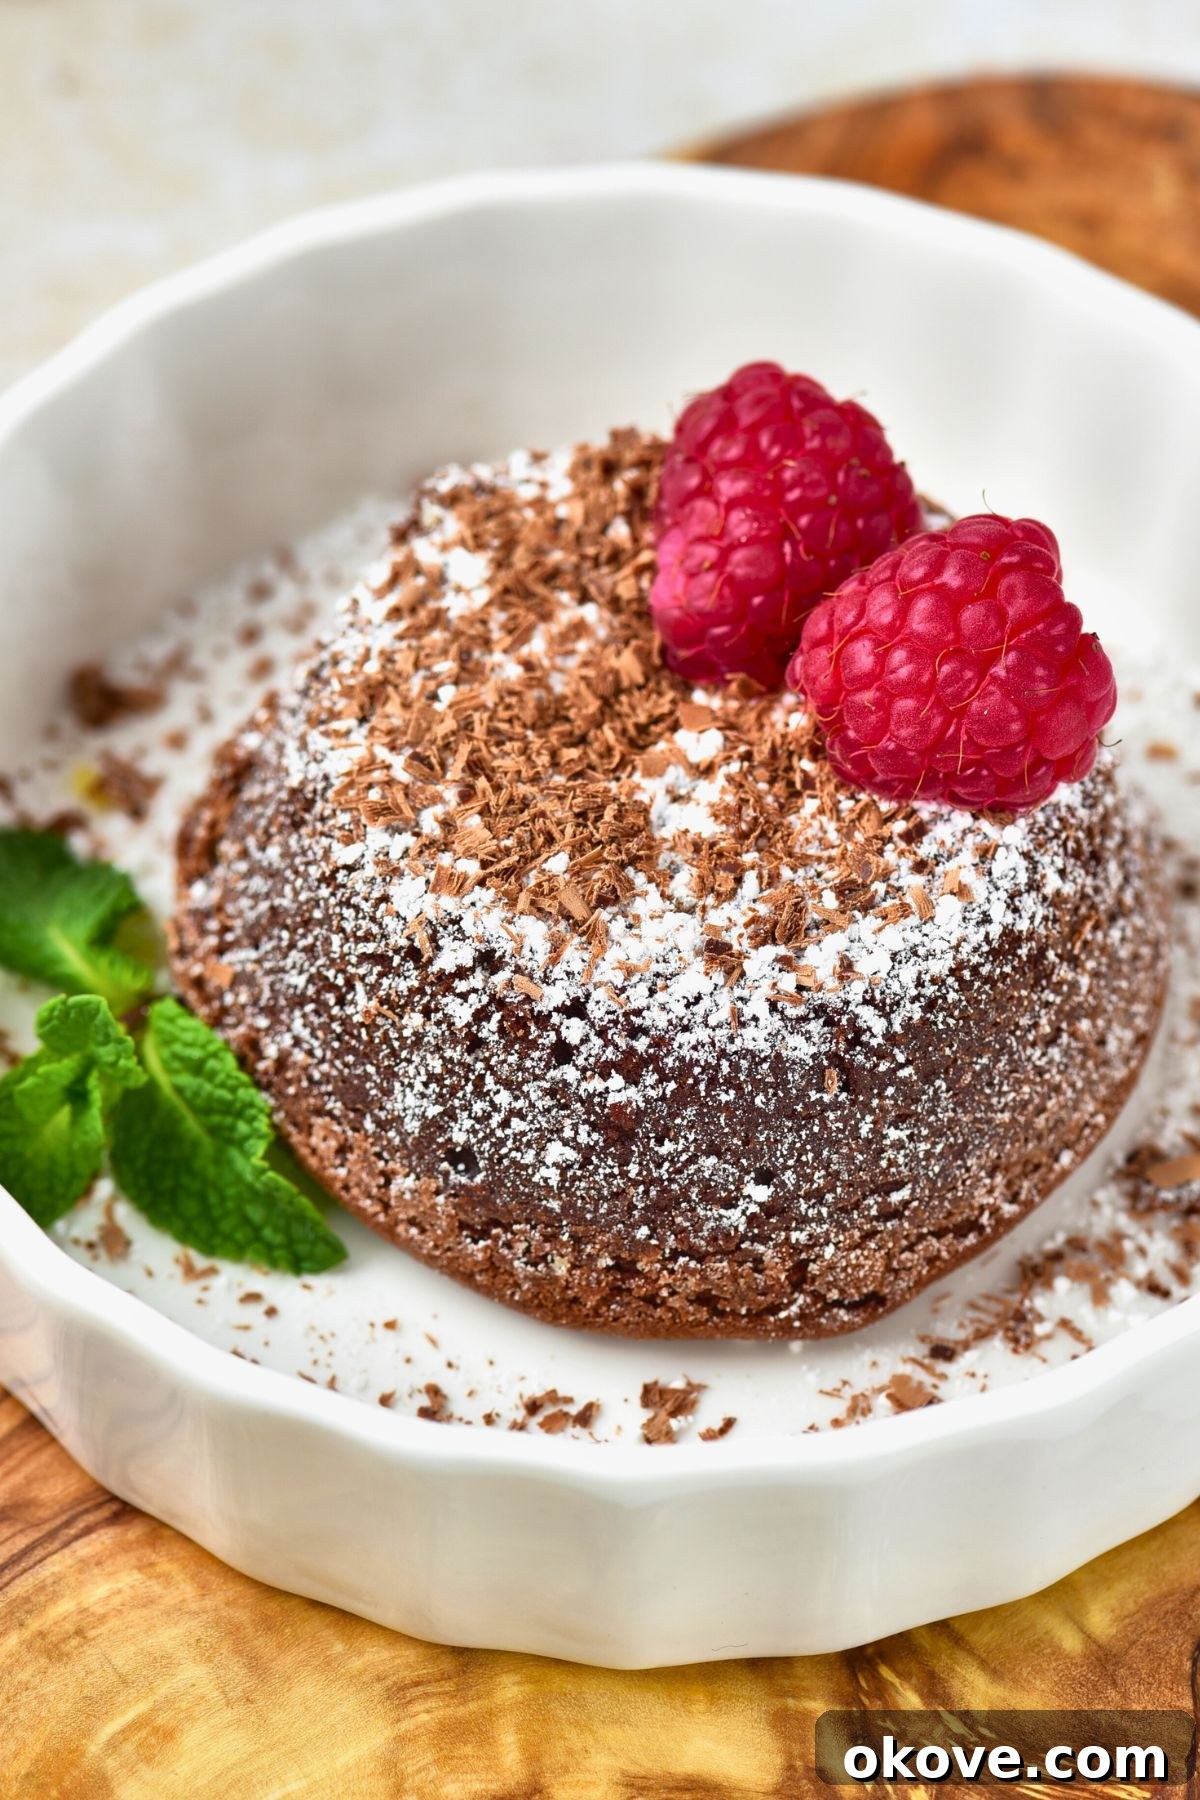
STEP 6: Rest, Unmold, and Serve. Once baked, carefully remove the ramekins from the oven. Let the cakes rest in their ramekins for about 5 minutes. This resting period allows the cakes to cool slightly and firm up, making them easier to unmold. After resting, run a thin knife carefully around the edges of each cake, between the cake and the ramekin, to loosen it. Place a serving plate upside down over the ramekin, then confidently flip the ramekin and plate together. Gently lift the ramekin, and your perfectly formed chocolate lava cake should slide out onto the plate. Serve immediately while warm to enjoy the full molten experience!
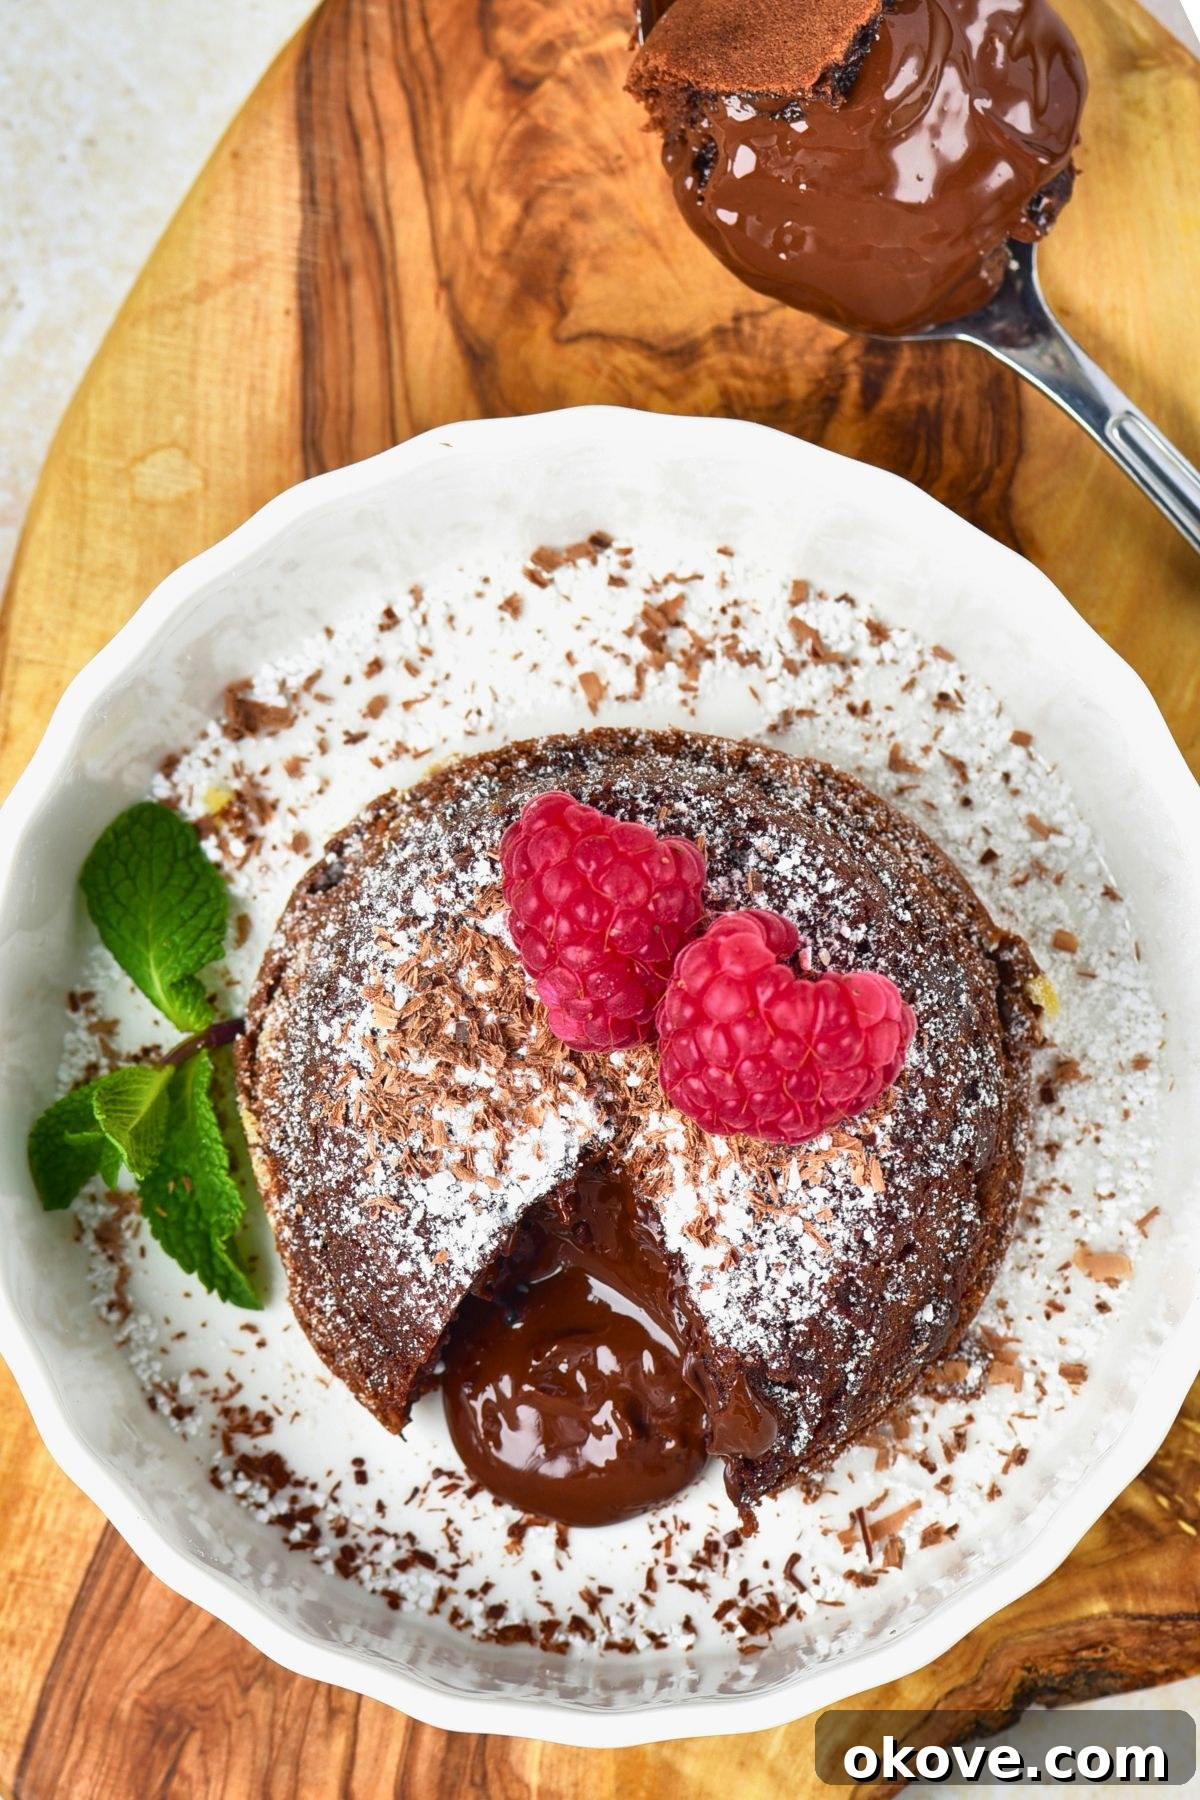
Serve it with fresh raspberries, a generous scoop of vanilla bean ice cream, a delicate drizzle of homemade chocolate sauce, or a light dusting of powdered sugar for an even more elegant and indulgent treat. The contrast of warm cake with cold ice cream is simply divine.
Pro Tips for Making the Best Molten Chocolate Lava Cake
- Don’t Overbake: This is the golden rule for lava cakes! The center should remain beautifully gooey for that signature molten effect. Keep a close eye on your cakes, especially towards the end of the baking time. A slight jiggle in the center is exactly what you’re looking for. Ovens vary, so your first batch might be a test run to find the perfect timing for your specific appliance.
- Grease and Flour Ramekins Thoroughly: To ensure your molten chocolate cakes unmold effortlessly and beautifully, be meticulous with greasing and flouring your ramekins. Even a small missed spot can cause sticking. For an extra non-stick boost, you can use cocoa powder instead of flour to dust dark chocolate cakes – this prevents any visible white flour residue.
- Serve Immediately: Chocolate lava cakes are a dessert meant to be enjoyed fresh from the oven. The contrast of the warm, soft, gooey center with the slightly firmer exterior is what makes them so special. As they cool, the center will continue to set.
- Room Temperature Ingredients: Ensure your eggs and egg yolks are at room temperature. This helps them incorporate more smoothly into the batter and creates a more emulsified, stable mixture, resulting in a lighter and more consistent cake texture.
- Quality Chocolate Matters: Since chocolate is the star of this dessert, using a good quality dark chocolate (60-70% cacao) will significantly impact the flavor. It will yield a richer, more profound chocolate taste.
- Know Your Oven: Ovens can have hot spots and temperature fluctuations. Consider using an oven thermometer to ensure your oven is truly at 450°F (230°C). This precision is vital for the quick, high-heat bake required for lava cakes.
Serving and Pairing Suggestions
Elevate your molten chocolate lava cake experience with thoughtful toppings and pairings. The warm, rich cake provides an excellent canvas for complementary flavors and textures.
- Classic Vanilla Ice Cream: The quintessential pairing! The cold, creamy vanilla ice cream provides a delightful contrast to the warm, intensely chocolatey cake.
- Fresh Berries: Raspberries, strawberries, or a mix of seasonal berries add a burst of freshness, a touch of tartness, and vibrant color that beautifully cuts through the richness of the chocolate.
- Powdered Sugar: A simple dusting of confectioners’ sugar adds an elegant finish and a subtle touch of extra sweetness.
- Whipped Cream: A dollop of freshly made whipped cream offers a light, airy texture and a delicate creaminess that complements the dense cake.
- Chocolate Sauce or Caramel Drizzle: For the ultimate chocolate indulgence, add an extra drizzle of homemade chocolate sauce or a rich caramel sauce.
- Mint Sprig: A fresh mint sprig provides a beautiful garnish and a refreshing aroma.
- Coffee or Liqueur: Serve alongside a robust espresso or a small glass of a complementary liqueur like raspberry liqueur (Chambord) or an orange liqueur (Cointreau) for a sophisticated after-dinner treat.
Frequently Asked Questions (FAQs)
Absolutely! While best served warm, you can prepare the batter and fill the ramekins ahead of time. Store the unbaked ramekins, covered tightly with plastic wrap, in the refrigerator for up to 24 hours. When you’re ready to serve, simply remove them from the fridge and bake as directed, adding an extra 1-2 minutes to the baking time to account for the cold batter. This makes them perfect for entertaining!
Yes, you can certainly experiment with different types of chocolate to tailor the flavor to your preference. Bittersweet or semi-sweet dark chocolate (60-70% cacao) is generally recommended for its depth of flavor. However, milk chocolate will yield a sweeter, milder cake, while white chocolate will offer a distinct, creamy vanilla note. Just ensure you’re using high-quality baking chocolate for the best results, as chocolate chips often contain stabilizers that can prevent a smooth melt.
Lava cakes are truly at their peak when enjoyed fresh and warm. However, if you happen to have leftovers, you can store them in an airtight container in the refrigerator for up to 2 days. To reheat, gently warm them in the microwave for 20-30 seconds at a time until warm. Be cautious not to overheat, as this can cause the molten center to set and the cake to become mushy. A conventional oven at a low temperature (around 300°F / 150°C) for 5-7 minutes can also work, wrapped loosely in foil.
No ramekins? No problem! You can use other oven-safe dishes like custard cups, small oven-safe mugs, or even muffin tins. If using muffin tins, fill only about two-thirds full and adjust baking time, as smaller cakes will bake faster. Just be sure to grease and flour them very well, regardless of the vessel.
The most common reason for a non-molten center is overbaking. Lava cakes bake very quickly, and even an extra minute or two can turn the liquid center into a fully cooked cake. Make sure your oven temperature is accurate and pay close attention to the visual cues: firm edges and a slight jiggle in the middle. It could also be that your batter was too cold from the fridge, requiring a longer bake time than anticipated.
More Irresistible Chocolate Recipes
If you’re a chocolate aficionado, you’ll love exploring these other delightful recipes that celebrate the rich, versatile flavor of chocolate:
Appetizers
Chocolate Hummus
A surprising yet delicious dip that’s perfect for a sweet snack or light dessert, pairing beautifully with fruits and crackers.
Desserts
Chocolate Peanut Butter Cake
The ultimate combination of rich chocolate and creamy peanut butter in a stunning layer cake, perfect for any celebration.
Breakfast
Double Chocolate Chip Muffins
Start your day with these rich, fluffy muffins packed with double the chocolate flavor, ideal for breakfast or a sweet treat.
Desserts
Easy Chocolate Covered Strawberries
A simple yet elegant dessert, these chocolate-covered strawberries are perfect for gifting, parties, or a quick indulgent snack.
Chocolate Lava Cake Recipe
Rebecca
5
15 mins
8-10 mins
5 mins
28-30 mins
Share by Email
Print Recipe
With a rich, gooey center that melts in your mouth, this chocolate lava cake is the ultimate chocolate lover’s treat. It’s easy to make but looks straight out of a fancy restaurant!
Equipment
- Ramekins (approx. 4-6 ounce capacity)
- Mixing Bowls (small and medium)
- Microwave-Safe Bowl (or double boiler)
- Hand Mixer or Stand Mixer
- Spatula
- Baking Sheet
- Small knife for unmolding
Ingredients
- 1/2 cup unsalted butter
- 6 ounces dark chocolate (60-70% cacao, good quality baking bar, chopped)
- 2 large eggs (room temperature)
- 2 large egg yolks (room temperature)
- 3 tablespoons granulated sugar
- 1/2 teaspoon kosher salt
- 2 tablespoons all-purpose flour (plus extra for dusting)
- Optional: Fresh raspberries, vanilla ice cream, powdered sugar, chocolate sauce for serving
Instructions
- Preheat and Prepare: Preheat oven to 450°F (230°C). Generously grease five 4-6 ounce ramekins with butter, coating all sides. Lightly dust with all-purpose flour, tapping out any excess. Place ramekins on a baking sheet.
- Melt Chocolate Mixture: In a small microwave-safe bowl, melt the butter and chopped dark chocolate in 30-second intervals, stirring after each, until completely smooth. Set aside to cool slightly.
- Whip Eggs and Sugar: In a separate medium bowl, combine eggs, egg yolks, granulated sugar, and kosher salt. Beat with a hand or stand mixer on medium speed for 3-4 minutes, until the mixture is thick, pale, and fluffy.
- Combine Batter: Gradually pour the slightly cooled melted chocolate and butter mixture into the whipped egg mixture, stirring continuously (or folding gently with a spatula) to keep the batter airy. Sift in the all-purpose flour and gently fold it in with a spatula until just combined and smooth, being careful not to overmix.
- Bake the Cakes: Divide the batter evenly between the prepared ramekins, filling them just below the rim. Place on the baking sheet and bake for exactly 8-10 minutes. The cakes are done when the edges are firm but the center still jiggles slightly when gently shaken.
- Rest and Unmold: Remove from the oven and let the cakes rest in the ramekins for about 5 minutes. Run a thin knife around the edges to loosen the cake from the ramekin. Place a serving plate over the ramekin and, holding both firmly, flip it over. Gently lift the ramekin to release the cake onto the plate. Serve immediately while warm.
Optional Serving Suggestions:
Serve your warm chocolate lava cakes with fresh raspberries, a scoop of vanilla bean ice cream, a drizzle of chocolate sauce, or a dusting of powdered sugar for an even more elegant and indulgent treat. The warm and cold contrast is divine!
Notes
- Precision is Key: Baking time is critical. An extra minute can turn a molten center into a regular chocolate cake. Watch carefully for the firm edges and jiggling center.
- Butter and Flour are Your Friends: Thoroughly greasing and flouring your ramekins is essential for easy unmolding.
- Quality Chocolate: Use a good quality dark chocolate for the best flavor.
- Serve Warm: For the ultimate experience, serve these cakes immediately after the 5-minute resting period.
Nutrition
Carbohydrates: 25g
Protein: 7g
Fat: 37g
Saturated Fat: 21g
Polyunsaturated Fat: 2g
Monounsaturated Fat: 11g
Trans Fat: 1g
Cholesterol: 198mg
Sodium: 274mg
Potassium: 287mg
Fiber: 4g
Sugar: 15g
Vitamin A: 787IU
Calcium: 51mg
Iron: 5mg
Nutrition information is automatically calculated, so should only be used as an approximation.
Additional Info
Cakes, Dessert
American
Mention @celebratingsimplyrecipes or tag #celebratingsimplyrecipes!