
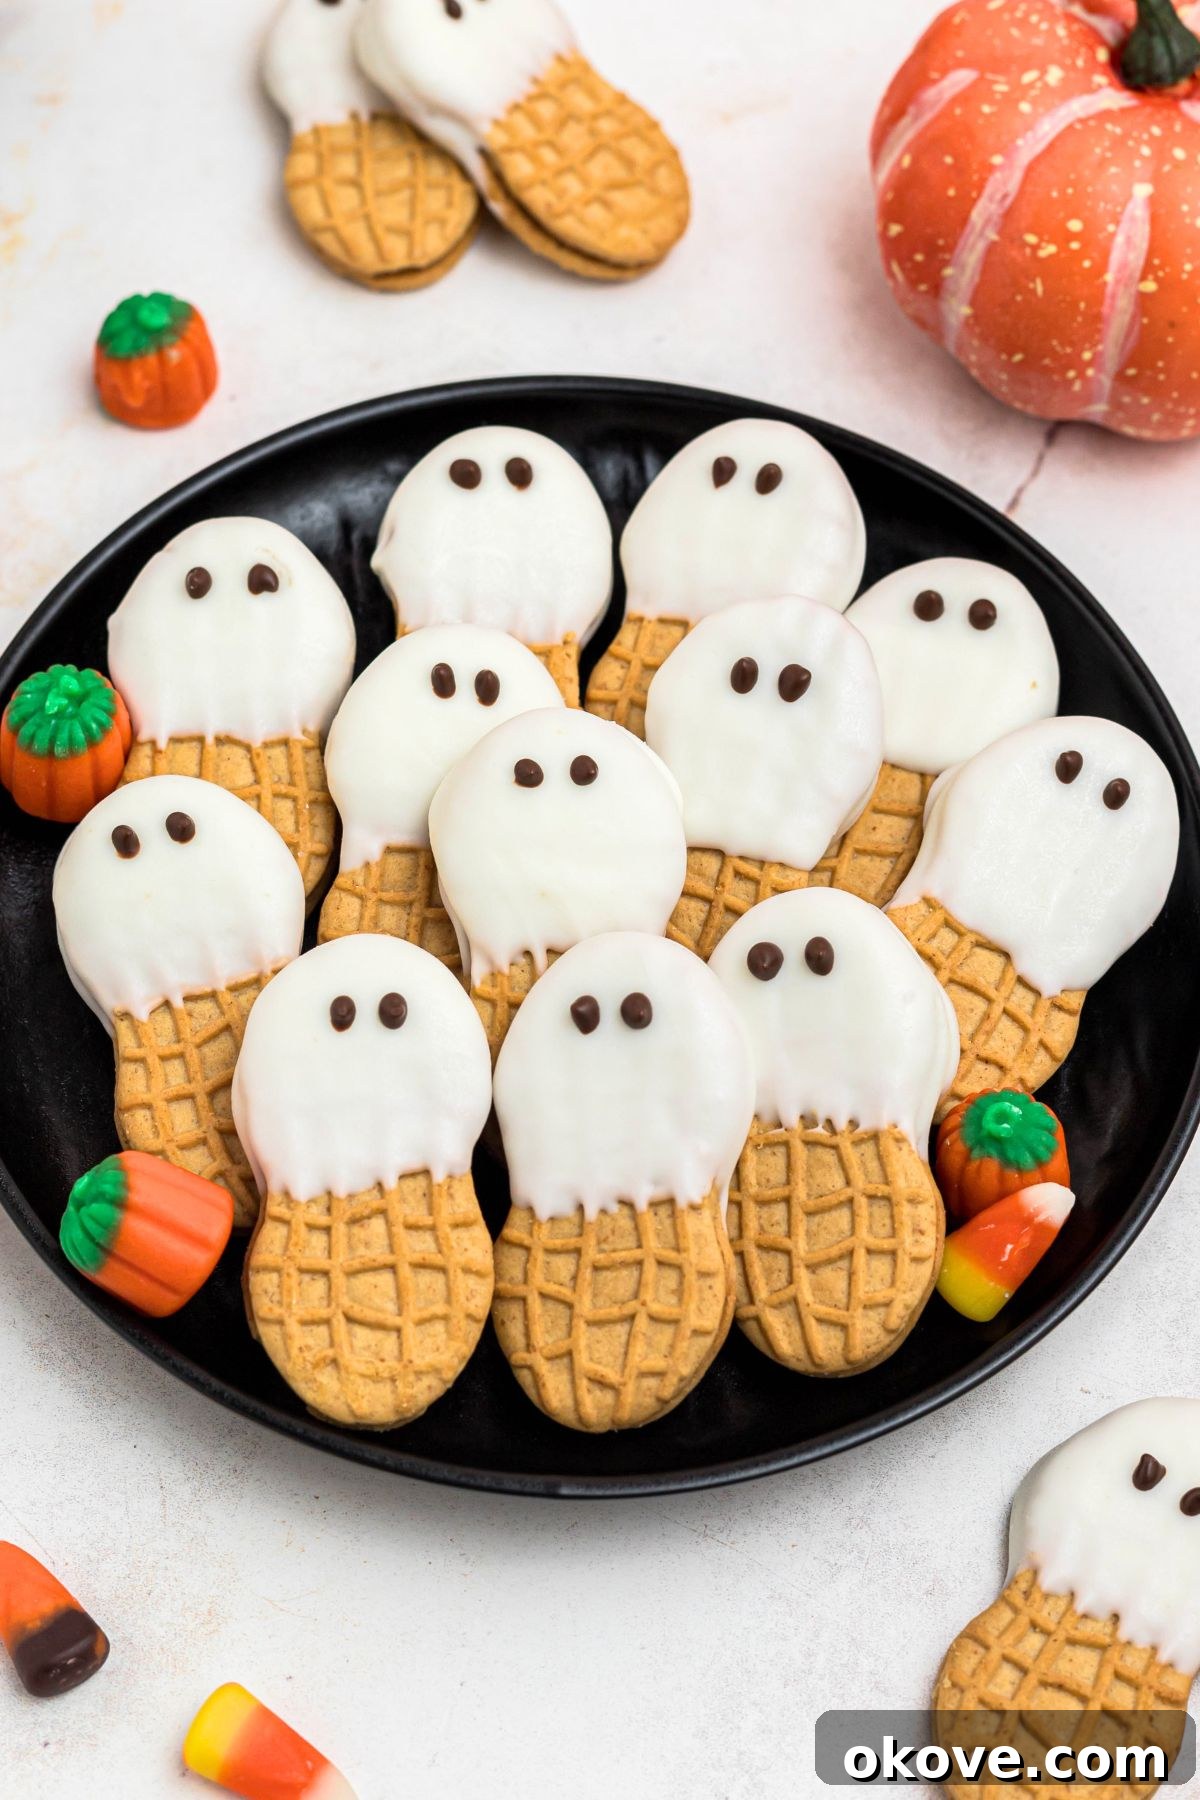
Easy Nutter Butter Ghost Cookies: Your Spooktacular Halloween Treat Guide
Get ready to conjure up some magic this Halloween with the easiest and most adorable Nutter Butter Ghost Cookies! These charming peanut butter treats, dipped in luscious white chocolate and adorned with playful chocolate eyes, are an absolute sensation for any Halloween gathering. Whether you’re planning a ghoulish party, looking for a fun activity with the kids, or simply craving a delightful seasonal snack, these ghost cookies are guaranteed to be a hit. Their effortless preparation and undeniable charm make them a beloved classic that vanishes quicker than a ghost in broad daylight!
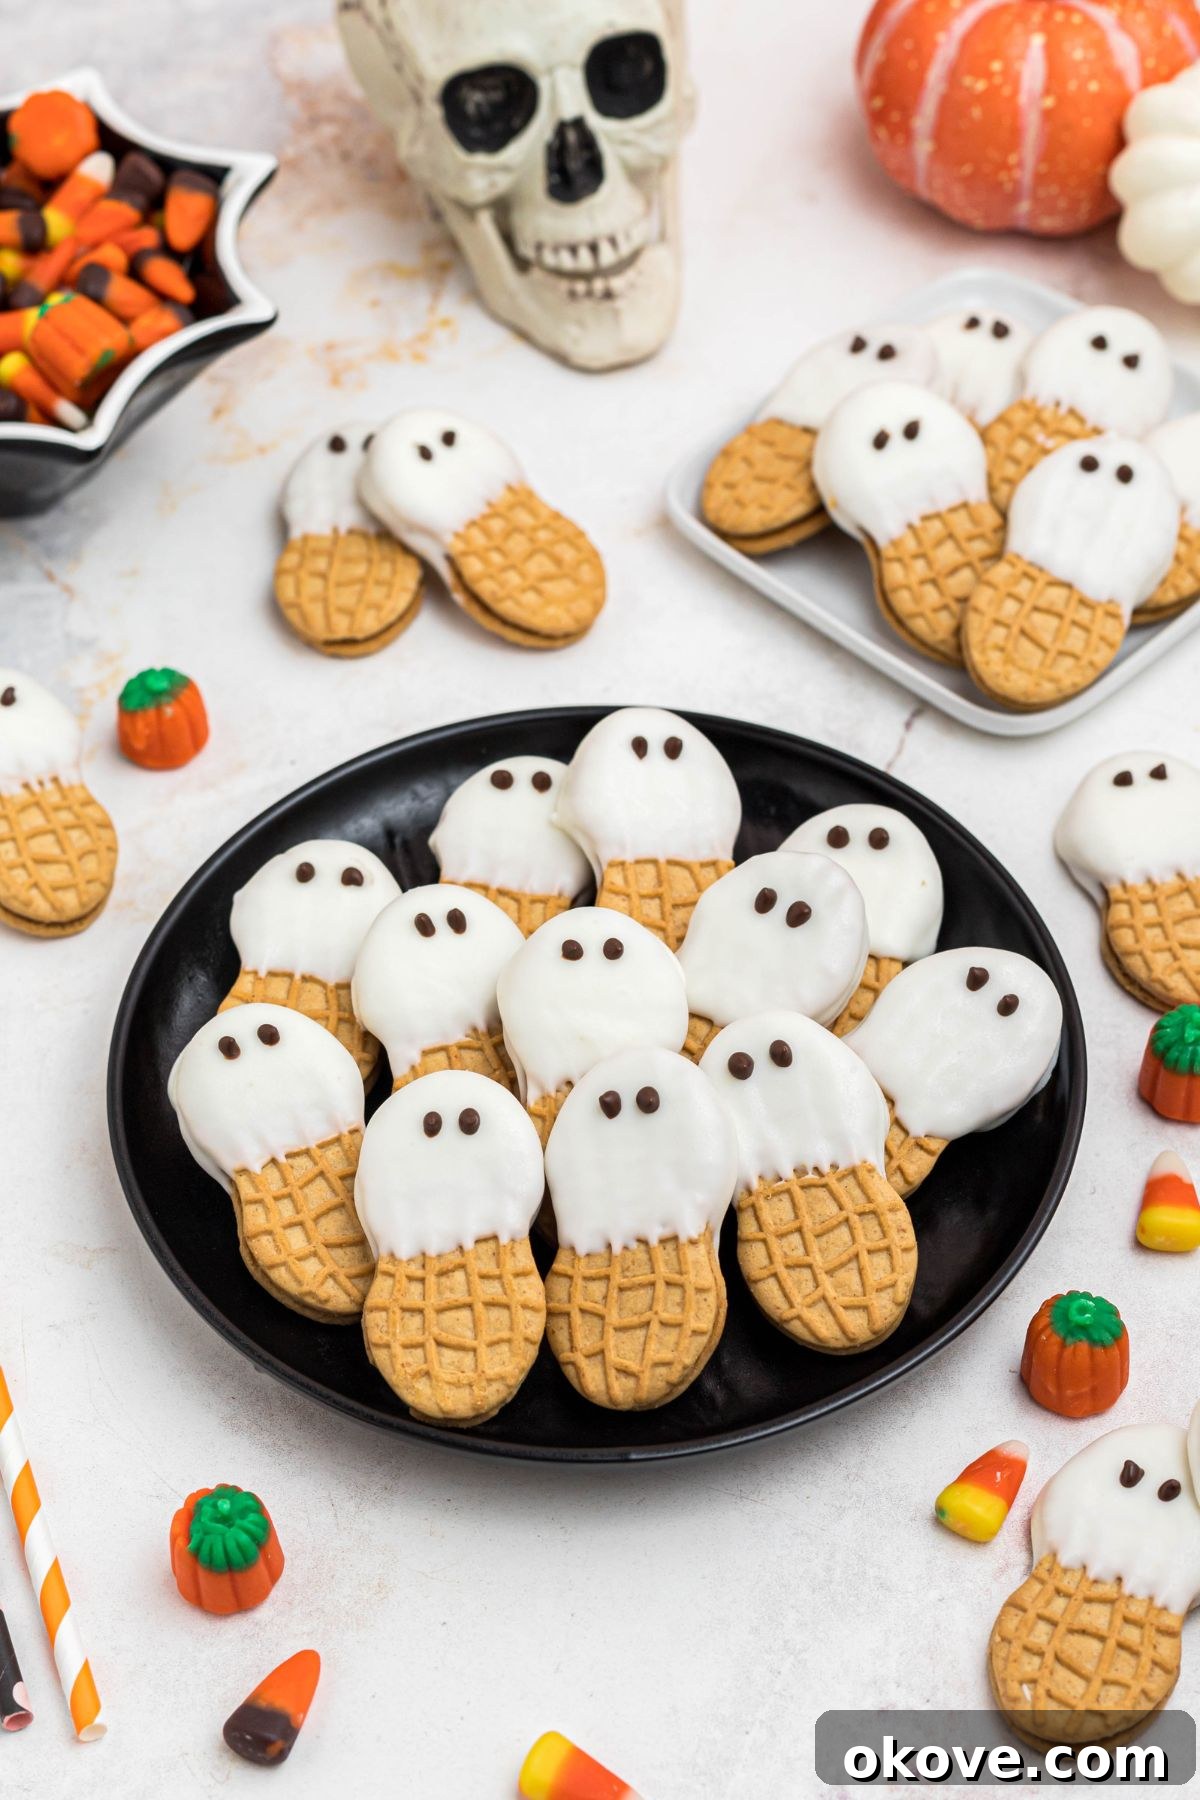
“These dipped cookies are as easy as they are adorable! They are perfect for Halloween parties and trick or treaters!”
-Becky
Crafting these ghostly treats requires minimal effort and just a few simple ingredients, transforming a humble peanut butter sandwich cookie into a boo-tiful Halloween masterpiece. They embody the spirit of the holiday – fun, slightly spooky, and utterly delicious. Dive into this guide to discover how to create your own batch of these delightful Nutter Butter Ghost Cookies that will bring smiles and screams (of delight!) to everyone.
Why You’ll Adore These Spooky Sweet Treats
- Simplicity at its Best: With only two main ingredients, this recipe is incredibly straightforward, making it perfect for novice bakers and busy parents alike.
- No-Bake Wonder: Forget about heating up the oven! These cookies are a no-bake dream, saving you time and effort.
- Kid-Friendly Fun: Little hands will love helping to dip the cookies and add the faces, making it a fantastic family activity.
- Crowd-Pleaser: Both kids and adults can’t resist the charming appearance and delicious combination of peanut butter and white chocolate.
- Perfect for Parties: These Nutter Butter Ghosts make an eye-catching and festive addition to any Halloween party spread, disappearing almost instantly!
Looking to elevate your Halloween celebration even further? Don’t miss out on other festive treats like my Caramel Apples with Sprinkles, Frankenstein Rice Krispie Treats, and Homemade Pop Tarts. For grown-up fall flavors, try a batch of these Fall Sangrias or a comforting Pumpkin Spice Coffee.
Table of Contents
- Essential Ingredients for Your Ghostly Creations
- Tools for Success
- Creative Variations to Try
- Step-by-Step: How to Make Nutter Butter Ghost Cookies
- Expert Tips for Perfect Ghost Cookies
- Nutter Butter Ghost Cookies FAQs
- More Spooktacular Halloween Recipes
- Nutter Butter Ghosts Recipe Card
Essential Ingredients for Your Ghostly Creations
Creating these delightful Nutter Butter Ghost Cookies is refreshingly simple, requiring just a handful of items you can easily find at any grocery store. The magic truly happens with the right combination of these two key components and a touch of imagination.
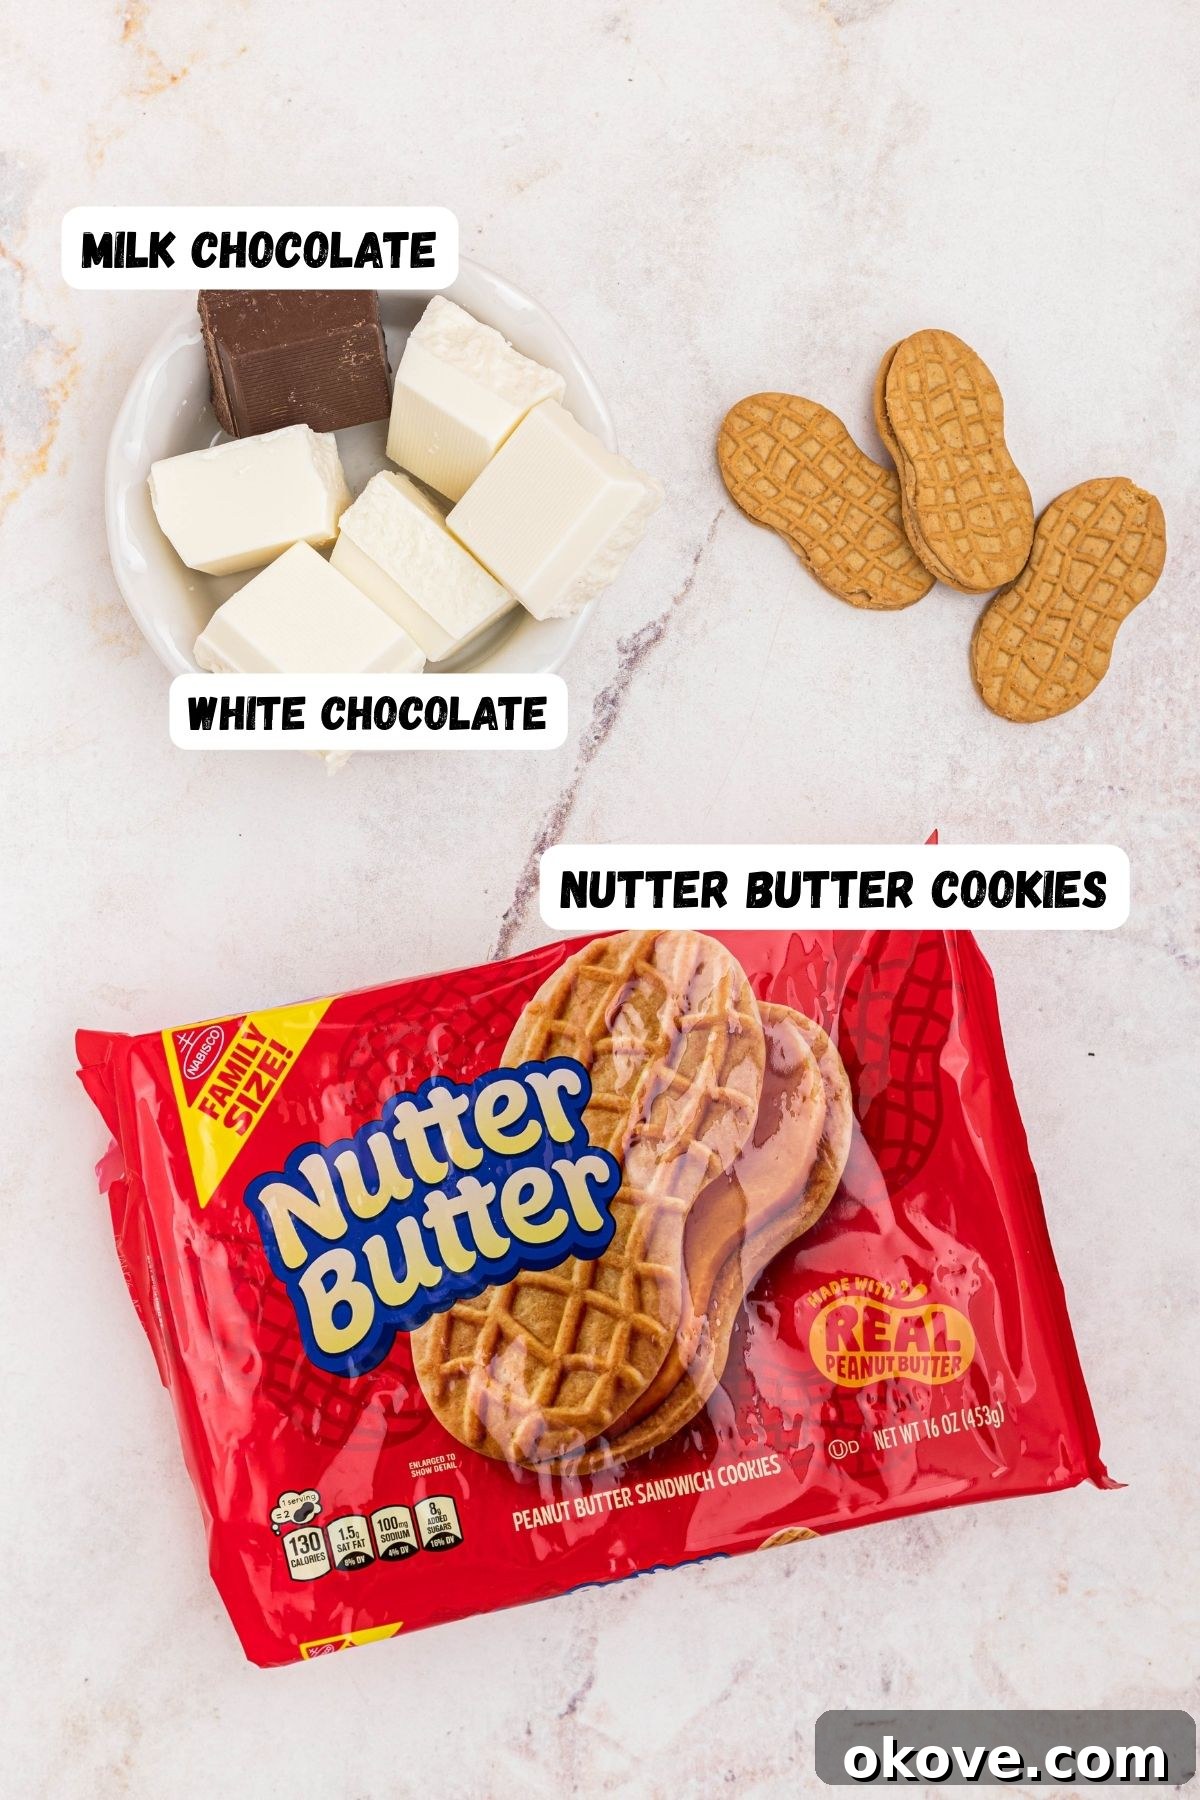
- Nutter Butter Cookies: These iconic peanut butter sandwich cookies are the undisputed stars of this recipe. Their unique oblong shape provides the perfect canvas for shaping our adorable ghosts. Choose the classic size for optimal results.
- White Candy Coating or Melted White Chocolate: This forms the ghostly “skin” of your cookies. You have a few excellent options:
- White Candy Melts: Often found in the baking aisle, these are designed to melt smoothly and harden quickly, providing a professional-looking finish without tempering.
- Melted Almond Bark: Similar to candy melts, almond bark is easy to work with and provides a consistent, smooth coating.
- Good Quality White Chocolate: If using actual white chocolate chips or bars, be sure to melt it carefully to prevent seizing. Adding a tiny bit of coconut oil or vegetable shortening (about 1 teaspoon per cup of chocolate) can help achieve a smoother consistency for dipping.
- Melting Chocolate, Mini Chocolate Chips, or Black Frosting: These are for bringing your ghosts to life with their eyes and mouths.
- Melting Chocolate: Dark or milk melting chocolate can be melted and used in a piping bag for precise facial features.
- Mini Chocolate Chips: For the absolute easiest option, simply press two mini chocolate chips onto the wet white coating for eyes.
- Candy Eyes: Pre-made edible candy eyes are a popular and super quick alternative that adds extra charm.
- Black Frosting: A tube of black gel or writing frosting offers great control for drawing detailed expressions.
Tools for Success
You won’t need any fancy gadgets for this recipe. Just a few basic kitchen tools will make the process smooth and enjoyable:
- Parchment Paper or Wax Paper: Essential for lining your baking sheets. This prevents the dipped cookies from sticking and makes cleanup a breeze.
- Baking Sheet: To hold your dipped cookies while they set.
- Microwave-Safe Bowl: For melting your white candy coating or chocolate. A heatproof bowl over a double boiler also works if you prefer stovetop melting.
- Small Spoon or Fork: Useful for dipping the cookies and tapping off excess coating.
- Piping Bag (Optional): If you plan to draw detailed faces with melted chocolate or frosting. A small zip-top bag with the corner snipped off works just as well.
A full list of ingredients and equipment is included in the recipe card below.
Creative Variations to Try
While the classic Nutter Butter Ghost is undeniably charming, there’s plenty of room to get creative and customize your spooky treats. Here are some fun variations to explore:
- Candy Eyes for Extra Charm: Elevate the cuteness factor by swapping out mini chocolate chips for store-bought candy eyes. They come in various sizes and instantly give your ghosts a playful, cartoonish look.
- Colorful Ghosts: Why stick to white? Use orange, green, or even purple candy melts for a vibrant twist on your ghost cookies. Imagine a whole spectrum of friendly (or mischievous!) spirits haunting your dessert table.
- Alternative Cookie Bases: If Nutter Butters aren’t your preference, other cookies can also be transformed into ghosts. Milano cookies, with their elongated shape, make elegant, tall ghosts. Shortbread cookies, while round, can also be dipped and decorated to resemble cute, plump spirits.
- Spooky Themed Variety Platter: Don’t let your Nutter Butter Ghosts fly solo! Pair them with other themed treats for an impressive Halloween spread. Imagine them alongside savory Mummy Hot Dogs, vibrant monster cupcakes, or festive sugar cookies for a truly unforgettable party platter.
- Sprinkle Fun: Before the white coating fully sets, sprinkle your ghosts with Halloween-themed sprinkles. Orange and black jimmies, tiny bats, or sparkly sugar can add extra texture and visual appeal.
- Drizzled Designs: After the white coating has set, drizzle your ghosts with melted dark chocolate or even colored candy melts for a marbled or striped effect, adding an artistic touch.
Step-by-Step: How to Make Nutter Butter Ghost Cookies
Making Nutter Butter Ghost Cookies is a simple process that yields impressive results. Follow these easy steps to bring your peanut butter spirits to life!
Preparation is Key
- Begin by lining a large cookie sheet with parchment paper or wax paper. This crucial step prevents your dipped cookies from sticking and allows them to set properly. Arrange your Nutter Butter cookies on the prepared sheet, leaving a little space between each one.
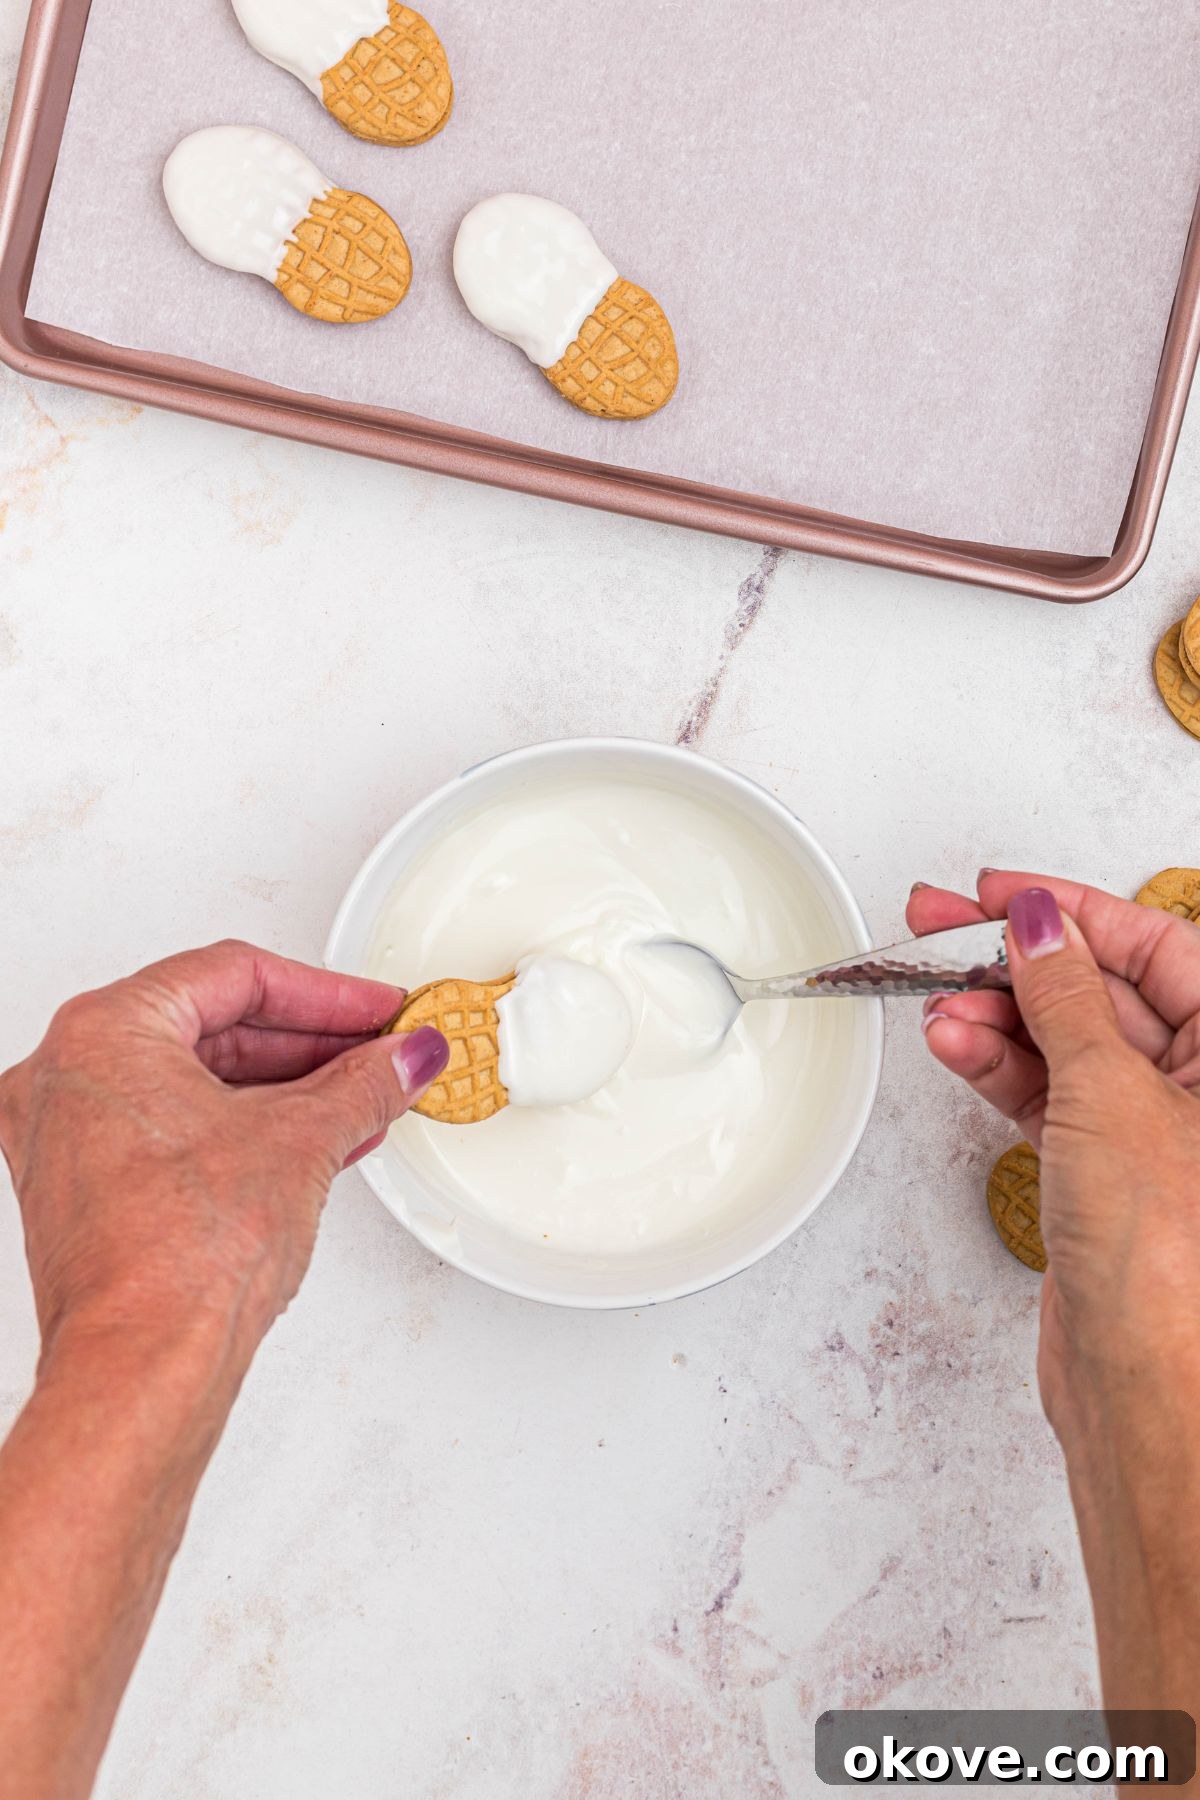
- Melt the White Coating: In a microwave-safe bowl, melt your white candy coating, almond bark, or white chocolate. Heat in 30-second intervals, stirring thoroughly after each interval, until the coating is completely smooth and creamy. Be careful not to overheat, as this can cause the chocolate to seize or become grainy.
- Dip for Ghostly Shapes: Take one Nutter Butter cookie at a time and dip it into the melted white coating. You can dip it entirely, or for a more classic ghost shape, dip it about two-thirds of the way up, allowing some of the peanut butter cookie to show at the bottom. Alternatively, use a spoon to drizzle and shape the coating over the top of the cookie, creating whimsical, flowing ghost tails. Gently tap the cookie against the side of the bowl or your wrist to shake off any excess coating, ensuring a smooth, clean finish. Immediately place the dipped cookie onto your prepared cookie sheet.
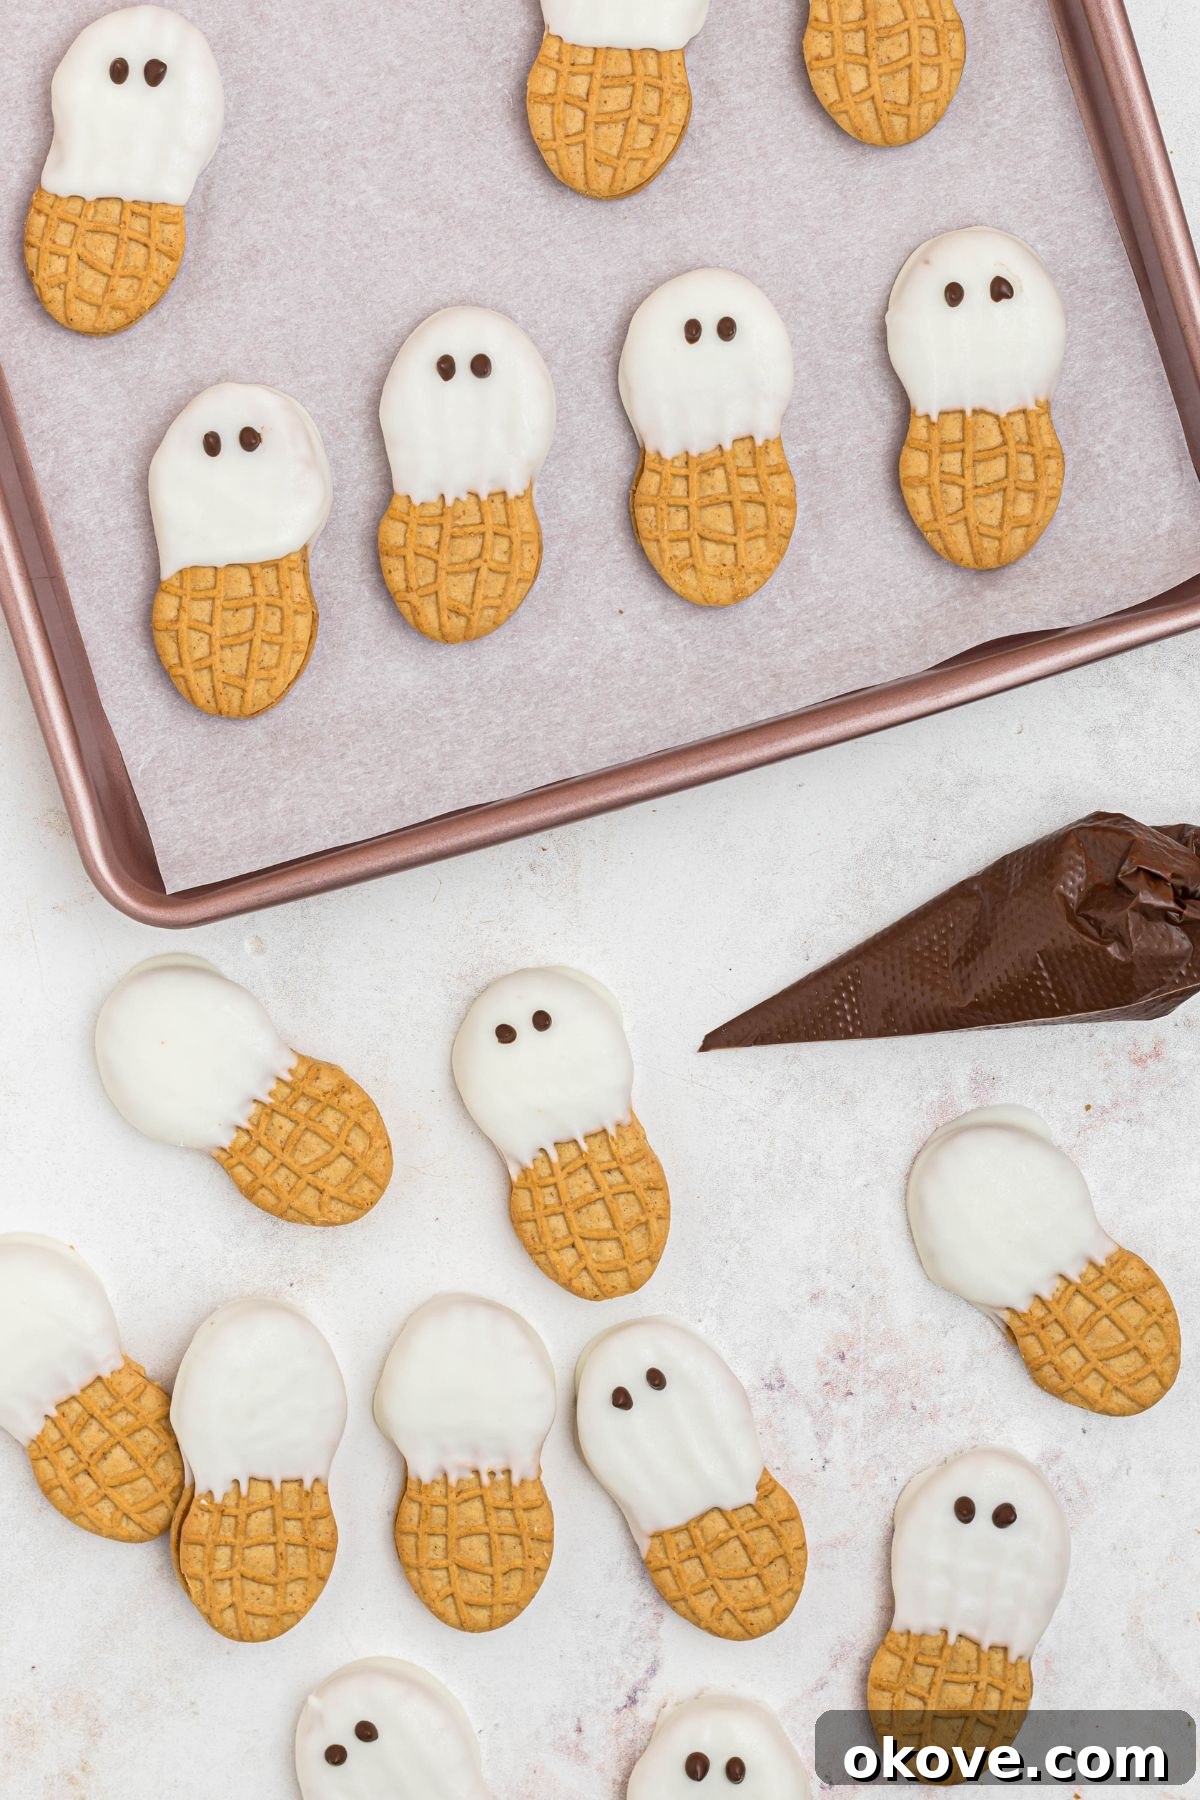
- Add Facial Features: This is where your ghosts get their personality! While the white chocolate is still wet (this is important so the eyes stick), use a piping bag filled with melted dark chocolate (or a small zip-top bag with the corner snipped off) to pipe two small dots for eyes. For a mouth, you can pipe a small oval, a crooked line, or a surprised “O” shape. If using mini chocolate chips or candy eyes, simply press them gently into the wet white coating.
- Allow to Set: Once all your ghosts are dipped and decorated, allow them to set completely. This can take anywhere from 5 to 20 minutes, depending on the temperature and humidity of your kitchen. For faster setting, you can place the cookie sheet in the refrigerator for about 5-10 minutes. The cookies are ready when the white coating is firm to the touch.
Expert Tips for Perfect Ghost Cookies
Achieving perfectly spooky and delicious Nutter Butter Ghost Cookies is easy with a few insider tricks. Keep these tips in mind for the best results:
- Choose the Right Coating for a Smooth Finish: For the smoothest, most professional-looking finish and quickest setting time, white almond bark or white candy coating is highly recommended. These products are formulated to melt beautifully and harden without becoming sticky or requiring tempering. If using white chocolate chips, add a teaspoon of coconut oil or vegetable shortening per cup of chocolate to improve its melt and consistency for dipping.
- Avoid Excess Chocolate for Clean Lines: After dipping each cookie, gently tap it against the side of your bowl or even your wrist. This helps to shake off any excess white coating, preventing thick drips and ensuring a clean, streamlined ghostly shape. A thinner, even coat also sets faster.
- Embrace Personality with Faces: Don’t be afraid to get creative with your ghost’s expressions! Some can look scared with wide eyes, others surprised with an open “O” mouth, and some simply silly with crooked smiles. Varying the eye and mouth shapes adds immense charm and makes each ghost unique. You can use a toothpick for very fine details if a piping bag feels too large.
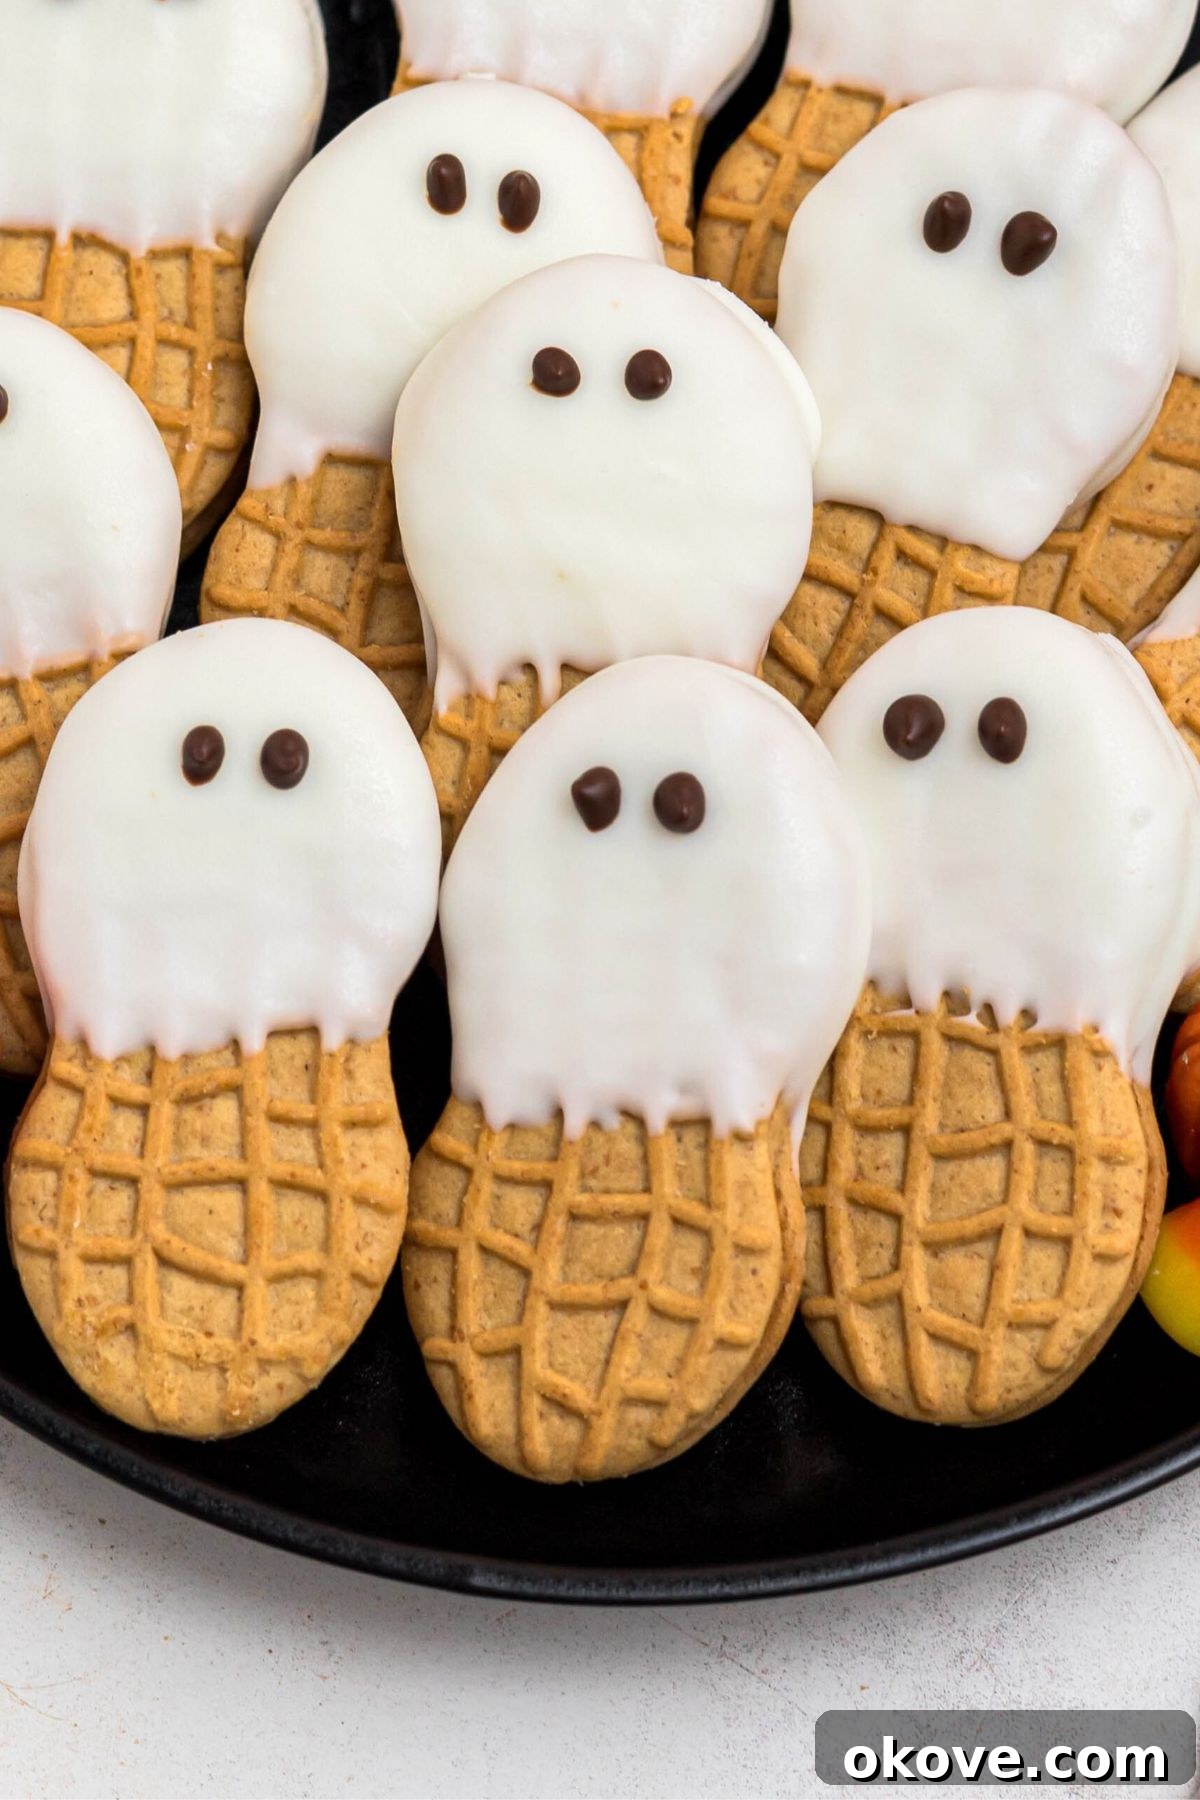
- Perfect Presentation: Once set, arrange your ghost cookies on a dark platter or a bed of crumbled Oreo “dirt” for a striking visual contrast. A few plastic spiders or other Halloween decorations can complete the spooky scene.
- Make Ahead for Stress-Free Parties: These dipped cookies are excellent for making in advance. Once fully set, store them in an airtight container between layers of wax paper or parchment paper. This prevents them from sticking together and keeps them fresh for up to 5 days at room temperature.
- Chill for Quicker Setting: If you’re short on time, place your cookie sheet with the freshly dipped ghosts in the refrigerator for 5-10 minutes. The cold air will quickly firm up the chocolate coating.
- Melt in Batches (if needed): If you’re making a large batch, melt your white coating in smaller portions. This prevents the entire bowl from hardening before you’ve finished dipping, ensuring a consistent, smooth consistency throughout the process.
Nutter Butter Ghost Cookies FAQs
Absolutely! Nutter Butter ghost cookies are perfect for making in advance, which is fantastic for party planning. They can be prepared up to 3 to 5 days before your event. Once they are fully set, store the coated cookies in an airtight container at room temperature. Be sure to place layers of wax paper or parchment paper between them to prevent any sticking or damage to their delicate ghost faces.
Yes, you can freeze Nutter Butter ghost cookies for longer storage, up to 2 months. To freeze them effectively, first place the completely set cookies in a single layer on a baking sheet and freeze for about an hour until firm. Then, transfer them to a freezer-safe airtight container, placing wax paper or parchment paper between layers to protect them. When you’re ready to enjoy, thaw them at room temperature.
For the best results, use white candy melts, melted white almond bark, or good quality white chocolate specifically designed for melting. These options melt smoothly and harden quickly, providing a beautiful, durable coating. If you’re using white chocolate chips, it’s often helpful to add about a teaspoon of coconut oil or vegetable shortening per cup of chips when melting. This helps thin the chocolate slightly, making it smoother for dipping and preventing it from seizing.
These fun and adorable Nutter Butter ghost cookies pair perfectly with a wide array of other Halloween recipes. Consider serving them alongside savory treats like spooky mummy dogs, or sweet delights such as Frankenstein Rice Krispie Treats, monster cupcakes, caramel apples, or a colorful Halloween bark. Creating a spread of various easy Halloween treats ensures there’s something for everyone to enjoy and makes for a truly festive and memorable party.
Nutter Butter cookies contain peanuts, so these ghost cookies are not suitable for individuals with peanut allergies. If you need an allergy-friendly alternative, consider using a different cookie base, such as vanilla wafers or gluten-free sandwich cookies, and ensure your white coating and decorative chocolates are also peanut-free.
More Spooktacular Halloween Recipes
Drinks
Orange Creamsicle Jello Shots
Appetizers
Dipped Strawberries
Holidays
Halloween Bark
Halloween Recipes
Mummy Hot Dogs
If you have tried this recipe or any others from Celebrating Simply, I’d love it if you would leave a ⭐ star rating and share your thoughts in the ✍️ comments below. Your feedback means a lot!
⭐
⭐
⭐
⭐
⭐
Nutter Butter Ghosts
Rebecca
32
cookies
15
5
20
Equipment
-
Parchment Paper or Wax Paper
-
Baking Sheet
-
Microwave safe bowl
-
Small Spoon or Fork
-
Piping Bag (optional, or small zip-top bag)
Ingredients
1x
2x
3x
1x
2x
3x
-
32
Nutter Butter Cookies -
12
ounces
melting white chocolate or candy coating -
1
ounce
melting dark chocolate (for eyes and mouth) or mini chocolate chips/candy eyes
Instructions
-
Line a cookie sheet with wax paper or parchment paper and arrange your Nutter Butter cookies on it, leaving space between each.
-
In a microwave-safe bowl, melt white candy coating (or almond bark/white chocolate) in 30-second intervals, stirring until smooth and creamy after each interval.
-
Dip each Nutter Butter cookie halfway, or spoon the coating over the top to create a ghostly shape. Gently tap off any excess coating before placing the cookie onto the prepared cookie sheet.
-
Before the white coating sets, use a piping bag (or a small zip-top bag with a corner snipped) to pipe small dots of melted dark chocolate for the eyes and mouth. Alternatively, press on mini chocolate chips or candy eyes.
-
Allow the coated and decorated cookies to set completely on the parchment-lined cookie sheet until firm. For quicker setting, you can place them in the refrigerator for 5-10 minutes.
Notes
- Servings: This recipe uses a standard 16 oz package of Nutter Butter cookies, which typically contains about 32 individual cookies.
- Use the right coating: White almond bark or white candy coating melts smoothly and hardens quickly, providing the best results for dipping.
- Avoid excess chocolate: Tap each cookie gently to shake off extra coating before drying to achieve a clean, smooth finish.
- Keep it fun: Experiment with different expressions! Make some ghosts look scared, some surprised, and others silly to give your cute little ghost cookies plenty of personality.
- Make ahead: These dipped cookies can be stored in an airtight container between layers of wax paper for up to 5 days, making them perfect for advance preparation.
Nutrition
Calories: 127kcal
Carbohydrates: 16g
Protein: 2g
Fat: 6g
Saturated Fat: 3g
Polyunsaturated Fat: 1g
Monounsaturated Fat: 2g
Cholesterol: 2mg
Sodium: 60mg
Potassium: 33mg
Fiber: 0.1g
Sugar: 11g
Vitamin A: 3IU
Vitamin C: 0.1mg
Calcium: 21mg
Iron: 0.1mg
Nutrition information is automatically calculated, so should only be used as an approximation.
Additional Info
Appetizer, Cookies, Dessert, Halloween Treats
American
Tried this recipe?
Mention @celebratingsimplyrecipes or tag #celebratingsimplyrecipes!