
The Ultimate Guide to Homemade Hot Cocoa Bombs: Easy Recipe & Creative Variations
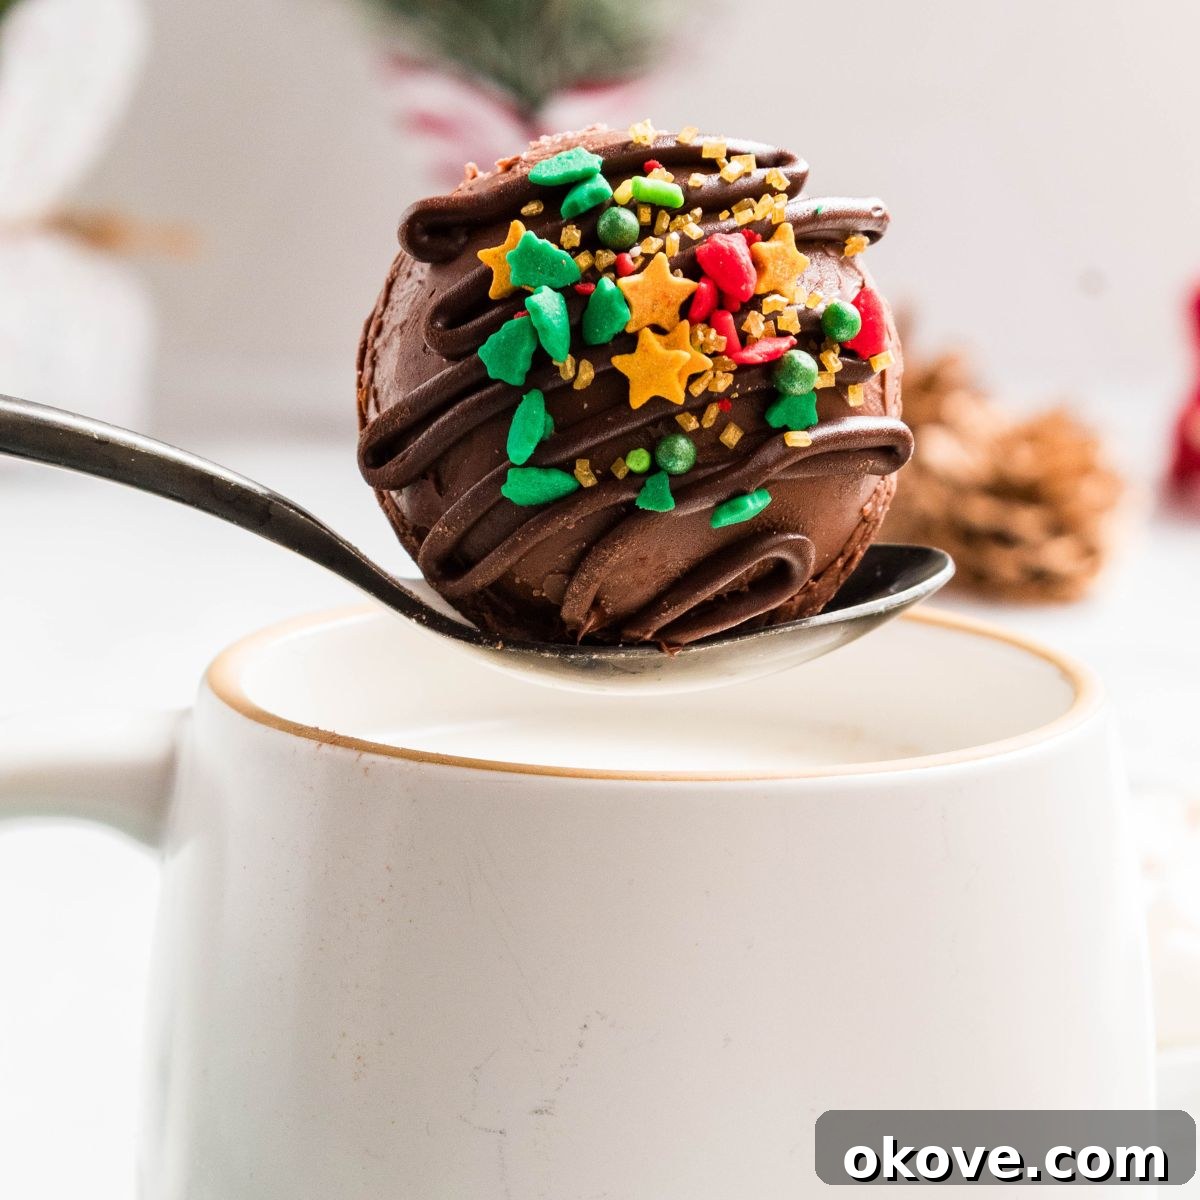
Hot cocoa bombs have taken the world by storm, transforming a simple cup of hot chocolate into an exciting, interactive experience. Imagine dropping a perfectly crafted chocolate sphere into a warm mug of milk and watching it dramatically melt away, revealing a treasure trove of cocoa mix and mini marshmallows that burst forth. It’s not just a drink; it’s a magical moment, perfect for cozy evenings, holiday gatherings, or thoughtful, homemade gifts. This comprehensive guide will walk you through everything you need to know to create stunning and delicious hot cocoa bombs right in your own kitchen.
Why You’ll Love Making Hot Cocoa Bombs
Crafting your own hot cocoa bombs is an incredibly rewarding activity, especially during the festive season. They offer an unparalleled blend of fun, creativity, and deliciousness. These charming chocolate spheres are more than just a sweet treat; they are an experience waiting to unfold. As you pour steaming hot milk over them, the chocolate shell gracefully melts, releasing a delightful eruption of cocoa powder and marshmallows, creating a rich and creamy cup of hot chocolate right before your eyes. The visual spectacle alone makes them a hit with both children and adults, sparking joy and wonder.
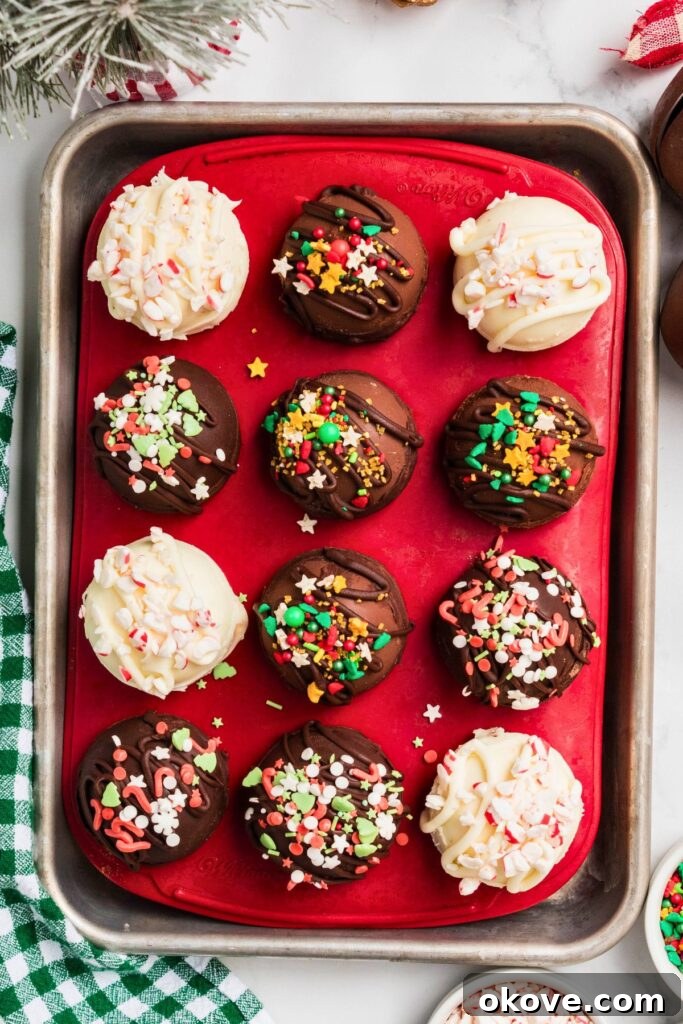
Beyond the enchanting reveal, hot cocoa bombs are also remarkably versatile. You can customize them in countless ways to suit any taste or occasion. Experiment with different types of chocolate, add a variety of fillings like sprinkles, crushed candies, or even a hint of espresso powder for an adult twist. Their customizable nature makes them fantastic for personalizing gifts, creating unique party favors, or simply adding a special touch to your daily routine. Get ready to impress your friends and family with these edible works of art that are as delightful to make as they are to enjoy.
Essential Ingredients for Perfect Hot Cocoa Bombs
Creating sensational hot cocoa bombs begins with selecting the right ingredients. Each component plays a vital role in ensuring your bombs are not only visually appealing but also deliver a rich, comforting, and utterly delicious hot chocolate experience. Here’s a breakdown of what you’ll need and why:
- Milk Chocolate Chips (or Melts): The foundation of any good cocoa bomb! Melted chocolate forms the perfect, smooth spherical shell that holds all the delightful surprises within. Milk chocolate offers a classic, sweet flavor that’s universally loved. For those who prefer a deeper, more intense chocolate taste, dark chocolate chips are an excellent alternative. Using high-quality chocolate chips or candy melts ensures a smoother melt and a more professional finish for your bombs.
- White Chocolate Chips (or Vanilla Candy Melts): White chocolate adds a beautiful contrast and another layer of flavor to your cocoa bombs. Its creamy, vanilla notes pair wonderfully with the rich hot chocolate powder. You can use it to create elegant white chocolate bombs or as a decorative drizzle over milk chocolate shells, adding visual interest and an extra touch of sweetness.
- Hot Cocoa Mix: This is the heart of your hot cocoa bomb. A good quality hot cocoa mix ensures that once your bomb melts, it transforms into a decadent and flavorful cup of hot chocolate. You can use your favorite store-bought mix or even create your own homemade blend for a truly unique taste. The amount used per bomb will depend on the strength desired and the size of your molds.
- Mini Marshmallows: No hot chocolate is complete without marshmallows! These miniature delights are essential for that classic, cozy hot cocoa experience. When the bomb melts into the hot milk, the marshmallows float to the top, slowly softening and melting, adding a creamy texture and sweet vanilla notes that beautifully complement the chocolate.
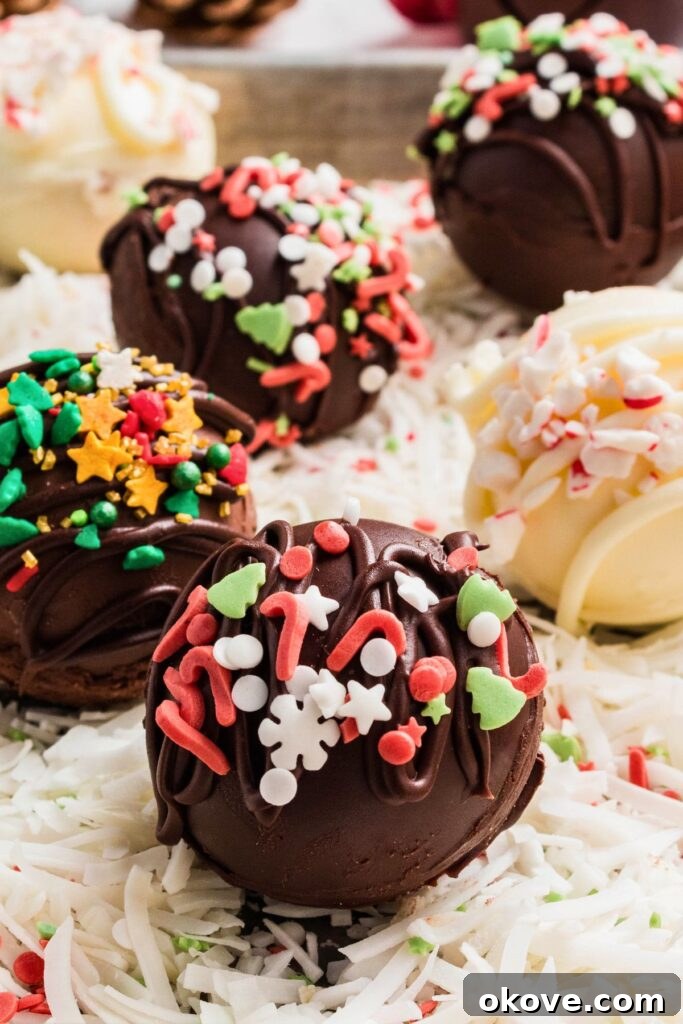
- Sprinkles and Crushed Peppermints (Optional Decorations): This is where you can let your creativity shine! Sprinkles come in an endless array of colors and shapes, allowing you to customize your cocoa bombs for any holiday, season, or theme. Crushed peppermints add a refreshing minty kick and a festive touch, especially during winter. Other options include chocolate shavings, edible glitter, small candies, or even a dusting of cinnamon or cocoa powder for garnish.
Step-by-Step Guide: How to Make Hot Cocoa Bombs
Making hot cocoa bombs is a fun and straightforward process that yields impressive results. Follow these detailed instructions to craft your very own delightful chocolate spheres. Remember, precision and patience are key to achieving perfectly formed and sealed bombs.
Equipment You’ll Need:
- Hot cocoa bomb mold (silicone half-sphere mold is recommended, or a silicone mini muffin tin)
- Microwave-safe bowls
- Spoons or a pastry brush
- Resealable bag (for piping melted chocolate)
- Small pan (optional, for tempering chocolate)
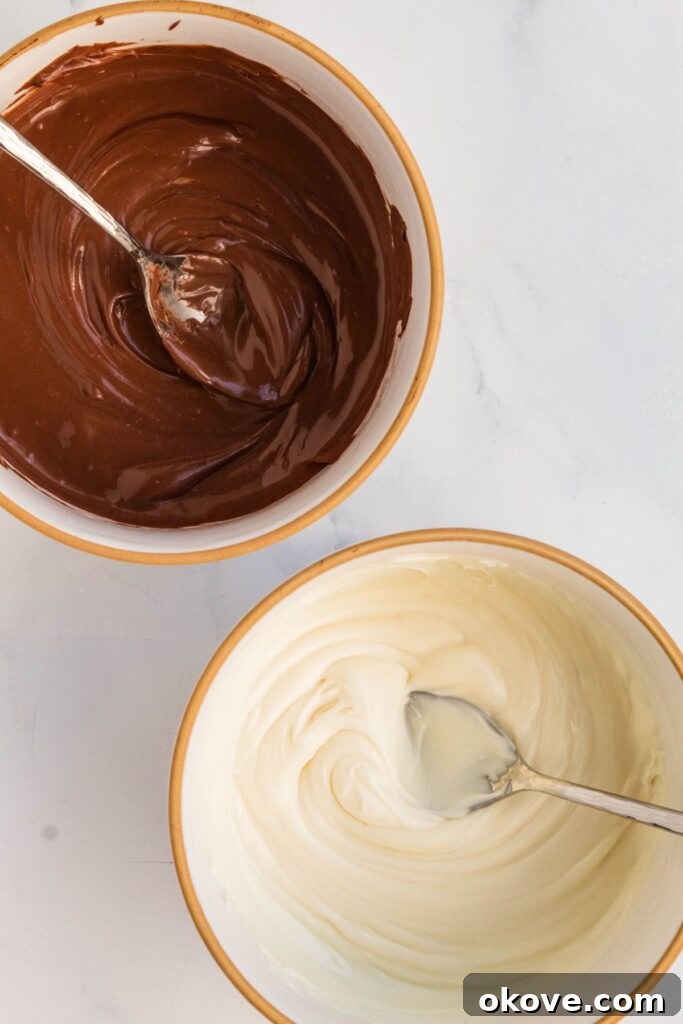
STEP 1: Melt Your Chocolate. Place 1.5 cups of your chosen chocolate chips (milk, dark, or white) into a microwave-safe bowl. Microwave in short 30-second intervals, stirring thoroughly after each interval. Continue until the chocolate is completely melted and smooth. Be careful not to overheat the chocolate, as it can scorch easily and become grainy. If you prefer, you can temper your chocolate using a double boiler method for a shinier, snappier finish.
STEP 2: Coat the Molds. Take your clean, dry silicone hot chocolate bomb mold. Pour or spoon approximately one tablespoon of melted chocolate into each cavity. Using the back of the spoon or a clean pastry brush, swirl the chocolate around the cavity, ensuring it evenly coats the entire surface and extends all the way up the sides of each half sphere. Make sure the layer is thick enough to be sturdy but not overly bulky. Repeat this process for all the desired half-spheres. For best results, consider applying a second thin coat after the first has slightly set, for added strength.
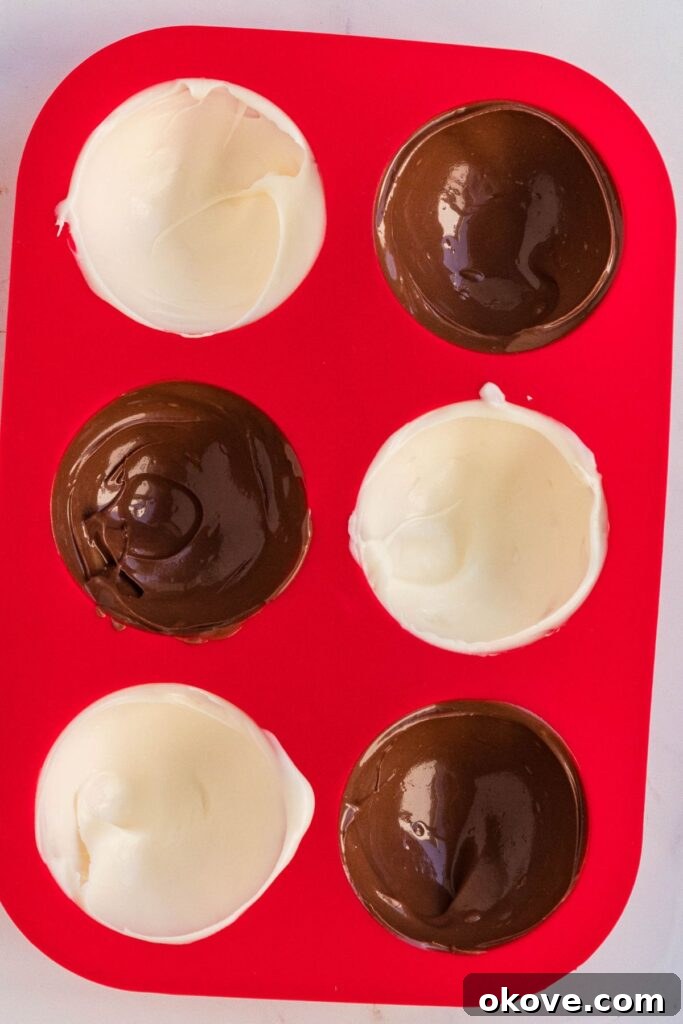
STEP 3: Chill and Set. Once all cavities are coated, carefully place the silicone mold into the refrigerator. Allow the chocolate to chill and set for at least 20 minutes. This step is crucial for easy removal of the chocolate shells. Repeat this entire process (melting and molding) with white chocolate chips if you plan to make white chocolate cocoa bombs or use both types of chocolate for a varied assortment.
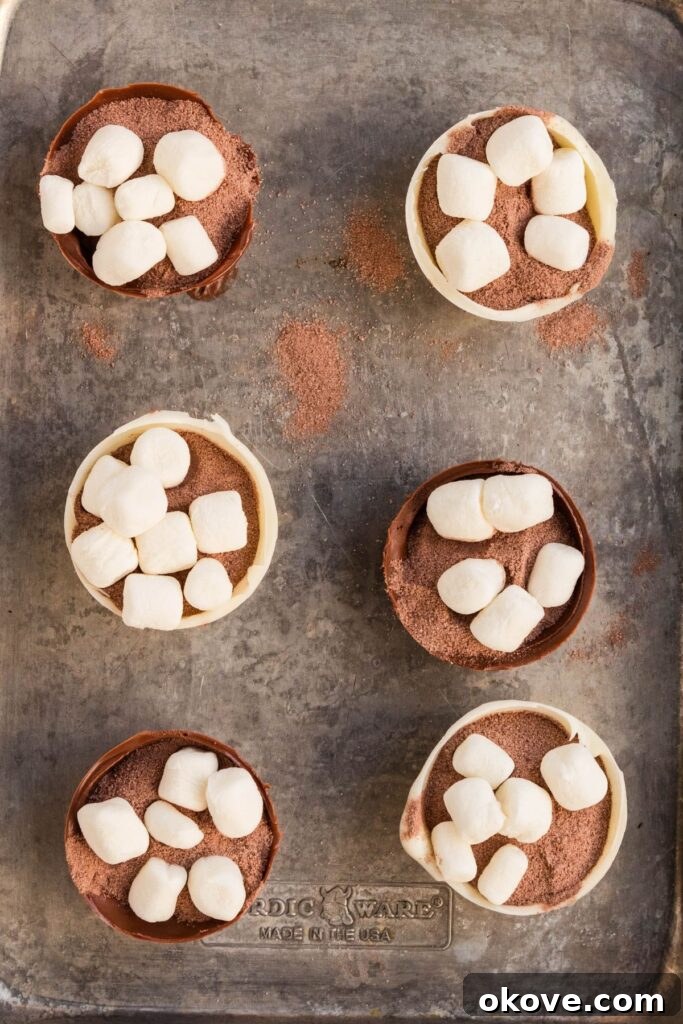
STEP 4: Fill the Chocolate Shells. Gently remove the hardened chocolate shells from the silicone molds. This requires a delicate touch to prevent cracking. Place them on a clean, flat surface. Take half of your chocolate shells and fill each one with about 1 tablespoon of hot chocolate mix and 5-7 mini marshmallows. You can also add other optional fillings at this stage, such as a pinch of sprinkles, crushed peppermints, or a small piece of candy for an extra surprise.
STEP 5: Prepare for Sealing. Heat the remaining 1/2 cup of chocolate chips in the microwave until melted and smooth (again, in 30-second intervals). Transfer this melted chocolate into a resealable bag. This will act as your “glue” for sealing the bombs.
STEP 6: Seal the Bombs. Snip a tiny tip off one corner of the resealable bag, creating a small piping hole. Carefully pipe a thin layer of melted chocolate around the edge of the filled half-shells. Then, take an empty half-shell and gently place it on top of a filled half-shell, aligning the edges to create a complete sphere. Press down lightly to create a secure seal, ensuring no gaps remain.
STEP 7: Smooth and Refine. Use a clean finger (or a small offset spatula) to gently smooth any excess melted chocolate around the seam of each chocolate sphere. This gives your hot cocoa bombs a polished, professional look. Repeat this sealing and smoothing process for all your hot cocoa bombs. If you are making white chocolate bombs, use melted white chocolate for sealing those as well.
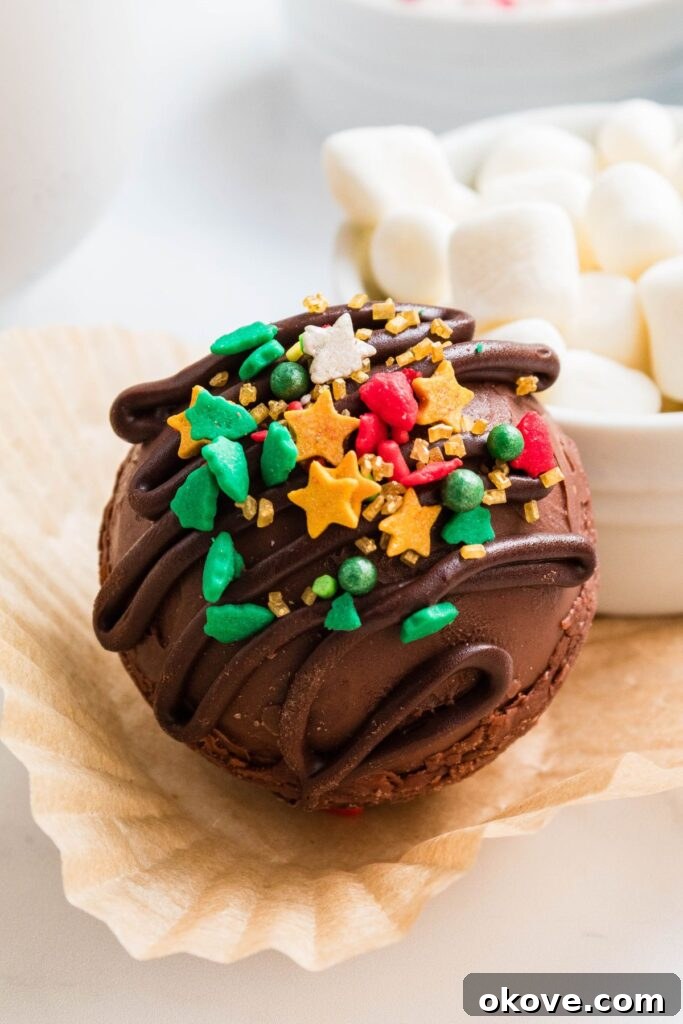
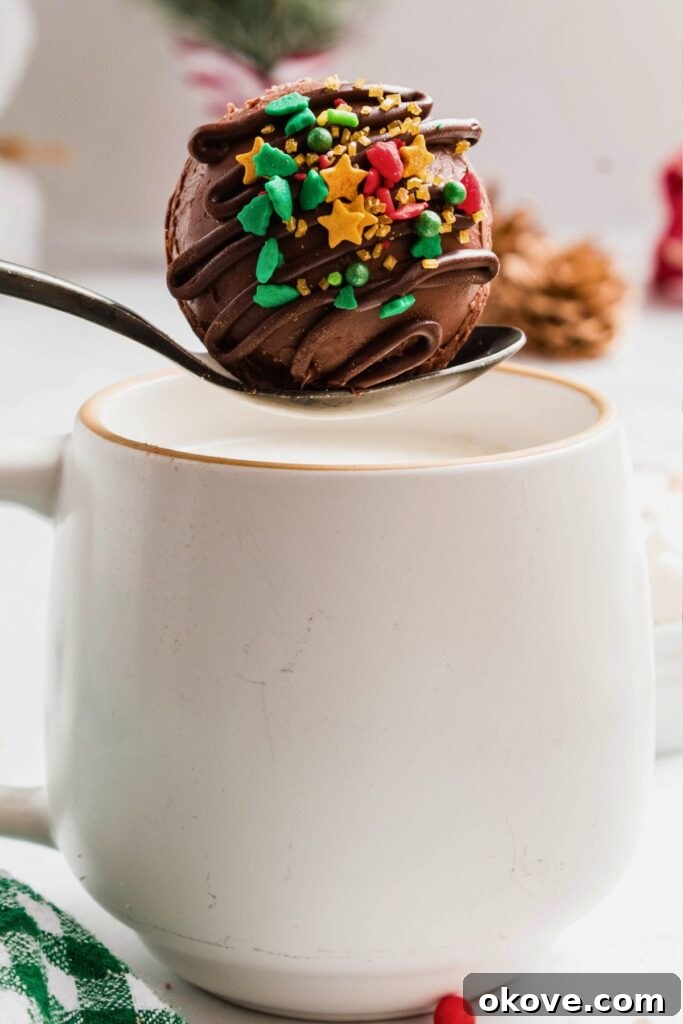
STEP 8: Decorate and Enjoy. Once sealed, you can further decorate your hot cocoa bombs. Drizzle the tops with contrasting melted chocolate (e.g., white chocolate drizzle on milk chocolate bombs), add a final sprinkle of sprinkles, crushed peppermints, or other festive toppings. Allow the decorations to set for a few minutes. When you’re ready to enjoy, simply drop one chocolate bomb into a mug, pour 8-10 ounces of steaming hot milk (or milk alternative) over it, and watch the magic unfold!
Pro Tips for Flawless Hot Cocoa Bombs
Achieving perfect hot cocoa bombs is an art that can be mastered with a few key techniques. These tips will help you navigate common challenges and elevate your creations from good to absolutely glorious.
- Temper Your Chocolate for Best Results: While microwaving chocolate is quick, tempering it provides a superior finish. Tempered chocolate is glossier, snaps cleanly, and resists melting at room temperature better. You can temper chocolate using a double boiler on the stovetop. Gently melt about two-thirds of your chocolate over simmering water (not boiling), then remove from heat and stir in the remaining one-third until fully melted. This brings the chocolate to a stable working temperature.
- Use a Candy Thermometer: When working with chocolate, especially when tempering, temperature control is vital. A candy thermometer will be your best friend, helping you avoid burning or seizing your chocolate. For most chocolates, keep the temperature below 130°F (54°C) during the melting phase. Overheating causes chocolate to seize, becoming thick and unusable.
- Ensure Absolutely Dry Equipment and Surfaces: Chocolate is incredibly sensitive to water. Even a single drop of moisture can cause melted chocolate to seize and become grainy and unworkable. Before you begin melting or molding, ensure all your bowls, spatulas, molds, and work surfaces are completely dry. This seemingly small detail makes a huge difference in the quality of your chocolate shells.
- Don’t Overfill Your Shells: While it’s tempting to cram as many marshmallows and as much cocoa mix as possible into your bombs, overfilling can make them difficult to seal properly. Stick to the recommended amount (around 1 tablespoon of mix and 5-7 mini marshmallows) to ensure a neat and secure seal. If the bombs are bulging, they are more likely to crack or open prematurely.
- Warm the Edges for a Perfect Seal: If you’re having trouble getting the two halves of your chocolate spheres to seal neatly, try gently warming the rim of one half-sphere. You can do this by briefly placing it on a warm plate (heated in the microwave for a few seconds) or using a warm, dry finger. This slightly melts the chocolate edge, allowing for a seamless bond when you press it against the other half.
- Work in a Cool Environment: Chocolate can be finicky in warm environments. If your kitchen is particularly warm, the chocolate shells might soften too quickly, making them difficult to handle. If possible, work in a cooler room or chill your hands under cold water before handling the chocolate to prevent fingerprints and melting.
Creative Variations to Customize Your Hot Cocoa Bombs
The beauty of hot cocoa bombs lies in their endless potential for customization. Once you’ve mastered the basic technique, you can unleash your creativity and craft unique flavor profiles and themes for any occasion. Here are some exciting variations to inspire your next batch:
- Experiment with Different Chocolates and Candy Melts: Don’t limit yourself to just milk and white chocolate. Explore the world of flavor by using dark chocolate for a rich, intense experience, or semi-sweet for a balanced taste. For vibrant, themed bombs, colored candy melts are your best friend. Imagine bright red bombs for Valentine’s Day, green for St. Patrick’s, or a mix of pastel shades for an Easter treat. You can even create magical unicorn-themed bombs with pink or purple candy melts, edible glitter, and a dash of white hot chocolate powder for a whimsical touch.
- Swap Out the Cocoa Mix and Add Unique Fillings: The inner filling is where your bombs truly come alive. Beyond traditional hot cocoa, consider these exciting alternatives:
- Adult Indulgence: Add a teaspoon of instant espresso powder to your cocoa mix for a mocha-flavored bomb, or a splash of liqueur-filled chocolate syrup.
- Seasonal Spices: During autumn, use orange candy melts and fill your bombs with cocoa mix and a generous pinch of pumpkin pie spice or ground cinnamon. For a unique chai experience, fill them with powdered chai mix and a few chai tea bags (remove tea bags before drinking!).
- Extra Flavor Bursts: Incorporate more than just marshmallows. Add extra sprinkles, finely crushed peppermints, mini chocolate chips, caramel bits, or even a small piece of a soft candy bar into the bomb for an added burst of flavor and texture when it melts.
- Candy Bar or Melting Wafers: If you’re not using chocolate chips, but rather large chocolate bars or melting wafers, ensure they are chopped into smaller, uniform pieces before melting. This promotes even melting and prevents scorching. High-quality melting wafers designed specifically for confectionery work beautifully and often don’t require tempering, making them a good option for beginners.
- Cookie Dough Bombs: For a truly decadent treat, substitute some of the hot cocoa mix with edible cookie dough bites.
- Nutty Delights: Add chopped nuts like pecans, almonds, or hazelnuts to the filling, especially if using a rich dark chocolate shell.
- Spicy Hot Chocolate Bombs: A pinch of cayenne pepper or chili powder in your cocoa mix can create a surprising and delightful kick.
Frequently Asked Questions About Hot Cocoa Bombs
Proper storage is essential to maintain the freshness and integrity of your hot chocolate bombs. In cooler weather (below 70°F or 21°C), you can store them on the counter at room temperature for up to two weeks. During warmer months or for longer storage, it’s best to keep them in the refrigerator, where they can last for up to six months. Always store them in an airtight container to prevent moisture absorption and keep them fresh.
While hot cocoa bombs have a remarkably long shelf life when refrigerated, freezing them is generally not recommended. The chocolate shells are somewhat delicate and can be prone to cracking during the freezing and thawing process due to temperature fluctuations. Storing them in the refrigerator for up to six months provides ample time to enjoy them without the risks associated with freezing.
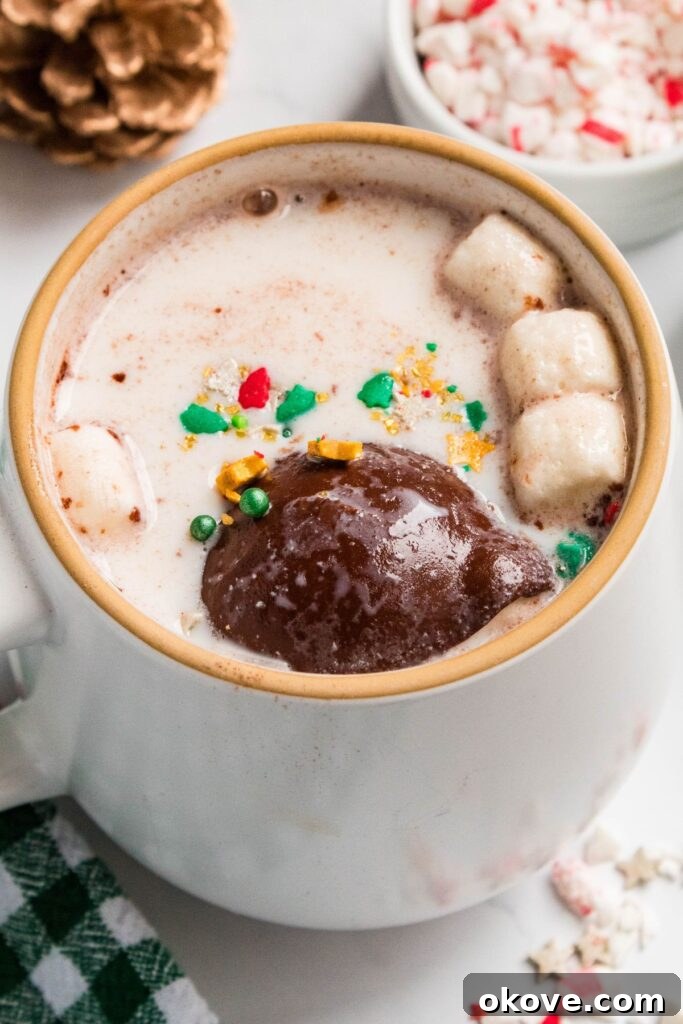
Using hot cocoa bombs is incredibly simple and utterly delightful! When you’re ready for a warm, sweet treat, simply place one hot cocoa bomb into your favorite mug. Heat 8-10 ounces of milk (dairy or non-dairy alternative) until steaming hot, but not boiling. Carefully pour the hot milk over the bomb and watch the magic unfold! The chocolate shell will melt away, releasing the cocoa mix and marshmallows. Stir gently until everything is fully dissolved and combined for a perfectly rich cup of hot chocolate. Children especially adore the “magical” appearance of the marshmallows.
No hot cocoa mix? No problem! You can easily make your own. In a large bowl, combine 1 cup of granulated sugar with ¾ cup of unsweetened cocoa powder. For an extra touch, you can add a pinch of salt and a tiny bit of powdered milk or creamer for richness. Store this homemade mix in an airtight container, and you’ll have a convenient supply for your hot cocoa bombs or any hot chocolate craving throughout the winter.
Don’t have a specialized half-sphere mold? You can still make hot cocoa bombs! A silicone mini muffin tin works wonderfully – just coat the cavities as described in the instructions. Alternatively, you can create rustic “cups” using small pieces of parchment paper formed into cup shapes and held within a regular muffin tin, or even use small silicone cupcake liners. Use the same amount of melted chocolate to coat the inside of these improvised molds, ensuring an even layer.
Serving and Gifting Your Hot Cocoa Bombs
Hot cocoa bombs are not just a treat; they’re an experience waiting to be shared. Here are some ideas for serving and gifting them:
- Cozy Evening Indulgence: Pair a hot cocoa bomb with a warm blanket, a good book, and a crackling fire for the ultimate relaxing evening.
- Party Favors: Individually wrap decorated hot cocoa bombs in clear cellophane bags with a festive ribbon. Attach a small tag with instructions for use. They make charming and memorable party favors for birthdays, holiday parties, or baby showers.
- Holiday Gifts: Assemble a collection of various flavored hot cocoa bombs in a decorative box or tin. Add a mug, a small bottle of flavored syrup, and perhaps some extra marshmallows for a thoughtful homemade gift basket.
- Dessert Bar: Offer a variety of hot cocoa bomb flavors as part of a dessert bar, allowing guests to choose their favorite. Provide different types of milk and toppings.
- Interactive Treat for Kids: Set up a “Hot Cocoa Bomb Station” for children, letting them choose their bomb and watch it melt. It’s an engaging activity that promises a delicious reward.
Conclusion: Your Journey to Hot Cocoa Bomb Mastery
Creating homemade hot cocoa bombs is a delightful and rewarding culinary adventure. From the satisfying process of molding and filling the chocolate shells to the enchanting reveal as they melt into a rich, comforting beverage, every step is infused with joy. We’ve covered everything from essential ingredients and detailed instructions to expert tips, creative variations, and practical FAQs, ensuring you have all the knowledge and confidence to craft stunning hot cocoa bombs. Whether you’re making them for a personal indulgence, a festive gathering, or as heartfelt gifts, these chocolate spheres are sure to bring smiles and warmth to everyone who experiences their magic. So, gather your ingredients, unleash your creativity, and get ready to stir up some sweet memories!
More Holiday Recipes
Holidays
Christmas Charcuterie Board
Desserts
Red Velvet Cake Mix Cookies
Desserts
Grinch Oreo Balls
Drinks
Pumpkin Spice Creamer
Hot Cocoa Bombs Recipe
By: Rebecca
Servings: 12 hot cocoa bombs
Prep Time: 30 minutes
Chill Time: 1 hour
Total Time: 1 hour 30 minutes
Pin Recipe |
Share by Email
Hot cocoa bombs are a fun and exciting way to enjoy hot chocolate. Drop your hot chocolate bomb into a mug of hot milk and watch it melt away to reveal a special treat.
Equipment:
- Hot cocoa bomb mold (silicone half-sphere mold or silicone mini muffin tin)
- Microwave-safe bowls
- Resealable bag
- Spoons or pastry brush
Ingredients:
- 1 1/2 cups milk chocolate chips (or chocolate melts)
- 1 1/2 cups white chocolate chips (or vanilla candy melts)
- 3/4 cup hot cocoa mix
- 1/2 cup mini marshmallows
- Optional: Sprinkles, crushed peppermints, small chocolate candies
Instructions:
- Place 1 cup of the milk chocolate chips into a microwave-safe bowl. Microwave in 30-second intervals, stirring after each, until chocolate is completely melted and smooth.
- Pour or spoon about a tablespoon of melted chocolate into each cavity of your hot chocolate bomb mold. Swirl or use a pastry brush to ensure the chocolate evenly coats the entire surface and sides of each half sphere.
- Repeat this for all 6 half-spheres. Place the mold into the refrigerator and chill for at least 20 minutes to set. Repeat this entire process with the white chocolate chips to create white chocolate cocoa bomb shells if desired.
- Gently remove the hardened chocolate shells from the silicone molds. Fill half of the chocolate shells with 1 tablespoon of hot chocolate mix and 5-7 mini marshmallows. Add any other optional fillings now.
- Heat the remaining 1/2 cup of chocolate chips in the microwave until melted (about 30 seconds). Transfer this melted chocolate to a resealable bag.
- Cut a tiny tip off the corner of the resealable bag. Pipe a thin layer of melted chocolate around the edge of the filled half-shells.
- Carefully place an empty chocolate half-shell on top of a filled one, aligning the edges to create a complete sphere. Gently press to seal, filling any small gaps with additional piped chocolate.
- Use your finger to smooth any excess melted chocolate on the outside seam of the chocolate spheres. Repeat this for all hot cocoa bombs. Repeat with white chocolate chips for white chocolate bombs.
- Drizzle the tops with contrasting melted chocolate (e.g., white chocolate on milk chocolate bombs), and add sprinkles, crushed peppermints, or other candy decorations if desired. Allow decorations to set.
- When ready to enjoy, dunk each chocolate bomb into 8-10 ounces of steaming hot milk and stir until dissolved.
Notes:
- If you don’t have a half-sphere mold, you can use a silicone mini muffin tin or create cups with parchment paper in a regular muffin tin, coating them with the same amount of chocolate.
- Chill and fill the chocolate bombs with hot cocoa mix and marshmallows, but avoid overfilling. They are easier to seal neatly if not overstuffed.
Nutrition (per serving – approximation):
- Calories: 270kcal
- Carbohydrates: 35g
- Protein: 2g
- Fat: 15g
- Saturated Fat: 9g
- Polyunsaturated Fat: 0.2g
- Monounsaturated Fat: 2g
- Trans Fat: 0.02g
- Cholesterol: 5mg
- Sodium: 86mg
- Potassium: 129mg
- Fiber: 0.3g
- Sugar: 32g
- Vitamin A: 8IU
- Vitamin C: 0.1mg
- Calcium: 68mg
- Iron: 0.2mg
Nutrition information is automatically calculated, so should only be used as an approximation.
Additional Info:
Course: Dessert
Cuisine: American
Tried this recipe?
We’d love to see your creations! Mention @celebratingsimplyrecipes or tag #celebratingsimplyrecipes on Instagram!