

Kickstart your day with these incredibly yummy and effortlessly easy breakfast cups! They’re not just a delicious treat; they’re a clever solution for busy parents and a fantastic way to minimize food waste. We especially love transforming leftover sandwich crusts into the base for these savory delights, giving them a second life and a delightful texture. These versatile cups freeze beautifully, making them an ideal make-ahead breakfast for your little ones, or a quick grab-and-go option for anyone in the family. The best part? You can customize them with any fillings or toppings your heart desires, making every batch unique!

Why Breakfast Cups Are a Game-Changer for Busy Households
In the whirlwind of busy mornings, finding quick, nourishing, and appealing breakfast options can feel like a Herculean task. Enter breakfast egg cups – a culinary hero that consistently checks all the boxes. They’ve earned their status as a beloved staple in countless households, and for excellent reasons:
1. Unbeatable Ease and Time-Saving Efficiency
Mornings often feel like a race against the clock, especially when you’re orchestrating the readiness of an entire family. This is where breakfast egg cups truly shine as a lifesaver. Their superpower lies in their prepare-ahead potential. Imagine whipping up a generous batch during a relaxed weekend afternoon, then simply refrigerating or freezing them. When those frantic weekdays hit, all it takes is a quick pop into the microwave or oven, and voilà – a warm, satisfying, and utterly effortless breakfast is served. This brilliant meal prep strategy liberates valuable morning minutes, allowing you more time for sips of coffee, last-minute tasks, or simply a calmer start to your day.
2. Endless Customization for Every Palate
One of the most appealing attributes of breakfast egg cups is their incredible versatility. They act as a blank canvas, inviting you to personalize each cup to perfectly match individual preferences and accommodate diverse dietary needs. Whether your picky eater craves a timeless ham and cheese pairing, your health-conscious teen prefers a vibrant, veggie-packed delight, or you’re experimenting with a medley of different ingredients, the creative possibilities are truly boundless. This adaptability ensures that everyone at the breakfast table can enjoy a meal tailored precisely to their liking, minimizing complaints and maximizing satisfaction. From different cheeses to an array of vegetables like spinach, bell peppers, or mushrooms, and various protein sources such as crumbled sausage or turkey bacon, you’re only limited by your imagination.
3. Nutrient-Rich and Perfectly Balanced
At the heart of these delectable cups are eggs, a nutritional powerhouse brimming with essential proteins, vital vitamins, and crucial minerals. By thoughtfully incorporating a variety of colorful vegetables, lean meats, and even a sprinkle of cheese into the mix, you’re not just creating a tasty meal; you’re crafting a balanced and hearty breakfast that provides sustained energy. This wholesome combination is key to keeping your family feeling full, energized, and mentally focused throughout the entire morning, helping them tackle school, work, or playtime with vigor. The protein in eggs aids muscle development and satiety, while vegetables contribute fiber and antioxidants, making these cups a truly complete meal.
4. Portable Perfection for On-the-Go Lifestyles
For those super busy mornings when every second counts, breakfast egg cups emerge as an unparalleled grab-and-go option. Their compact and self-contained nature makes them incredibly convenient. Whether your children are dashing off to school, you’re rushing out the door for work, or you simply need a quick, nutritious snack while running errands, these cups offer the ideal solution for a delicious and mess-free breakfast on the move. Say goodbye to messy toast crumbs or soggy cereal; these cups are designed for portability, fitting perfectly into lunchboxes, briefcases, or even just a hand for a quick bite anywhere, anytime.
Essential Ingredients for Your Breakfast Cups
Creating these delightful breakfast cups requires a few simple, wholesome ingredients. Here’s a detailed look at what you’ll need, along with tips for selection and customization:
- Bread: This forms the delightful base of your cups. While I love to use the crusts saved from my kids’ sandwiches – a fantastic zero-waste hack – any type of bread will work beautifully. Consider using whole wheat for added fiber, sourdough for a tangy twist, or even gluten-free bread for dietary needs. The key is to have a soft, pliable bread that can be easily flattened and torn.
- Ham: Sliced deli ham is our go-to for its convenience and savory flavor. However, feel free to experiment! Crumbled cooked sausage, diced turkey bacon, shredded chicken, or even vegetarian alternatives like plant-based deli slices can be wonderful additions.
- Cheese: Shredded cheddar cheese melts beautifully and provides a classic, comforting taste. But don’t limit yourself! Monterey Jack, mozzarella, Gruyère, or a Mexican blend can offer different flavor profiles. For a dairy-free option, use your favorite plant-based shredded cheese.
- Eggs: The star of the show! Large eggs are typically what recipes call for. Ensure they are fresh for the best texture and flavor. The number of eggs will depend on how many cups you plan to make and their size.
- Mustard: A secret ingredient! A spoonful of normal yellow mustard or Dijon mustard adds a subtle tang and depth to the egg mixture, elevating the overall flavor without making the cups taste distinctly “mustardy.” It’s a wonderful flavor enhancer that brightens the savory notes.
- Milk: A splash of milk helps to create a lighter, fluffier texture for the egg mixture. Any type of milk works here – whole, skim, or even non-dairy alternatives like almond, soy, or oat milk if you need a dairy-free option.
Optional Add-ins for Enhanced Flavor and Nutrition:
- Vegetables: Finely diced bell peppers, spinach (wilted and squeezed dry), mushrooms, onions, or zucchini can add vibrant color, fiber, and vitamins.
- Herbs & Spices: A pinch of dried oregano, chives, garlic powder, or a dash of hot sauce can really wake up the flavors.
- Other Meats: Cooked and crumbled bacon, finely chopped cooked chicken, or breakfast sausage bits.
- Different Cheeses: Feta, goat cheese, or a sprinkle of Parmesan for a sharper taste.
How To Craft Your Perfect Breakfast Cups
Follow these simple steps to create a batch of delightful breakfast cups that are sure to become a family favorite. With just a little preparation, you’ll have a nutritious and convenient meal ready for any day of the week.
Step 1: Preheat the Oven and Prepare Your Muffin Tin
Begin by preheating your oven to a steady 400°F (200°C). This ensures the oven is at the correct temperature when your cups are ready to go in, leading to even baking. Next, take a standard 12-cup muffin tin and lightly grease each well with cooking spray or a dab of butter. Greasing is crucial to prevent the egg cups from sticking, making them easy to remove once baked.
Step 2: Prepare the Bread Base
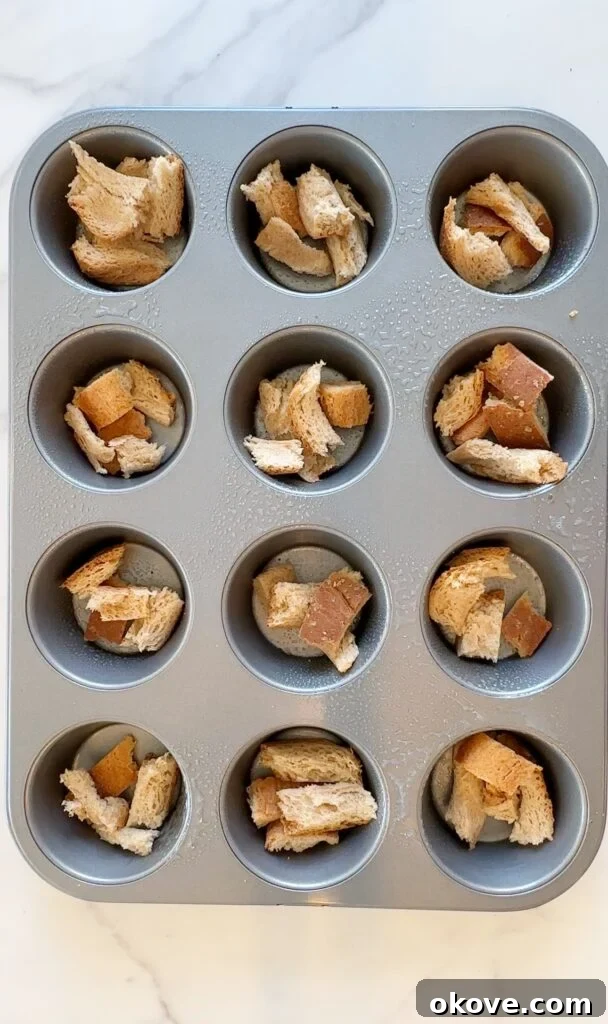
Using a rolling pin or simply your hands, gently flatten each slice of bread. This makes the bread more pliable and easier to fit into the muffin wells. Then, tear each flattened slice into small, manageable pieces – roughly 1-inch squares. Place a few pieces into the bottom of each greased muffin tin well, pressing down lightly to form a rustic bread base. This bread layer acts as a delicious crust, soaking up some of the egg mixture and adding a pleasant texture.
Step 3: Layer the Cheese and Ham
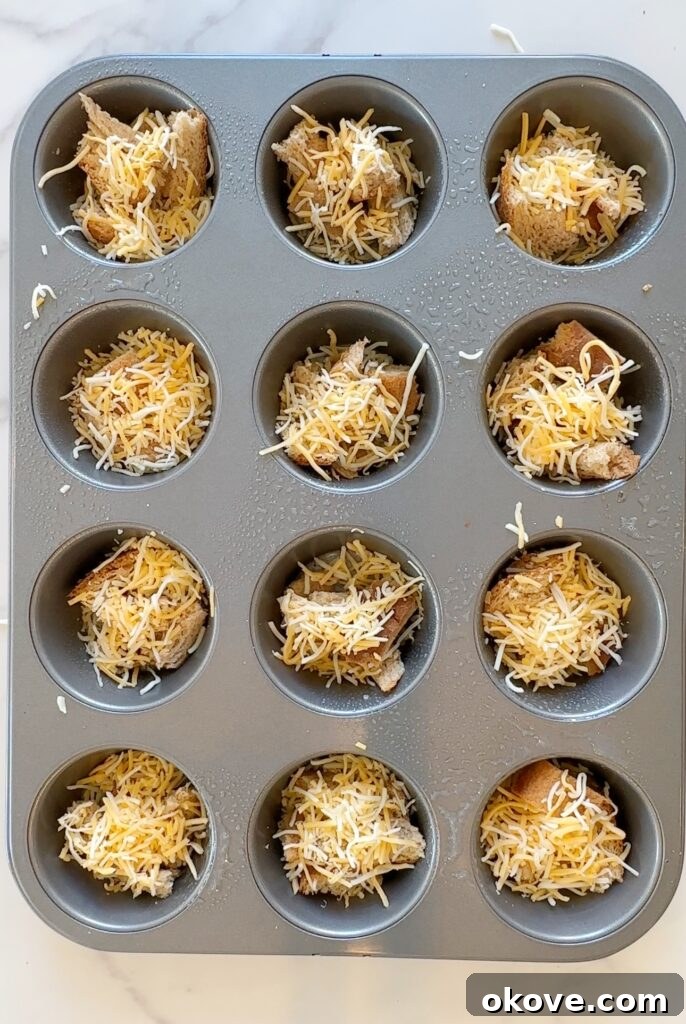
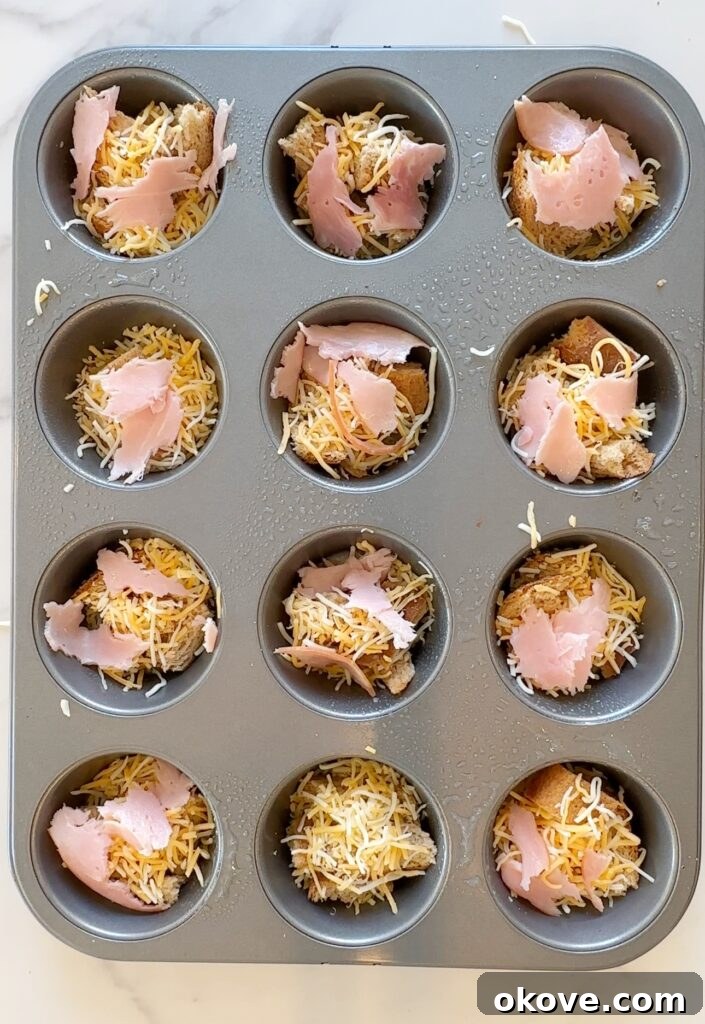
Now for the delicious fillings! Evenly sprinkle a generous amount of shredded cheddar cheese into each muffin well, directly over the bread pieces. The cheese will melt and become wonderfully gooey. Next, take a slice of deli ham (or your preferred meat) and either fold it or tear it into smaller pieces, placing it on top of the cheese in each cup. You want to ensure the ham is distributed well for flavor in every bite.
Step 4: Whisk the Egg Mixture
In a medium-sized mixing bowl, crack your eggs. Add the milk and the mustard to the bowl. Using a whisk, beat the ingredients together until they are well combined and the yolks and whites are fully integrated. Don’t be shy about whisking thoroughly – this introduces air, which contributes to a fluffier texture. The mustard, while subtle, adds a delightful tang and complex flavor to the egg mixture, enhancing the savory notes without being overpowering.
Step 5: Pour the Egg Mixture into the Cups
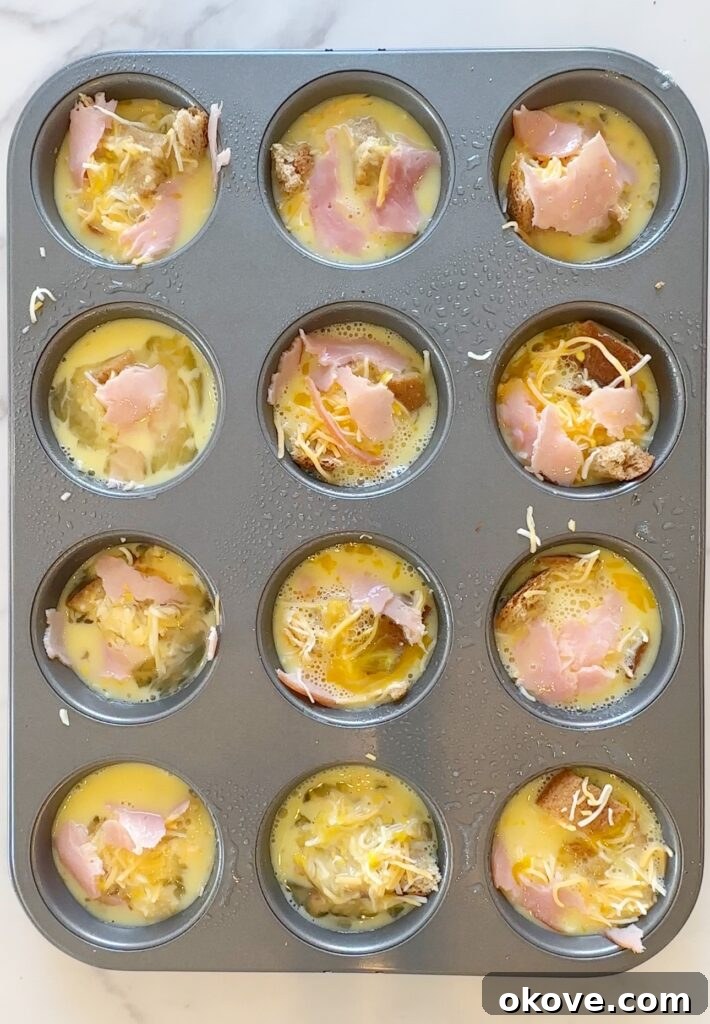
Carefully pour the whisked egg mixture over the ham, cheese, and bread in each muffin cup. Fill each cup to about 3/4 full, leaving a little room at the top. This space is important because the eggs will puff up as they bake, and overfilling can lead to overflow and a messy oven. Distribute the mixture as evenly as possible among all the wells.
Step 6: Bake to Golden Perfection
Gently place the muffin tin into your preheated oven. Bake for approximately 18-20 minutes. The exact baking time can vary depending on your oven and the size of your cups, so keep an eye on them. The egg cups are perfectly baked when they are set in the center, have a slightly firm texture, and are beautifully lightly golden brown on top. You can also gently press the center; if it springs back, they’re likely done.
Step 7: Cool and Serve
Once baked, carefully remove the muffin tin from the oven. Let the egg cups cool in the tin for a couple of minutes – this helps them firm up slightly and makes them easier to remove. Then, use a small spoon or a butter knife to gently loosen the edges and carefully lift each breakfast cup out of its well. Arrange them on a serving plate, and they are now ready to be devoured! Serve them warm, or let them cool completely for meal prepping.
Tips for Perfectly Delicious Breakfast Cups Every Time
- Don’t Overfill: Always leave about 1/4 inch of space at the top of each muffin well to prevent spillage as the eggs rise.
- Customize with Care: If adding watery vegetables like spinach or mushrooms, sauté them first to remove excess moisture. This prevents a soggy base.
- Seasoning is Key: Don’t forget salt and pepper! A pinch of garlic powder or onion powder can also add a nice savory depth.
- Evenly Distribute Fillings: Try to spread the bread, cheese, and ham (or other fillings) as evenly as possible in each cup so every bite is packed with flavor.
- Check for Doneness: Ovens vary, so the baking time is a guideline. The eggs should be set in the middle with no jiggle. An internal temperature of 160°F (71°C) is ideal for cooked eggs.
- Variety is the Spice of Life: Make a batch with different fillings! Some with sausage, some with veggies, some plain for the pickiest eaters.
Storage and Reheating for Maximum Convenience
One of the greatest benefits of these breakfast cups is their fantastic make-ahead and storage capabilities, ensuring you always have a healthy option at hand. Properly stored, they maintain their freshness and flavor, making busy mornings a breeze.
Refrigeration:
After the breakfast cups have completely cooled down to room temperature, place them in an airtight container. Store them in the fridge for up to 3-4 days. This makes them perfect for a week’s worth of quick breakfasts or snacks.
Freezing for Long-Term Freshness:
For longer storage, breakfast cups can be frozen for up to 3 months. Once cooled, place each breakfast cup individually into a freezer-safe ziplock bag. To prevent freezer burn and maintain freshness, remove as much air as possible from the bag before sealing. A neat trick is to use a straw: insert it into the bag, seal most of the way around it, suck out the air, then quickly pull out the straw and seal completely. This creates a vacuum seal, keeping your cups fresh and delicious.
Reheating Instructions:
- From the Fridge:
- Microwave: Place 1-2 cups on a microwave-safe plate and heat for 30-60 seconds, or until warmed through.
- Oven/Toaster Oven: Preheat to 350°F (175°C). Place cups on a baking sheet and heat for 5-10 minutes, or until warm. This method often helps crisp up the bread base slightly.
- From the Freezer:
- Microwave: Place frozen cups on a microwave-safe plate and heat for 1-2 minutes, or until thoroughly heated, flipping halfway if needed.
- Oven/Toaster Oven: Preheat to 350°F (175°C). Place frozen cups on a baking sheet and heat for 15-20 minutes, or until hot in the center.
- Air Fryer: For a crispy exterior, place frozen cups in a preheated air fryer at 325°F (160°C) for 8-12 minutes, checking halfway.
Recipe: Classic Ham & Cheese Breakfast Cups

Breakfast Cups
Cook Time: 15 mins |
Servings: 12 breakfast cups
Review Recipe |
Print Recipe
Ingredients
- 3 pieces of whole wheat bread (or sandwich crusts)
- 3 slices deli ham, diced
- 1 cup shredded cheddar cheese
- 6 large eggs
- 1 cup milk (any type, including non-dairy)
- 2 tsp mustard (yellow or Dijon)
- Cooking spray or butter for greasing
- Salt and pepper to taste (optional)
Instructions
- Preheat your oven to 400°F (200°C) and lightly grease a 12-cup muffin tin with cooking spray or butter.
- Flatten each slice of bread slightly with a rolling pin or your hands, then tear into small pieces. Distribute a few pieces into the bottom of each greased muffin cup, pressing down gently.
- Evenly distribute the diced ham into each muffin cup, followed by a sprinkle of shredded cheddar cheese.
- In a mixing bowl, whisk together the eggs, milk, and mustard until well combined. Season with a pinch of salt and pepper if desired.
- Carefully pour the egg mixture over the fillings in each muffin cup, filling them to about 3/4 full.
- Bake in the preheated oven for 15-18 minutes, or until the egg cups are set in the center and lightly golden on top.
- Allow the breakfast cups to cool in the muffin tin for a few minutes before gently removing them with a spoon. Serve warm or let them cool completely for storage.
Nutrition Information
Nutrition information provided is automatically calculated and should be used as an approximation.
Additional Info
Course: Breakfast
Cuisine: American
Mention @reallittlemeals or tag #reallittlemeals!