

Festive Grinch Oreo Balls: The Ultimate No-Bake Holiday Treat
Bring a burst of holiday cheer to your dessert table with these irresistibly delicious and adorably festive Grinch Oreo Balls! Each one is a delightful bite-sized treat, capturing the playful spirit of the beloved Grinch character. Best of all, this incredibly simple, no-bake recipe requires only four essential ingredients, making it a perfect activity for bakers of all ages and skill levels. Whether you’re planning a festive gathering, looking for a charming homemade gift, or simply want to add a touch of whimsy to your holiday season, these green and red truffles are guaranteed to steal the show (and hearts!).

Effortless Grinch Oreo Balls: Your Go-To Holiday Recipe
Crafting these Grinch-inspired Oreo truffles is an absolute joy, transforming simple ingredients into a whimsical and delectable dessert that will be the talk of any holiday party. The rich, creamy chocolate center, made from crushed Oreos and softened cream cheese, offers a luxurious texture and deep flavor that perfectly complements the sweet candy coating. These charming green treats, each topped with a tiny red heart, evoke the Grinch’s transformation and symbolize the true spirit of Christmas joy.
Beyond their delightful taste and adorable appearance, these Grinch Oreo Balls are incredibly versatile. They are a fantastic project for involving children in the holiday baking process, creating cherished memories alongside delicious treats. For a thoughtful and quick Christmas gift, simply arrange them in cellophane bags or decorative boxes – they make perfect presents for teachers, neighbors, or colleagues. Their playful design and festive colors encapsulate the magic of the holiday season, making them a must-have for your celebrations.
Why You’ll Adore This Grinch-Themed Dessert
- Incredibly Easy: With only four ingredients and no baking required, this recipe is perfect for beginners and busy holiday schedules.
- Festively Fun: The vibrant green color and iconic red heart instantly evoke the Grinch, adding a playful touch to your Christmas spread.
- Deliciously Creamy: The rich, smooth center made from Oreos and cream cheese is utterly satisfying.
- Kid-Friendly Activity: A wonderful recipe to make with children, from crushing cookies to rolling balls and adding sprinkles.
- Perfect for Gifting: Beautifully packaged, these truffles make charming and thoughtful homemade presents.
- No-Bake Convenience: Skip the oven and enjoy a hassle-free dessert creation.
Essential Ingredients for Your Grinch Oreo Balls
Creating these magical holiday treats requires just a handful of readily available ingredients. Quality ingredients ensure the best flavor and texture, so choose wisely!
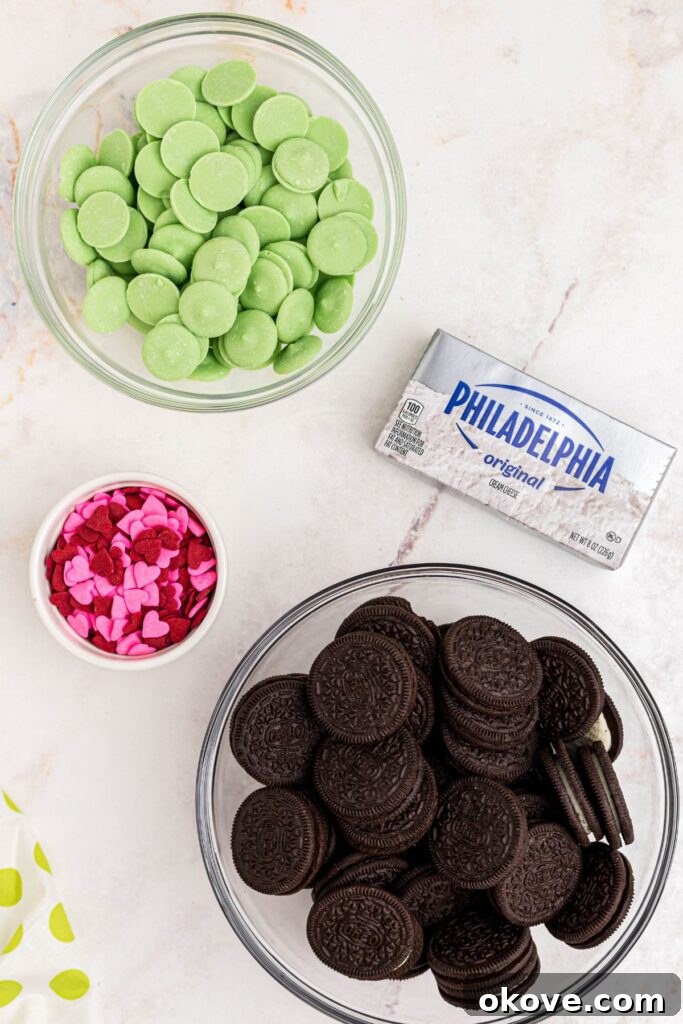
- Oreo Cookies: The classic chocolate sandwich cookies with their iconic creamy filling are the star here. A 16-ounce package is ideal. You’ll crush the entire cookie, filling and all, to create the rich base for your truffles. Feel free to experiment with different Oreo flavors for unique variations!
- Cream Cheese, Softened: Full-fat cream cheese works best for a rich, creamy, and stable truffle mixture. It’s crucial that it’s softened to room temperature so it blends smoothly with the crushed Oreos, creating a consistent “dough” without lumps.
- Light Green Candy Melts: These convenient melts provide the perfect Grinch-green color and a smooth, easy-to-work-with coating. You’ll typically need two 12-ounce bags to ensure full coverage for all your truffles. If light green candy melts are hard to find, you can easily use white chocolate melting wafers or almond bark and add gel-based green food coloring. Gel coloring provides vibrant color without altering the consistency too much, unlike liquid food coloring.
- Red Heart Sprinkles: These tiny, festive hearts are the signature touch, symbolizing the Grinch’s growing heart. You can usually find these at most craft stores, baking supply shops, or in the baking aisle of larger supermarkets, especially during the holiday season. If you can’t find heart shapes, a small dab of red icing or other small red sprinkles can work as an alternative.
Step-by-Step Guide: Crafting Your Grinch Oreo Cookie Balls
Follow these simple instructions to create perfect, festive Grinch Oreo Balls:
- Prepare Your Workspace: Begin by lining a large baking sheet with parchment paper. This non-stick surface will make it easy to transfer the dipped truffles and prevent them from sticking as they chill. Set it aside for later.
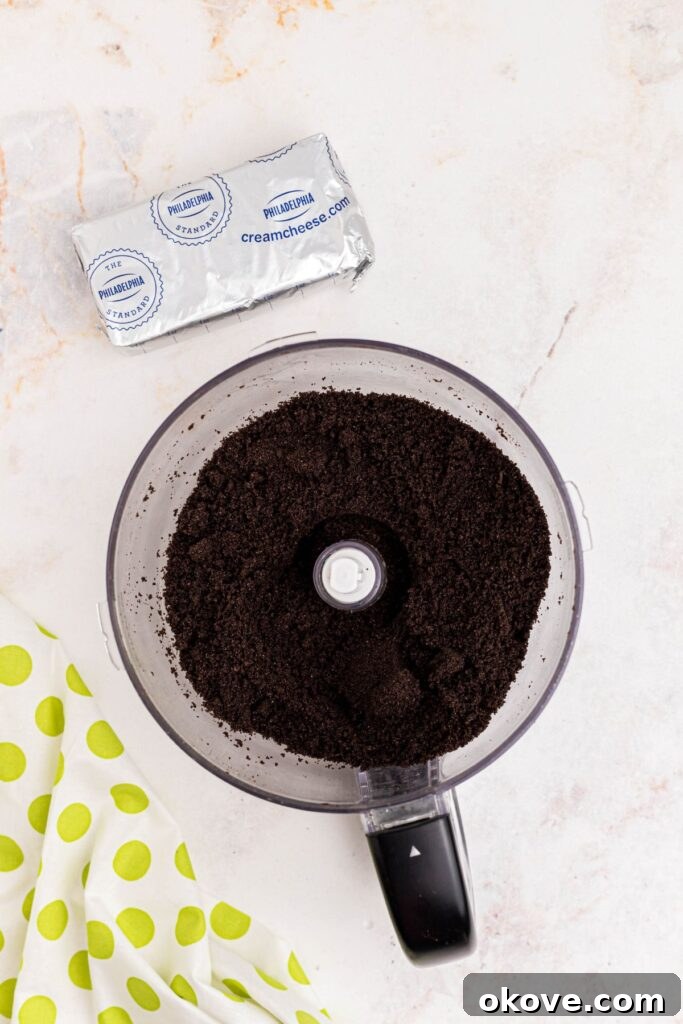
- Crush the Oreos: Place the entire package of Oreo cookies, including their creamy filling, into a food processor. Pulse the cookies until they are transformed into fine, uniform crumbs. This ensures a smooth base for your truffles. If you don’t have a food processor, no problem! You can achieve the same result by placing the cookies in a large, heavy-duty Ziploc bag and crushing them thoroughly with a rolling pin or the bottom of a sturdy glass. Aim for a texture similar to fine sand.
- Combine with Cream Cheese: Transfer the crushed Oreo crumbs into a large mixing bowl. Add the softened cream cheese to the bowl. Using a sturdy spoon or a rubber spatula, mix the Oreos and cream cheese together. Continue stirring and pressing until a thick, uniform “dough” or batter forms. It should be firm enough to roll into balls.
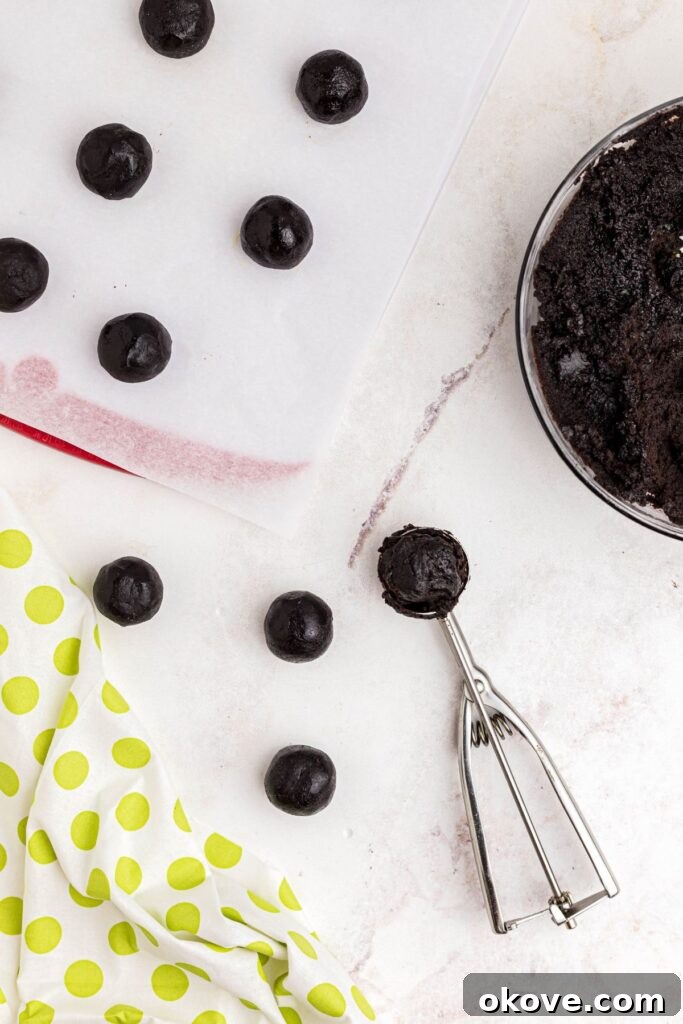
- Form the Truffle Balls: Use a small portion scoop (about 1 tablespoon in size) or a small spoon to portion out the mixture. Roll each portion gently between the palms of your hands to form smooth, uniform balls. Place the formed balls onto the prepared baking sheet. Repeat this process until all of the Oreo and cream cheese mixture has been used. Aim for roughly 30 balls from a standard recipe.
- Chill for Firmness: Once all the balls are formed, place the baking sheet into the freezer for 15-30 minutes. This crucial step allows the truffle balls to firm up significantly, making them easier to dip and ensuring they hold their shape without crumbling in the warm candy coating.
- Melt the Candy Coating: While your Oreo balls are chilling, prepare the green candy melts. Place them in a microwave-safe bowl. Microwave the candy melts for 1 minute initially, then stir thoroughly. Continue microwaving in 30-second intervals, stirring vigorously after each interval, until the candy melts are completely smooth and free of lumps. Be careful not to overheat, as this can cause the coating to seize.
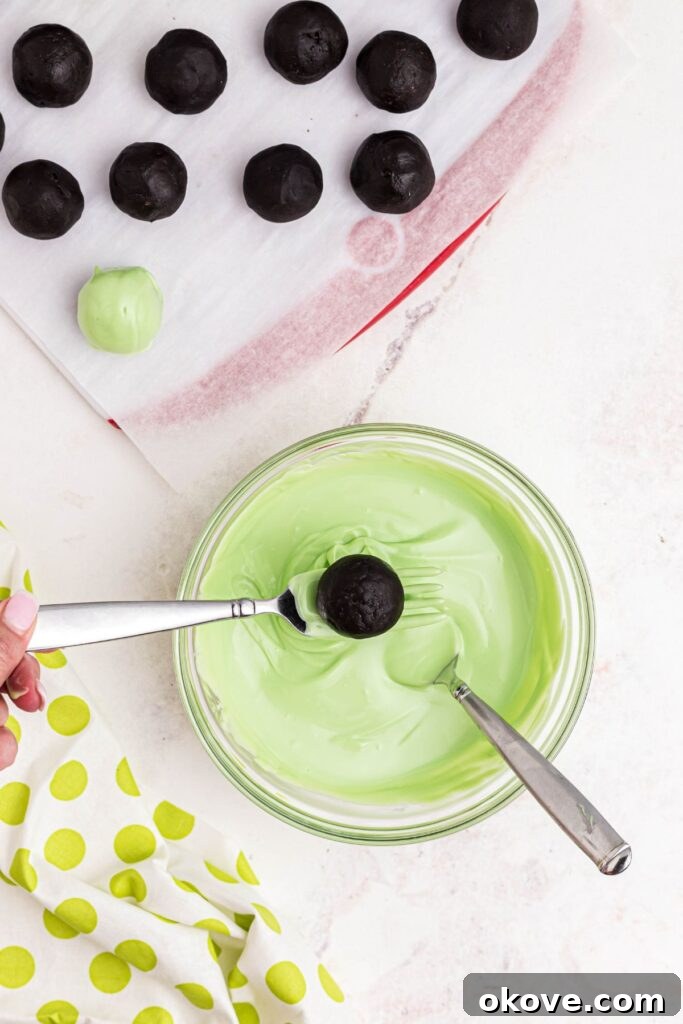
- Dip the Truffles: Remove the firm Oreo balls from the freezer. Using a fork or a specialized candy dipping tool, carefully dip each ball into the melted green candy coating. Ensure the entire ball is fully coated. Gently tap the fork or tool against the side of the bowl to allow any excess coating to drip back into the bowl. This helps achieve a smooth, even finish and prevents puddles of candy on your parchment paper. Carefully transfer the coated ball back to the lined baking sheet.
- Add the Signature Heart: For an extra festive touch, if desired, you can add a bit more melted coating to a piping bag (or a small Ziploc bag with the corner snipped) and drizzle it artfully across the tops of the balls for added texture. Immediately, while the green coating is still wet, gently press a red heart sprinkle onto the top of each Oreo ball. Allow the balls to sit for 5-10 minutes at room temperature, or return the tray to the refrigerator, until the candy coating is completely firm and set.
Expert Tips for Perfect Grinch Oreo Balls
Achieve professional-looking and tasting Grinch Oreo Balls every time with these helpful tips:
- Microwave with Caution: Candy melts can burn or seize if overheated. Always microwave in short 30-second bursts, stirring thoroughly after each interval. The residual heat will continue to melt the candy, so stir until smooth even if there are a few small lumps left.
- Ensure Everything is Dry: Water is the enemy of candy melts! Even a tiny drop can cause the coating to seize and become thick and unusable. Make sure all your utensils, bowls, and even your hands are completely dry before working with the candy melts.
- Thorough Chilling is Key: Don’t skip or rush the chilling step for the Oreo balls. Well-chilled balls are firm, easier to handle, and prevent the candy coating from becoming too thin or messy during dipping. They also help the coating set faster.
- Invest in a Dipping Tool: While a fork works, a candy dipping tool (available at baking supply stores) can provide a much smoother, more professional finish. They help drain excess coating more efficiently, preventing pools of candy at the base of your truffles.
- Customize Your Hearts: If red heart sprinkles are unavailable, get creative! You can use a small drop of red gel icing to draw a heart, use other small red candies, or even finely chop a red fruit roll-up into heart shapes.
- Work in Batches: If you’re making a large quantity or find the candy melts starting to cool and thicken, work with smaller batches of Oreo balls. Keep the remaining balls in the freezer until you’re ready to dip them. You can also re-melt the candy coating in short bursts if it starts to thicken too much.
- Temperature Control for Coating: If your candy melts become too thick while dipping, add a teaspoon of coconut oil or vegetable shortening (not water!) and stir until smooth. This will thin the coating slightly and make it easier to work with.

Exciting Variations for Your Oreo Truffles
While the classic Grinch Oreo Ball is a holiday favorite, the possibilities for customization are endless! The world of cookies offers a vast array of flavors to inspire your creativity. Here are just a few ideas to get you started:
- Mint Oreo Grinch Balls: For a delightful flavor twist that naturally complements the green color, use Mint Oreos for your truffle base. The cool, refreshing mint flavor paired with chocolate and cream cheese is simply divine and adds another layer of festive appeal.
- Golden Oreo Truffles: If you prefer a vanilla-flavored base, opt for Golden Oreos. These provide a lighter, buttery vanilla flavor that pairs wonderfully with the sweet candy coating. You can still use green candy melts and red hearts for the Grinch theme.
- Red Velvet Oreo Truffles: Create a stunning contrast by using Red Velvet Oreos. The deep red cookie base creates a beautiful, rich center that’s perfect for Christmas. You can still coat them in green for a Grinch theme, or even white chocolate for a different festive look.
- Peppermint Bark Grinch Balls: Add a pinch of crushed peppermint candies to your green candy melt mixture for a festive crunch and burst of peppermint flavor.
- Chocolate Dipped: Instead of green candy melts, dip some of your truffles in melted dark or white chocolate for a more traditional look. You can still add the red heart or other holiday sprinkles.
- Add Extracts: Mix a few drops of peppermint extract, almond extract, or even a hint of rum extract (for adult versions) into your cream cheese mixture for added depth of flavor.

Frequently Asked Questions About Grinch Oreo Balls
To maintain their freshness and firm texture, store your Grinch Oreo Balls in an airtight container in the refrigerator. They will remain fresh and delicious for up to 5 days, making them an excellent make-ahead dessert for holiday parties or preparing in advance for gift boxes.
Absolutely! Grinch Oreo Balls freeze beautifully. Once they are fully set and the candy coating is firm, transfer them to an airtight freezer-safe container or a large freezer bag. To prevent them from sticking together, layer them with parchment paper between each stack. When you’re ready to serve, simply move them to the refrigerator and allow them to thaw overnight. They can be stored in the freezer for up to 3 months.
Yes, you can! White chocolate chips or baking bars can be used. If using regular white chocolate, you’ll need to add gel-based green food coloring to achieve the desired Grinch color. Be aware that tempering chocolate can be a bit more involved than melting candy melts to get a smooth, non-streaky finish, but it’s certainly an option for a different flavor profile.
The traditional Oreo cookies contain wheat flour and are not gluten-free. However, many brands now offer gluten-free chocolate sandwich cookies that can be substituted for regular Oreos in this recipe. Always check the labels of all your ingredients, including candy melts and sprinkles, to ensure they meet your dietary needs.
This recipe is wonderfully kid-friendly! Children can easily help with crushing the cookies (with supervision), mixing the cream cheese and cookie crumbs, rolling the balls, and pressing on the heart sprinkles. Melting the candy melts should be done by an adult, but dipping can be done by older children with assistance.
Grinch Oreo Balls
Rebecca
30 balls
45 minutes
10 minutes
55 minutes
Share by Email
Print Recipe

Grinch Oreo balls are not only delicious but also bring a bit of holiday fun to your dessert table. Each one is a cute little holiday treat and you only need four ingredients to make them.
Equipment
- Food Processor (or large Ziploc bag)
- Large Mixing Bowl
- Baking Sheet
- Parchment Paper
- Microwave-safe Bowl
- Fork or Dipping Tool
Ingredients
- 1 16 ounce package Oreos
- 8 ounces cream cheese, softened to room temperature
- 2 bags light green candy melts, 12 ounce bags (or white chocolate melts + green gel food coloring)
- 1 tablespoon red heart sprinkles
Instructions
- Line a baking sheet with parchment paper, and then set aside.
- Place the Oreo cookies (including the filling) into a food processor and pulse until they are fine cookie crumbs. If you don’t have a food processor, you can place the cookies in a large Ziploc bag and crush them with a rolling pin.
- Transfer the crushed Oreos to a large mixing bowl. Add the softened cream cheese to the Oreos and stir them together until a thick batter forms.
- Use a portion scoop or small spoon to scoop out about a tablespoon of the mixture. Roll the mixture in the palms of your hands into a ball shape. Place on the prepared baking sheet until all of the batter is used.
- Once all the balls are formed, place the baking sheet in the freezer for 15-30 minutes, so the balls will become firm.
- While the Oreo balls are in the freezer, place the green candy melts in a microwave-safe bowl. Microwave for a minute, and then in 30-second intervals stirring each time, until they are melted and smooth.
- Remove the Oreo balls from the freezer and, using a fork or dipping tool, dip each ball into the melted green candy coating, until it’s fully coated. Use a spoon to help coat the ball if necessary. Gently tap the fork holding the ball so excess coating falls back into the bowl. Transfer the ball back to the lined baking sheet.
- If desired, add melted coating to a piping bag and cut the tip of the bag to drizzle coating back and forth across the tops of the balls. Before the coating hardens, gently press red candy hearts on the top of each Oreo ball. Then let the balls sit for 5-10 minutes, until the coating is firm. You can return the tray to the fridge so they will firm up faster.
Notes
Be careful not to burn the candy melts. Microwave in 30-second intervals, stirring each time to make sure they are melting evenly. They can burn quickly, causing the coating to seize up and become unusable.
Always use dry utensils and bowls when working with candy melts. Even a simple drop of water can cause the coating to harden and clump.
Nutrition
Calories: 149 kcal
Carbohydrates: 17 g
Protein: 1 g
Fat: 8 g
Saturated Fat: 5 g
Polyunsaturated Fat: 0.1 g
Monounsaturated Fat: 1 g
Cholesterol: 8 mg
Sodium: 79 mg
Potassium: 34 mg
Fiber: 0.01 g
Sugar: 14 g
Vitamin A: 102 IU
Calcium: 9 mg
Iron: 1 mg
Nutrition information is automatically calculated, so it should only be used as an approximation.
Additional Info
Tried this recipe?
Mention @celebratingsimplyrecipes or tag #celebratingsimplyrecipes!