
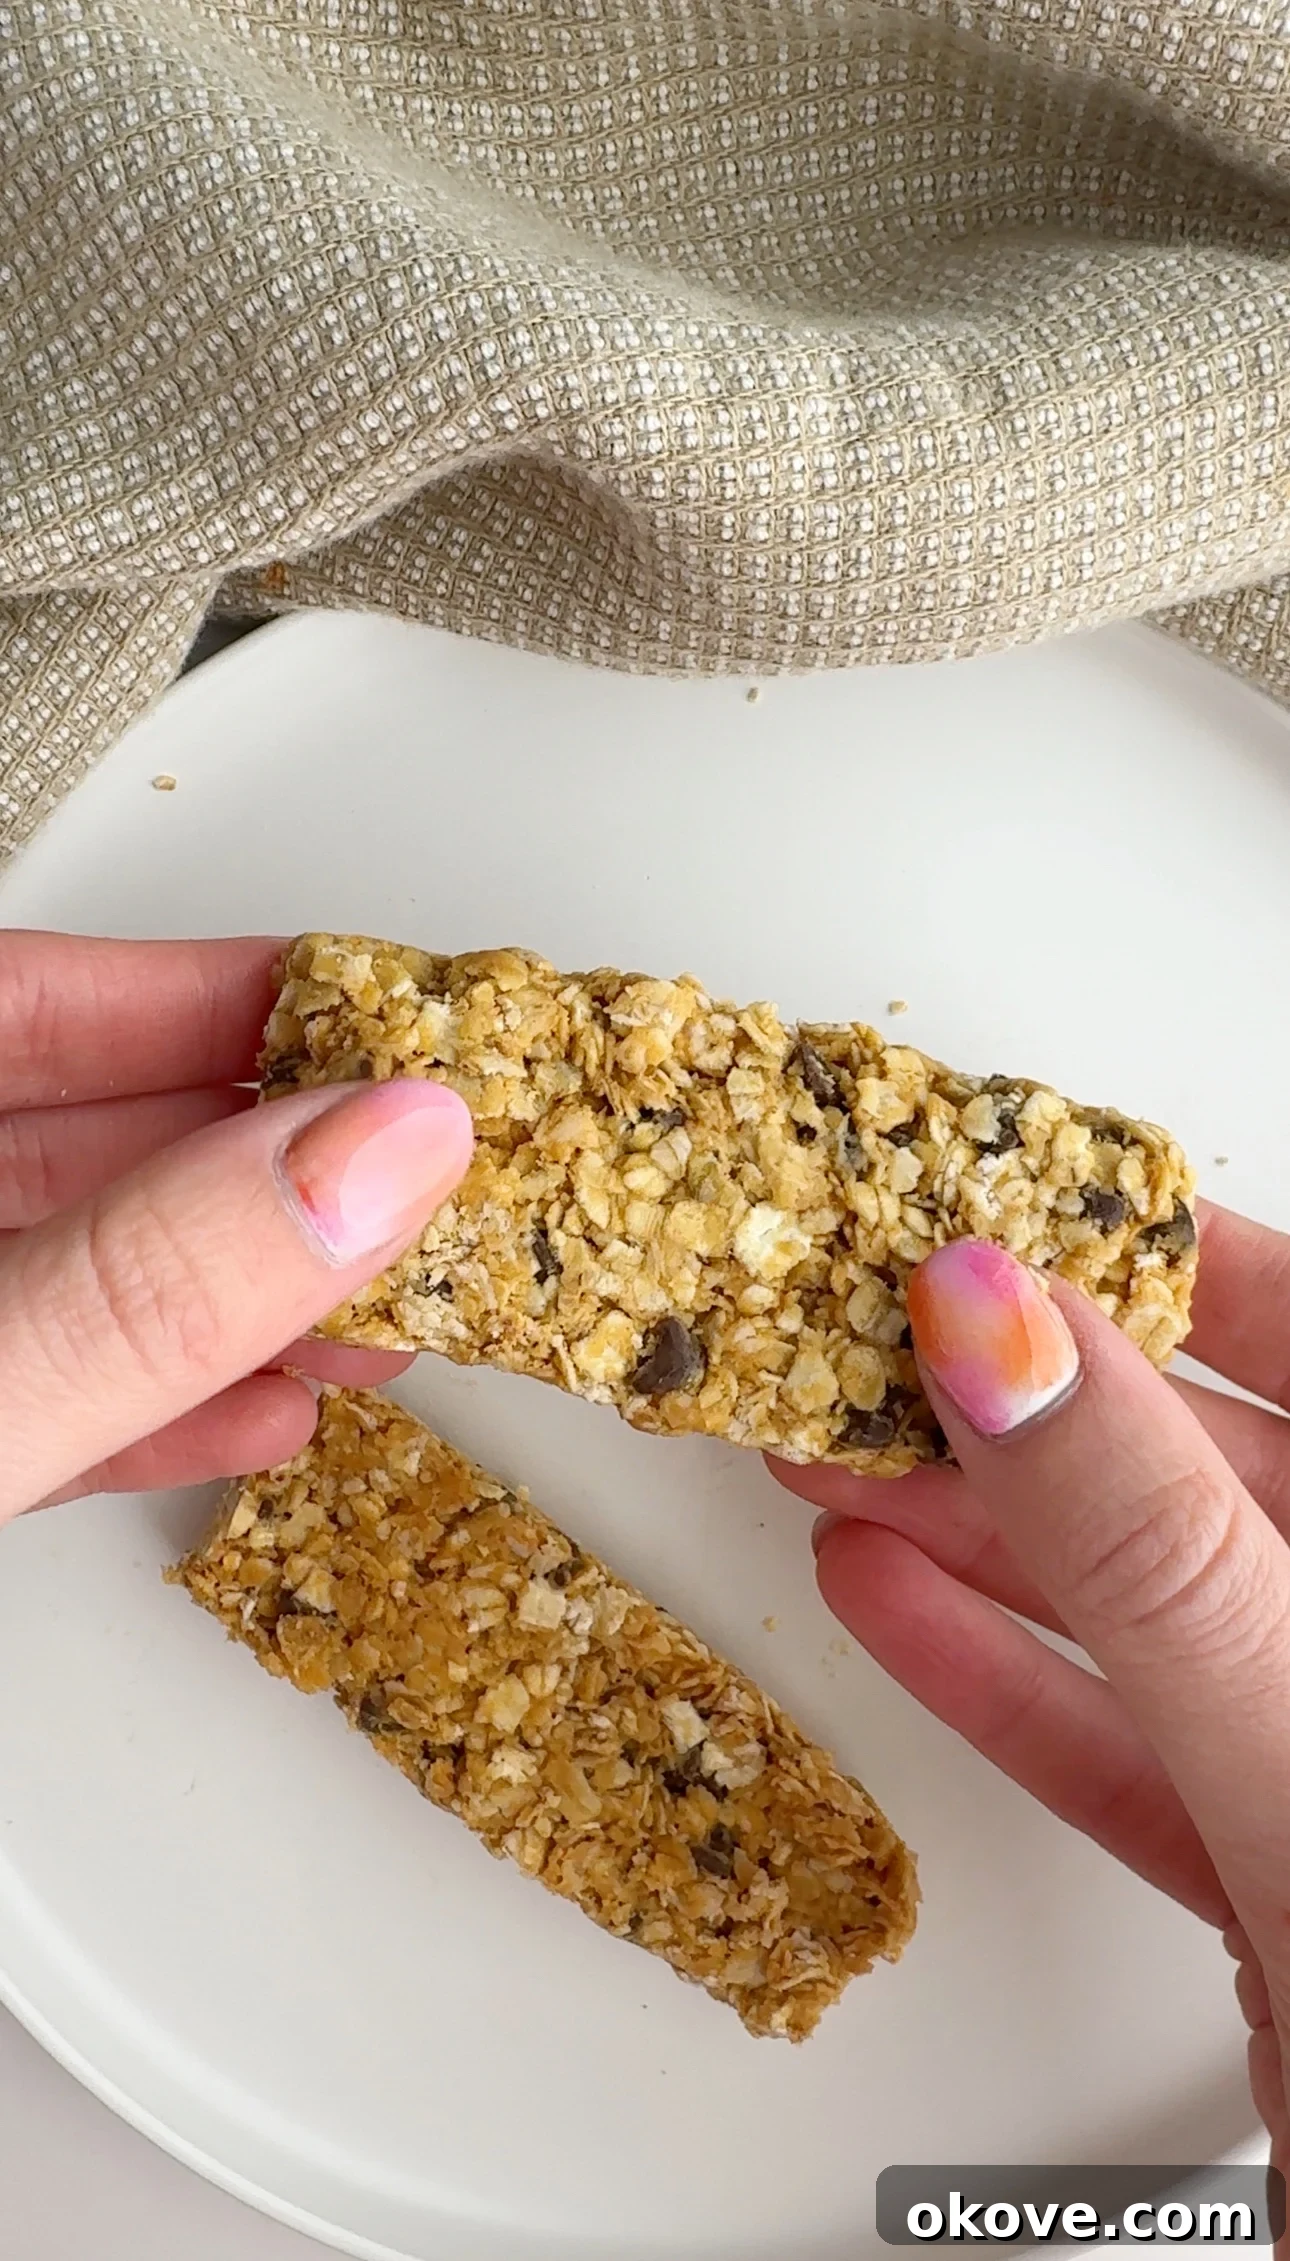
In a world bustling with busy schedules, finding wholesome, convenient, and genuinely delicious snacks for your little ones (and yourself!) can feel like an unending quest. Look no further than these incredibly easy-to-make, no-bake homemade granola bars. Crafted with love and just five simple ingredients, these chewy, naturally sweet treats are a game-changer for any family. Say goodbye to store-bought options laden with preservatives and artificial additives, and embrace a healthier, tastier alternative that’s not only toddler-approved but loved by all ages.
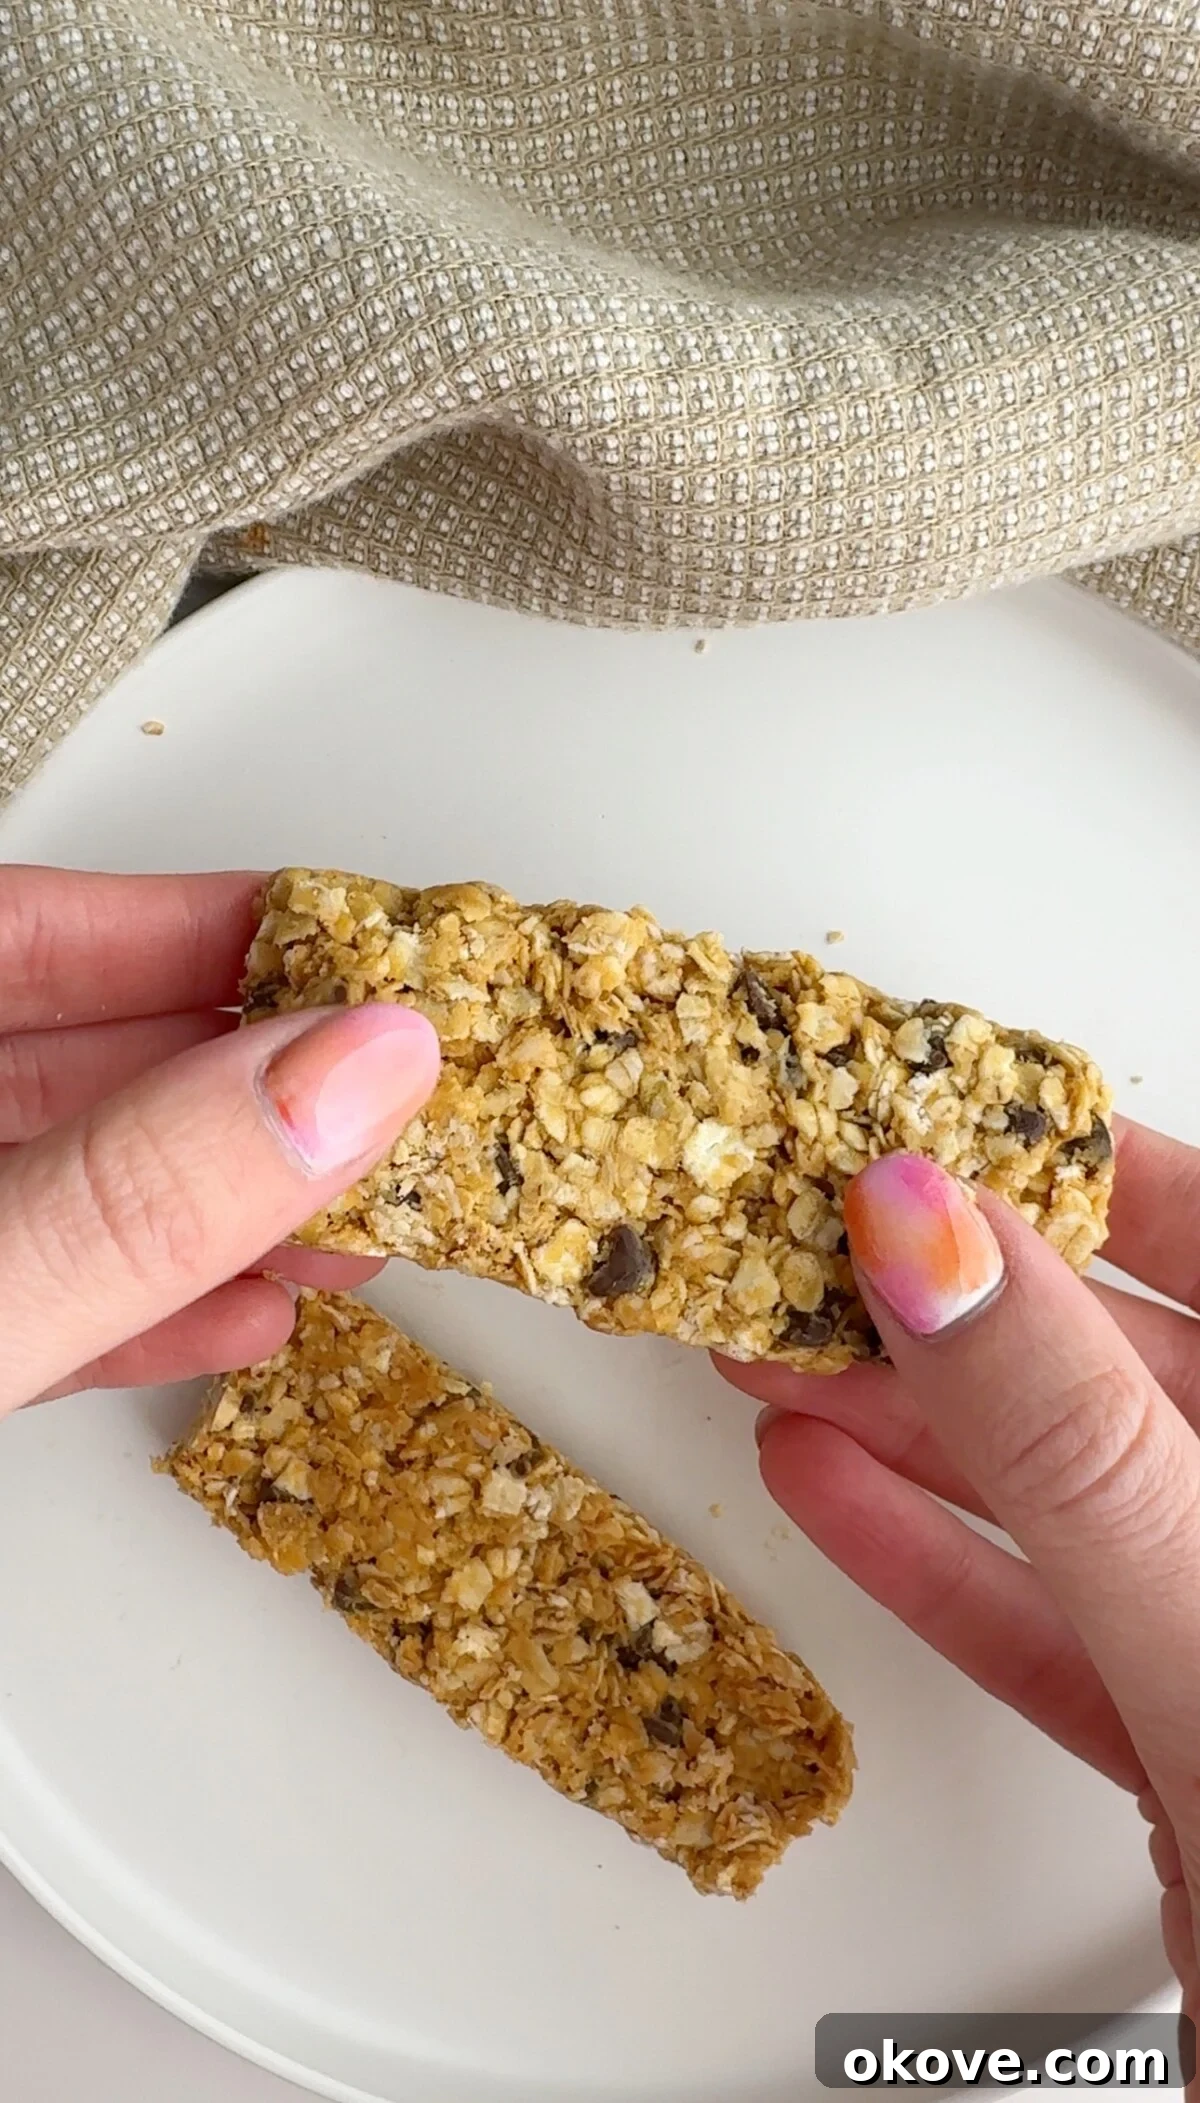
These delightful peanut butter granola bars are more than just a snack; they’re a versatile solution for lunchboxes, energizing after-school bites, or quick grab-and-go fuel for your active lifestyle. Imagine a snack that combines the satisfying chewiness of oats, the creamy richness of peanut butter, a touch of natural sweetness from honey, and a hint of vanilla, all studded with delightful mini chocolate chips. It’s a symphony of flavors and textures designed to nourish and please, ensuring your family enjoys a truly wholesome treat.
Why Homemade Granola Bars Are the Ultimate Choice for Toddlers and Families
When it comes to feeding our families, especially our growing toddlers, we seek options that are not only appealing but also contribute positively to their health and development. These homemade granola bars tick all the boxes, offering a myriad of benefits that make them a superior choice over most commercial alternatives.
- Nutritionally Superior: Unlike many processed snacks, these healthy granola bars are built on a foundation of natural, nutrient-dense ingredients. Rolled oats provide complex carbohydrates for sustained energy and a significant amount of fiber, crucial for digestive health. Peanut butter delivers essential protein and healthy fats, vital for brain development and overall growth in toddlers. Honey, in moderation, offers natural sweetness alongside some antioxidants. This combination ensures that each bite isn’t just delicious but also contributes meaningful nutrients, helping to fuel busy little bodies and minds without the sugar crash associated with high-fructose corn syrup and artificial sweeteners.
- Endlessly Customizable: The beauty of making your own no-bake granola bars lies in the freedom to adapt the recipe to suit every family member’s preferences and dietary needs. The basic recipe is fantastic, but it’s also a canvas for culinary creativity. Want more texture? Add chopped nuts like almonds or walnuts (ensure they are finely chopped for toddlers). Craving a fruity twist? Incorporate dried cranberries, raisins, or finely diced apricots. For an extra boost of nutrition, consider stirring in chia seeds, flaxseeds, or hemp hearts, which are packed with omega-3s and fiber. A pinch of cinnamon or a dash of pumpkin pie spice can also elevate the flavor profile, making each batch unique and exciting. This adaptability also makes them ideal for managing allergies or sensitivities by easily swapping out ingredients like peanut butter for other nut or seed butters.
- Unbeatable Convenience for Busy Lifestyles: In the whirlwind of daily family life, convenience is king. These homemade granola bars are the epitome of grab-and-go convenience. They’re perfect for frantic mornings when there’s no time for a sit-down breakfast, a much-needed energy boost during afternoon slumps, or a satisfying snack after school activities. Their portable nature means they can be tucked into lunchboxes, diaper bags, or backpacks without fuss. Plus, since they don’t require refrigeration for short periods, they’re ideal for picnics, road trips, or playdates at the park. Preparing a large batch on the weekend means you have a healthy snack solution ready for the entire week, saving time and stress during peak hours.
- Naturally Kid-Friendly & Parent-Approved: The natural sweetness from honey and the exciting crunch of mini chocolate chips make these granola bars incredibly appealing to toddlers and older children alike. The chewy texture is easy for little mouths to manage, and the familiar flavors are a guaranteed hit. Parents love them because they offer a healthier alternative to store-bought varieties, which often contain excessive added sugars, artificial colors, and preservatives that many families prefer to avoid. Moreover, the process of making these bars can be a fun, engaging kitchen activity for kids, allowing them to participate in creating their own wholesome snacks, fostering a positive relationship with food, and building valuable life skills.
Simple Ingredients for Incredible Flavor
The magic of these no-bake granola bars lies in their simplicity. With just five core ingredients, you can create a snack that’s far superior to anything you’ll find on supermarket shelves. Each ingredient plays a crucial role in both flavor and binding, resulting in a perfectly chewy and satisfying bar.
- 1 cup Peanut Butter: The cornerstone of these bars, peanut butter provides rich flavor, essential healthy fats, and protein. It also acts as the primary binder, holding all the ingredients together for that perfect chewy texture. For best results, use a natural peanut butter with minimal added sugar and oil, but avoid overly runny varieties as they can affect the bar’s consistency.
- 1/3 cup Honey: This natural sweetener not only adds delicious flavor but also acts as a key binding agent, contributing to the bars’ chewiness. Remember, honey is suitable for children aged 12 months and older. For younger toddlers or those with honey restrictions, see our substitution notes below.
- 1 tsp Vanilla Extract: A splash of vanilla extract elevates the overall flavor profile, adding a warm, aromatic note that complements the peanut butter and honey beautifully. Don’t skip it!
- 2 1/2 cups Rolled Oats: The bulk of the bar, rolled oats (also known as old-fashioned oats) provide fiber, whole grains, and a satisfying chew. They absorb the wet ingredients and become soft yet firm once set. Quick oats can also be used but may result in a slightly different texture, while steel-cut oats are not recommended for this no-bake recipe.
- 1/3 cup Mini Chocolate Chips: These little gems provide bursts of sweet chocolatey goodness. Mini chips are preferred as they distribute more evenly throughout the mixture and ensure every bite gets a touch of chocolate without overpowering the bar. If you only have regular chocolate chips, chop them finely for similar results.
Crafting Your Perfect Peanut Butter Granola Bars: A Step-by-Step Guide
Making these homemade granola bars is incredibly simple and requires no baking, making it a perfect project for beginner cooks or for involving little helpers in the kitchen. Follow these straightforward steps to create your batch of delicious, healthy snacks.
- Combine the Wet Ingredients: In a generously sized mixing bowl, combine the creamy peanut butter, golden honey, and fragrant vanilla extract. Use a sturdy spatula or a wooden spoon to mix these ingredients thoroughly until they are completely smooth and seamlessly blended. The mixture should have a uniform consistency, resembling a thick sauce. This step is crucial for ensuring the flavors are evenly distributed throughout your granola bars.
- Integrate Dry Ingredients: Once your wet base is smooth, add the rolled oats and the mini chocolate chips to the bowl. Stir diligently, ensuring every oat flake and chocolate chip is coated with the peanut butter and honey mixture. Continue mixing until all the ingredients are uniformly combined, leaving no dry pockets. This ensures your bars will hold together well and have consistent flavor and texture.
- Prepare the Baking Dish: Select an 8×8 inch baking dish. Line the entire dish with parchment paper, allowing a generous amount of excess paper to hang over the sides. These “overhangs” will serve as convenient handles, making it incredibly easy to lift the set granola bars out of the dish later, preventing sticking and making cleanup a breeze.
- Press and Flatten: Transfer the entire granola bar mixture into the parchment-lined baking dish. For optimal results, place another piece of parchment paper directly on top of the mixture. Using your hands, a flat bottomed glass, or another small pan, press down *very firmly* and evenly across the entire surface of the mixture. The goal is to compact the mixture as much as possible, eliminating air pockets and creating a dense, cohesive block. This firm pressing is critical for ensuring the bars hold their shape and don’t crumble when cut.
- Chill to Perfection: Once pressed, remove the top piece of parchment paper. Place the baking dish containing the flattened granola bar mixture into the refrigerator. Allow it to chill for a minimum of 1-2 hours. This refrigeration period is essential as it allows the peanut butter and honey to firm up, effectively binding all the ingredients together and setting the bars. Patience here will be rewarded with perfectly firm, sliceable bars.
- Slice and Serve: After the chilling period, remove the dish from the refrigerator. Use the excess parchment paper overhangs to carefully lift the entire slab of granola bars out of the baking dish and onto a clean cutting board. Using a sharp knife, cut the large slab into individual bars or squares of your desired size. For cleaner cuts, you can run your knife under hot water and wipe it clean between cuts. Enjoy your freshly made, wholesome, and delicious no-bake peanut butter granola bars!
Versatile Substitutions to Suit Every Taste and Diet
One of the many advantages of homemade snacks is the flexibility to adapt them to various dietary preferences or what you simply have on hand. These no-bake granola bars are incredibly forgiving, allowing for easy substitutions without compromising on taste or texture.
Peanut Butter Alternatives: While peanut butter is classic, you can easily swap it for other nut or seed butters. For those with peanut allergies, almond butter or cashew butter are excellent alternatives, offering similar creamy textures and healthy fats. For a completely nut-free option, sunflower seed butter (SunButter) works wonderfully. Always ensure your chosen alternative has a similar consistency to natural peanut butter for the best binding results.
Honey Substitutions for Vegan or Younger Diets: If you’re aiming for a vegan-friendly version or preparing these for toddlers under 12 months (due to honey restrictions), maple syrup or agave nectar are fantastic replacements for honey. Keep in mind that these might yield a slightly softer bar due to their different sugar compositions, so you might need to increase the chilling time to ensure they set properly.
Rolled Oats for Gluten Sensitivities: The base of these bars is oats, which are naturally gluten-free. However, oats are often processed in facilities that also handle gluten-containing grains, leading to cross-contamination. If you or your family members have gluten sensitivities or Celiac disease, simply opt for certified gluten-free rolled oats to ensure your granola bars are safe and compliant with a gluten-free diet.
Beyond Mini Chocolate Chips: Creative Mix-Ins: While mini chocolate chips are a crowd-pleaser, the possibilities for mix-ins are endless!
- Dried Fruits: Introduce natural sweetness and chewiness with dried cranberries, golden raisins, chopped apricots, or finely diced dates.
- Nuts and Seeds: For added crunch, protein, and healthy fats, stir in chopped almonds, walnuts, pecans, pumpkin seeds (pepitas), or sunflower seeds. Ensure nuts are finely chopped for younger children.
- Spices: A pinch of cinnamon, nutmeg, or pumpkin pie spice can add a delightful warmth and aromatic depth to your bars.
- Other Flavors: Consider shredded coconut for a tropical twist, or a handful of mini M&Ms for an extra fun, colorful treat (though this adds more sugar).
Smart Storage Solutions for Your Homemade Granola Bars
Making a batch of these delicious no-bake granola bars is a smart move for meal prep, and knowing how to store them properly ensures they remain fresh, firm, and ready to enjoy whenever hunger strikes.
- Refrigerator Storage for Short-Term Freshness: Once cut into individual bars, arrange them in an airtight container. You can stack them with small pieces of parchment paper in between layers to prevent sticking. Stored in the refrigerator, these homemade granola bars will maintain their optimal texture and freshness for up to two weeks. The cool temperature helps them stay firm and delightfully chewy, making them perfect for daily snacking.
- Freezer Storage for Long-Term Enjoyment: These granola bars are excellent candidates for freezing, making them ideal for larger batches or future planning. To freeze, wrap each individual bar tightly in parchment paper or plastic wrap. This prevents freezer burn and makes them easy to grab one at a time. Once wrapped, place the individual bars into a freezer-safe ziplock bag or an airtight container. They can be safely frozen for up to 3 months. To enjoy a frozen bar, simply remove it from the freezer and allow it to thaw at room temperature for about 15-30 minutes, or place it in the refrigerator overnight. They’ll be just as delicious as when they were first made!
Common Questions About No-Bake Granola Bars
Here are answers to some frequently asked questions to help you master your homemade granola bars and ensure they’re perfect for your family.
Are these toddler-friendly granola bars gluten-free?
- To guarantee your no-bake granola bars are 100% gluten-free, it’s essential to use certified gluten-free rolled oats. While oats are naturally free of gluten, they can often be cross-contaminated during processing with wheat, barley, or rye. Additionally, always double-check the labels of your other ingredients, such as chocolate chips and any mix-ins, to ensure they don’t contain hidden gluten-containing ingredients.
How do I ensure they hold their shape and don’t crumble?
- The key to firm, non-crumbly granola bars lies in two critical steps:
- Firm Pressing: After transferring the mixture to the pan, use significant pressure to press it down firmly and evenly. This compacts the oats and binder, creating a dense slab that won’t fall apart.
- Adequate Chilling: The refrigeration time is non-negotiable. Allowing the bars to chill for at least 1-2 hours gives the peanut butter and honey time to solidify, effectively “setting” the bars. If you substitute honey with maple syrup, which is a thinner binder, you might notice a slightly softer bar or need to extend the chilling time further.
Can I serve these no-bake bars with anything else?
- Absolutely! These easy granola bars are fantastic on their own, but they also pair wonderfully with other foods. They make an excellent addition to a breakfast plate alongside a side of fresh fruit or a dollop of Greek yogurt for added protein. For a complete snack, serve them with a glass of milk or a small fruit smoothie. Their versatility makes them a great companion to many toddler-friendly meals and snacks.
Can I reduce the sugar content?
- Yes, you can experiment with slightly reducing the amount of honey. However, keep in mind that honey acts as a crucial binder, so reducing it too much might affect the bars’ ability to hold their shape. You can also reduce the overall sugar by using unsweetened chocolate chips or by replacing some of the chocolate chips with unsweetened dried fruit or chopped nuts.
What if my peanut butter is too runny or too stiff?
- The consistency of your peanut butter can impact the final texture of the bars. If your natural peanut butter is very runny, try draining off some of the oil before measuring, or add an extra tablespoon or two of oats to absorb excess moisture. If it’s too stiff, gently warm it in the microwave for 15-20 seconds to make it more pliable and easier to mix.
Explore More Healthy Toddler Snacks
If your family loves these easy homemade granola bars, you’re in luck! We have a treasure trove of other nutritious and kid-friendly snack recipes that are perfect for little hands and growing appetites. Discover new favorites that are simple to make and packed with wholesome goodness.
Easy Peanut Butter Banana Bites: These no-bake Peanut Butter Banana Bites are made with just two ingredients and ready in minutes! A simple and fun toddler snack that’s full of healthy fats, fruit, and protein—perfect for little hands and growing appetites.
Healthy Banana Chocolate Chip Ice Cream: Craving a sweet treat? This Healthy Banana Chocolate Chip Ice Cream is made with frozen bananas and chocolate chips. Creamy, naturally sweet, and dairy-free, it’s a refreshing toddler treat or dessert that parents will love too.
Flour-Free Peanut Butter Chocolate Muffins: These soft, flour-free Peanut Butter Chocolate Muffins are made with wholesome ingredients and naturally sweetened with banana. Perfect for toddlers, they’re gluten-free, protein-rich, and ideal for a quick breakfast or a satisfying snack.
Wholesome Blueberry Bars: These easy Blueberry Bars are soft, fruity, and made with oats and fresh or frozen berries. A naturally sweet snack or breakfast for toddlers that’s freezer-friendly and great for make-ahead meal prep, ensuring you always have a healthy option on hand.
Creamy Avocado Chocolate Pudding: Avocado Chocolate Pudding is a creamy, nutrient-rich dessert made with just a few simple ingredients. Naturally sweet and packed with healthy fats, it’s a toddler-friendly treat that feels indulgent but fuels their day with goodness.
If you loved these kid-friendly homemade granola bars and added them to your family’s snack rotation, we’d be thrilled to hear about it! Share your delicious creations on Instagram and tag us @reallittlemeals. Your feedback and photos inspire us to keep creating healthy, happy recipes for families everywhere!
★
★
★
★
Homemade Granola Bars
10
1
12 bars
Review Recipe
Print Recipe
Ingredients
- 1 cup peanut butter
- 1/3 cup honey, (ages 1+)
- 1 tsp vanilla extract
- 2.5 cups rolled oats
- 1/3 cup mini chocolate chips, must be mini. If you don’t have mini, chop up some chocolate.
Instructions
-
In a large bowl, combine the peanut butter, honey, and vanilla extract. Mix until smooth and well-blended. Add the rolled oats and mini chocolate chips to the peanut butter mixture. Stir until all the ingredients are evenly combined.
-
Line an 8×8 inch baking dish with parchment paper, leaving some excess hanging over the sides for easy removal.
-
Transfer the mixture to the prepared baking dish. Place another piece of parchment paper on top and press down firmly to flatten the mixture evenly.
-
Refrigerate the granola bars for 1-2 hours to allow them to set.
-
Once set, remove from the fridge and use the excess parchment paper to lift the granola bars out of the dish. Cut into bars or squares of your desired size.
Notes
Chill Time: Allow the bars to chill for at least one hour to set properly.
Customization: Feel free to add mix-ins like dried fruit, nuts, chia seeds, flaxseeds, or shredded coconut for added nutrition and flavor.
Nutrition
Nutrition information is automatically calculated, so should only be used as an approximation.
Additional Info
Tried this recipe?
Mention @reallittlemeals or tag #reallittlemeals!