
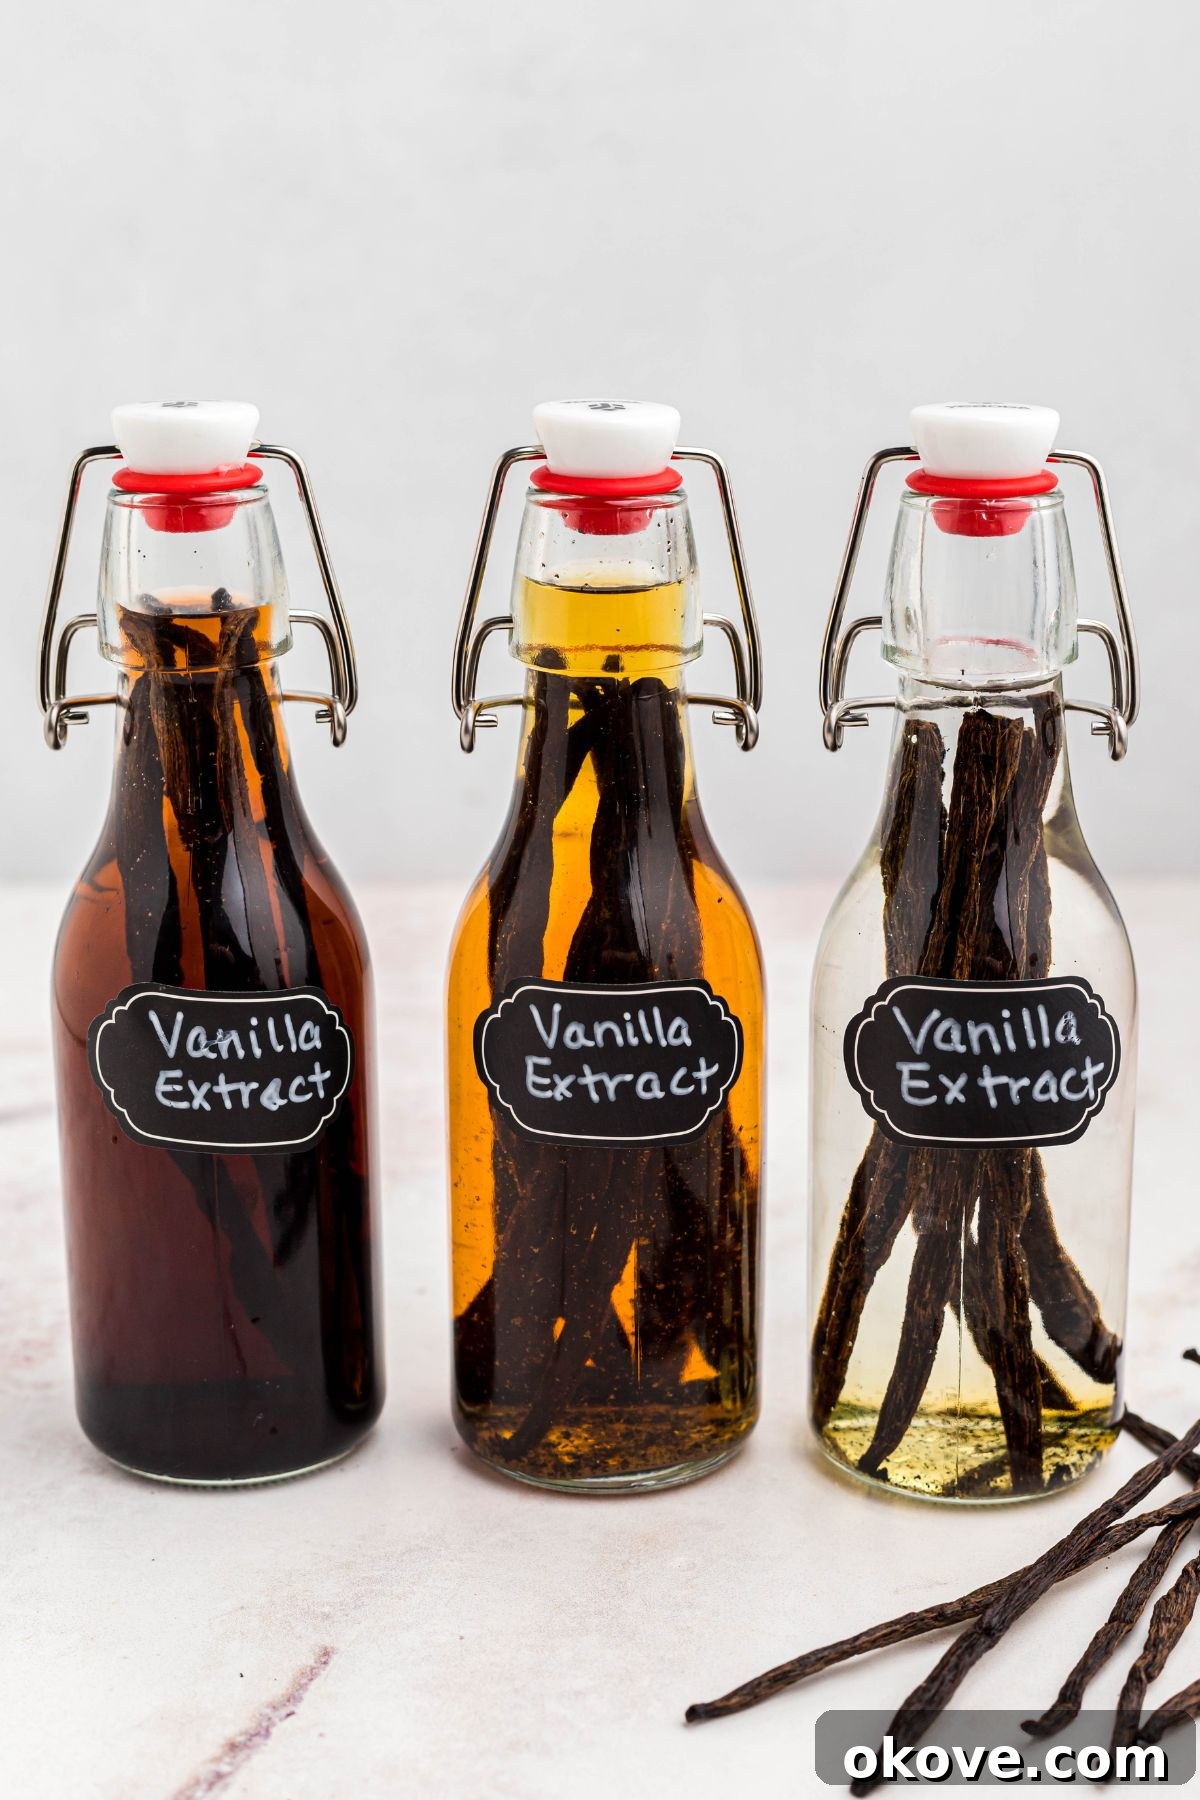
Transform your baking from good to extraordinary with the unparalleled richness of homemade vanilla extract. Crafted with just two simple ingredients – premium vanilla beans and your choice of alcohol – this exquisite kitchen staple delivers a depth of authentic flavor that store-bought versions simply can’t match. Whether you’re whipping up a batch of chewy cookies, baking a decadent cake, creating a silky custard, or preparing any sweet treat, pure vanilla is the secret ingredient to elevating your culinary creations. Beyond its indispensable role in the kitchen, a beautifully bottled homemade vanilla extract also makes an incredibly thoughtful, personalized, and cherished gift for fellow food enthusiasts and bakers.
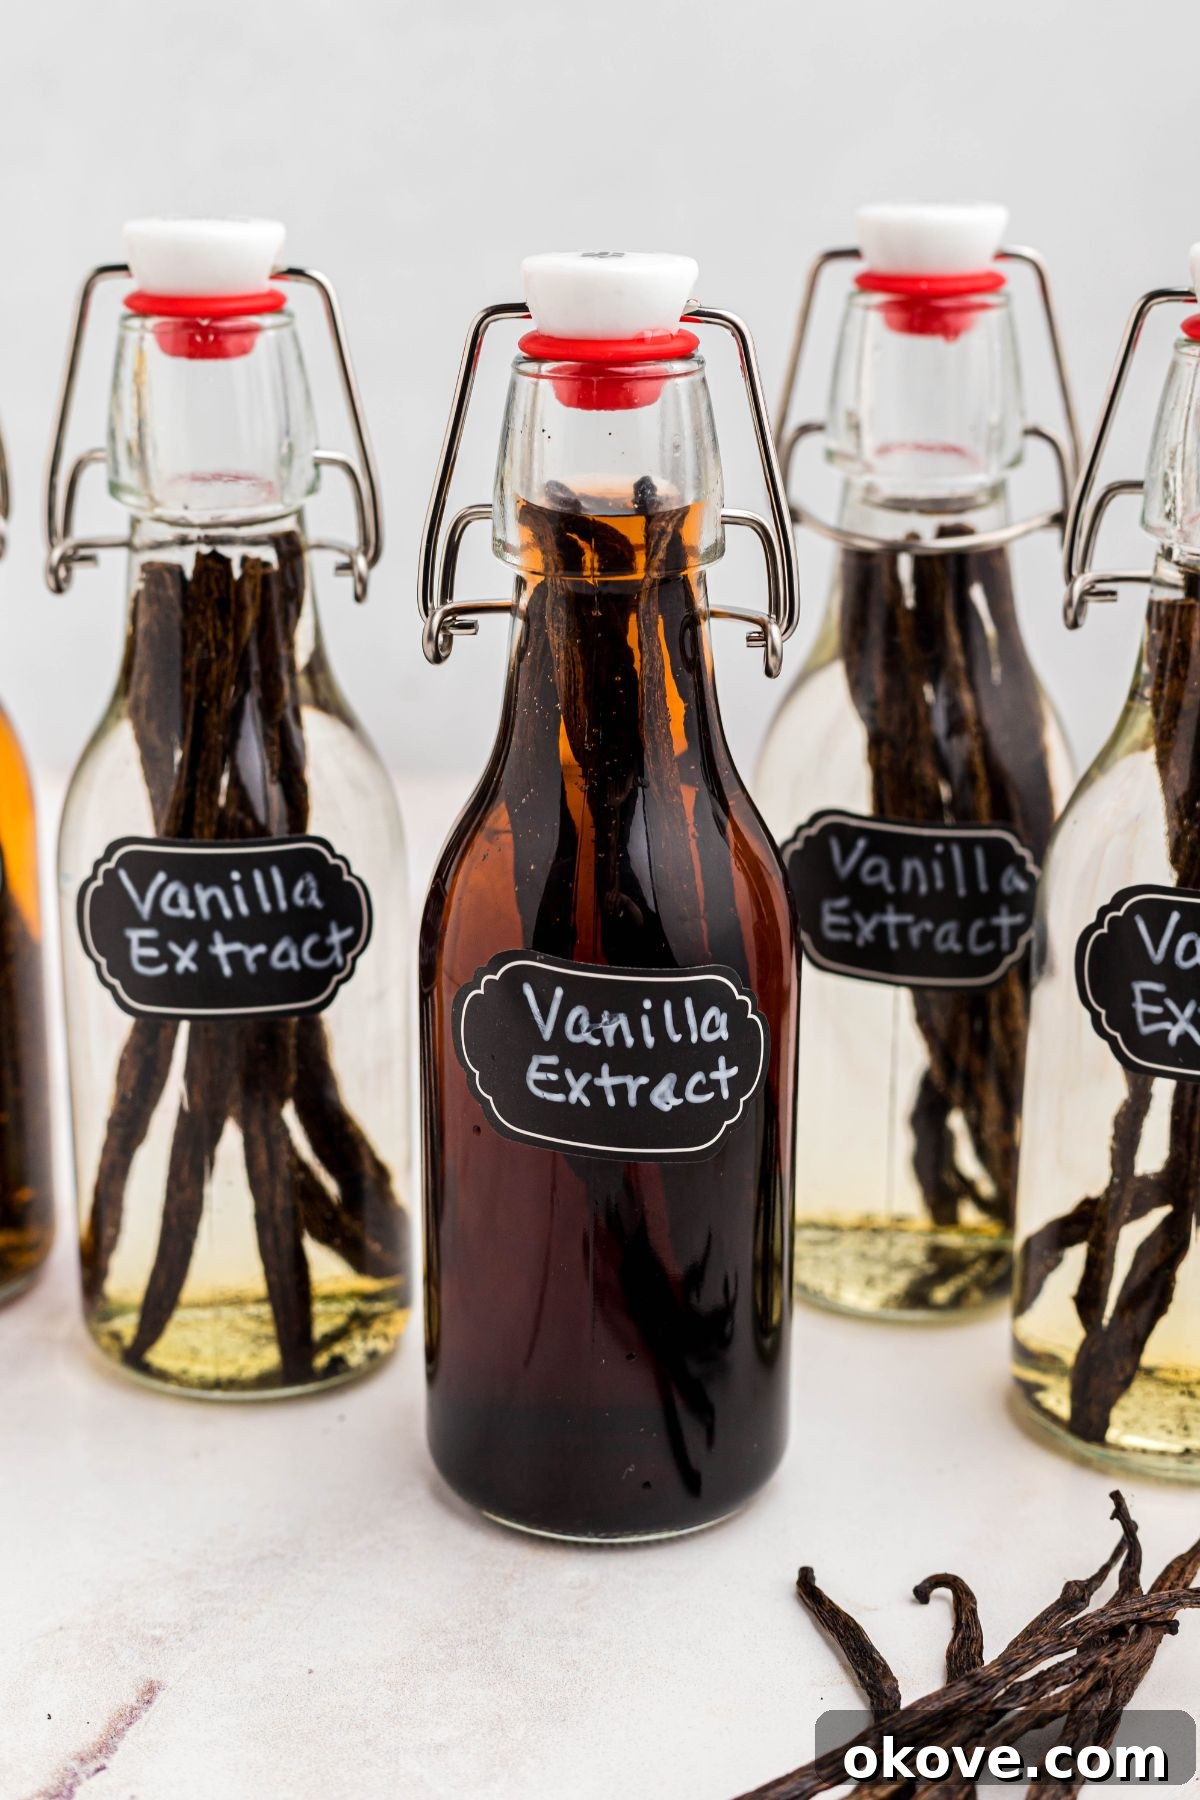
The Ultimate Guide to Making Easy Homemade Vanilla Extract
Embarking on the journey of making your own vanilla extract might seem daunting, but it’s surprisingly straightforward and immensely rewarding. Forget the complex processes you might imagine; this delightful DIY project requires minimal hands-on time – just a few minutes of initial prep work. The real magic happens over time, with a generous dose of patience as the high-quality vanilla beans slowly infuse their unparalleled aroma and taste into the alcohol. The result? A truly pure vanilla extract that boasts a flavor profile far superior to the mass-produced alternatives found in supermarkets, which are often laden with artificial additives, sugar, or corn syrup.
One of the most exciting aspects of crafting your own vanilla is the unparalleled ability to customize and personalize. You become the artisan, hand-selecting from an array of exquisite vanilla bean varieties and choosing your preferred alcohol base. This opens up a world of unique flavor combinations, allowing you to tailor your extract to specific culinary needs, personal preferences, or even the tastes of those you intend to gift it to. Moreover, the longer you allow the beans and alcohol to mingle and mature – a process known as ‘curing’ or ‘infusion’ – the more profound, complex, and robust the vanilla flavor becomes, culminating in an extract that’s truly a labor of love and a testament to patience.
Why Choose Homemade Vanilla Extract?
Beyond the satisfaction of a successful DIY project, there are numerous compelling reasons to ditch commercial vanilla and embrace the homemade alternative:
- Superior Flavor & Purity: Unlike many commercial extracts that rely on artificial flavors or unhealthy additives, homemade vanilla guarantees a pure, unadulterated flavor derived directly from real vanilla beans. The nuanced aroma and complex taste notes are simply unparalleled, adding a depth that elevates any recipe.
- Cost-Effective in the Long Run: While the initial investment in quality vanilla beans might seem higher than a small bottle from the grocery store, homemade extract is significantly more economical over time. A batch lasts for years and can even be ‘refilled’ by simply adding more alcohol, making it a sustainable and budget-friendly option.
- Complete Customization: From selecting your preferred bean origin (Madagascar, Tahitian, Mexican, etc.) to choosing the perfect alcohol base (vodka, rum, bourbon, or brandy), you have complete control over the final flavor profile. This allows for endless experimentation and personalization that store-bought options can’t offer.
- Thoughtful & Personalized Gifts: Homemade vanilla extract, bottled in elegant jars with custom labels, makes an exceptional and highly appreciated gift for bakers, home cooks, or anyone who appreciates gourmet ingredients. It’s a personal touch that truly stands out during holidays or special occasions.
- No Artificial Ingredients: Enjoy peace of mind knowing exactly what goes into your extract – just pure vanilla beans and a high-quality alcohol base, free from synthetic flavors, colors, corn syrup, or preservatives.
- An Engaging Culinary Project: The process itself is a rewarding experience, connecting you more deeply with the ingredients you use and enhancing your appreciation for true flavor development. It’s a journey from raw ingredients to a luxurious staple.
Essential Ingredients for Your Homemade Vanilla Extract
Crafting your own exquisite vanilla extract requires just a few key components. The quality of these ingredients directly impacts the richness, complexity, and overall success of your final product, so choose wisely!
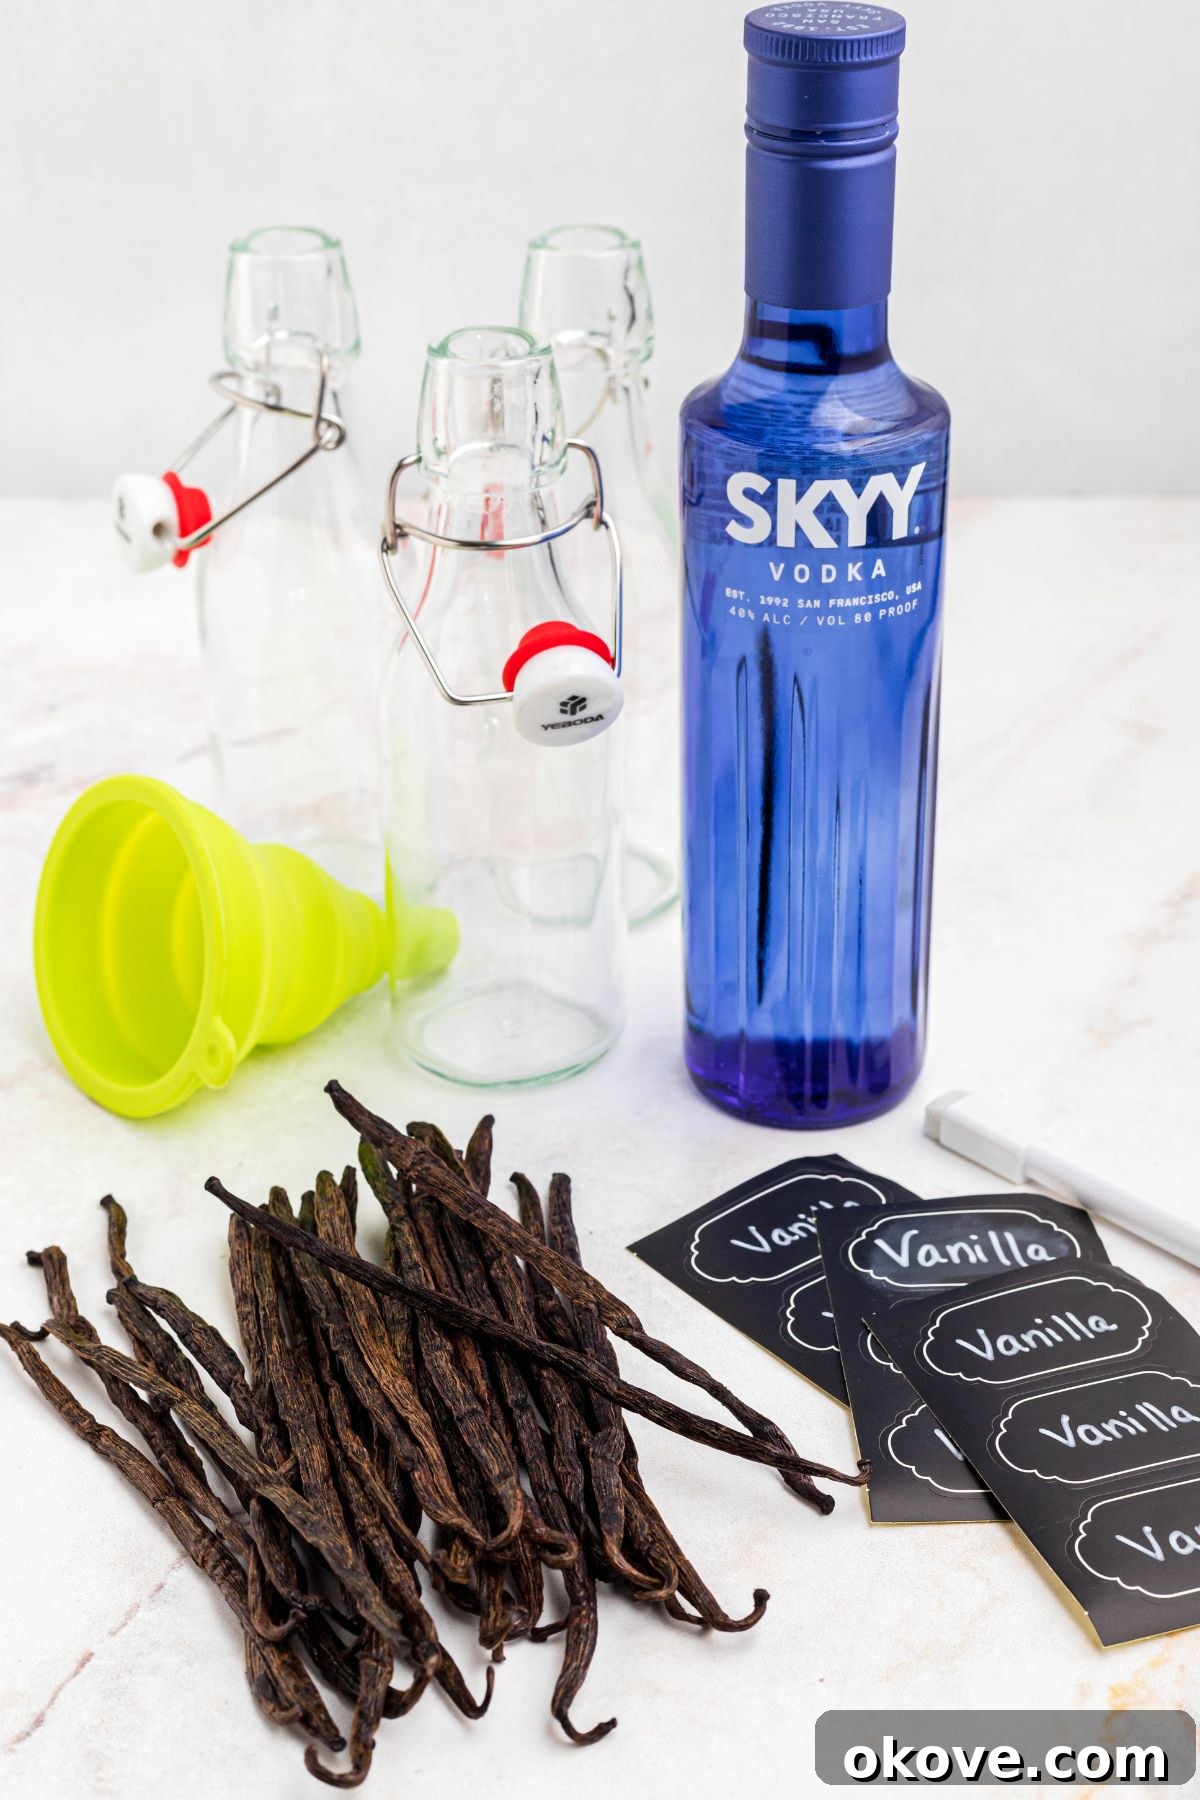
1. Premium Vanilla Bean Pods
The very heart and soul of your vanilla extract, vanilla beans are the star of this simple recipe. They come in various types, each offering a distinct flavor profile. For the best results, always opt for plump, fragrant, and pliable beans that are dark brown to black. Avoid beans that appear dry, brittle, or cracked, as they will have less moisture and consequently, less flavor to impart.
- Madagascar (Bourbon) Vanilla Beans: This is the most popular and widely recognized variety, cultivated primarily in Madagascar and surrounding Indian Ocean islands. They are renowned for their classic, rich, creamy, and sweet vanilla flavor, often described with deep, buttery undertones. It’s an excellent choice for an all-purpose extract that complements almost any dessert or baking application.
- Tahitian Vanilla Beans (Vanilla tahitensis): Primarily grown in Tahiti and Papua New Guinea, Tahitian beans are distinct from the Planifolia variety. They are typically plumper and contain fewer vanillin crystals but boast a higher concentration of other aromatic compounds. This gives them a more floral, fruity, and delicate flavor profile, often described with notes of cherry, licorice, or anise. They are fantastic for lighter desserts, fruit-based recipes, custards, or when you desire a brighter, more perfumed vanilla essence.
- Mexican Vanilla Beans (Vanilla planifolia ‘Mexicana’): Hailing from Mexico, the birthplace of vanilla, these beans offer a bold, warm, and slightly smoky flavor. They often have hints of chocolate, nutmeg, and cinnamon, creating a more exotic and robust extract. Mexican vanilla pairs wonderfully with chocolate, coffee, and spiced baked goods, adding a depth that beautifully enhances these flavors.
- Other Varieties: For the adventurous, explore less common types like Ugandan (known for its bold, earthy, and intensely chocolatey notes) or Indian (offering a unique blend of fruity and woody notes) for even more unique extracts. You can also create custom blends by combining different bean types to achieve a truly personalized and complex flavor. When buying, look for ‘Grade A’ or ‘Gourmet’ beans for optimal moistness and high vanillin content, though ‘Grade B’ or ‘Extract’ beans are also excellent and more cost-effective for extract making, as their lower moisture content actually concentrates the essential flavor compounds.
2. High-Quality Alcohol Base
The alcohol serves a crucial role as the solvent, effectively extracting the vanillin and hundreds of other aromatic flavor compounds from the vanilla beans. A neutral alcohol is generally recommended to allow the pure vanilla flavor to shine unobstructed, but different types of alcohol can impart subtle, complementary undertones:
- Vodka: This is by far the most popular and widely recommended choice for homemade vanilla extract due to its extremely neutral flavor profile. It acts as a blank canvas, allowing the pure essence of the vanilla bean to be the absolute star, making it incredibly versatile for all baking applications. Choose a good quality vodka, at least 80 proof (40% alcohol by volume), for optimal extraction.
- Rum: Opting for light or dark rum can add warm, slightly sweet, and caramelized notes to your vanilla extract. Dark rum, in particular, contributes a deeper, richer vanilla with hints of molasses, which is especially good in recipes like rum cakes, banana bread, or caramel-based desserts.
- Bourbon: For a more complex, oaky, and subtly smoky vanilla extract with rich undertones of caramel and spice, bourbon is an excellent choice. It pairs exceptionally well with chocolate, nuts, pumpkin, and autumnal flavors, adding a sophisticated warmth.
- Brandy: Brandy offers distinctive fruity and slightly sweet undertones that can add a sophisticated and aromatic touch to your vanilla. It works beautifully in fruit tarts, pastries, cream-based desserts, or anything where a richer, more aromatic vanilla is desired.
Alcohol Proof: It’s important to ensure your chosen alcohol is at least 70 proof (35% alcohol by volume) to properly extract the vanilla compounds. Most standard vodkas, rums, bourbons, and brandies readily meet this requirement, but always check the label.
3. Glass Bottles or Jars and Labels
You’ll need clean, airtight glass containers for both infusing and storing your finished vanilla extract. Mason jars work perfectly for larger batches, while smaller, decorative swing-top or corked bottles are ideal for gifting. Ensure all containers have tight-fitting lids or stoppers to prevent alcohol evaporation and keep the contents fresh. Don’t forget labels! These are essential for noting the type of vanilla bean, the alcohol used, and, most importantly, the date the infusion was started. This helps you track its maturation and ensures consistency for future batches.
Step-by-Step Guide: Crafting Your Own Pure Vanilla Extract
The process of making homemade vanilla extract is incredibly simple, requiring minimal effort for maximum flavor reward. Follow these easy steps to create your own liquid gold, a true staple for any discerning baker:
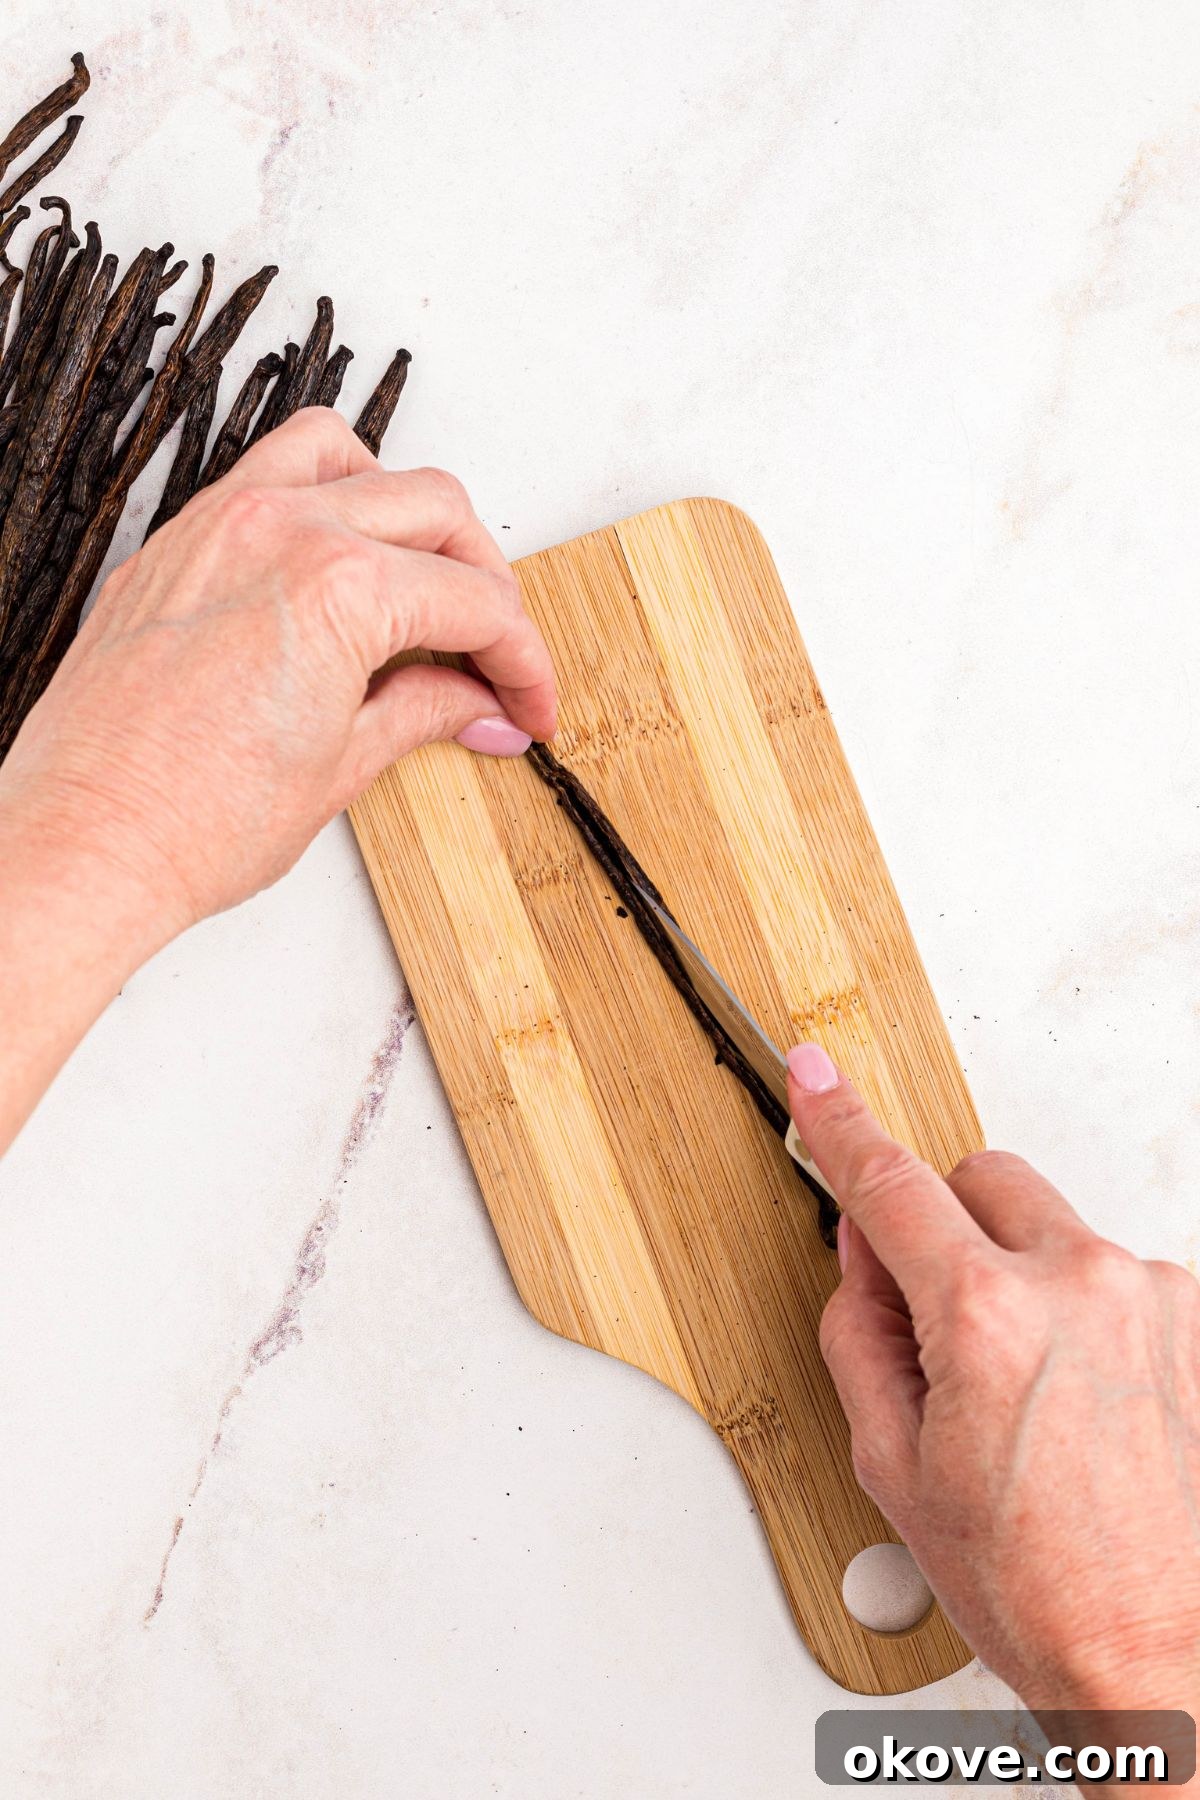
- STEP 1: Prepare the Vanilla Beans. Lay each vanilla bean pod flat on a clean cutting board. Using a sharp paring knife, carefully split each bean lengthwise from end to end, but not all the way through, keeping one side intact. You want to expose the tiny, aromatic seeds (often called “vanilla caviar”) inside without completely separating the bean. This exposure allows for maximum surface area contact with the alcohol, ensuring optimal flavor extraction. If your beans are exceptionally long, you may cut them in half crosswise after splitting to better fit your chosen bottles or jars. Some prefer to fully split the bean and scrape out the seeds, then add both seeds and pod to the alcohol for a flecked extract.

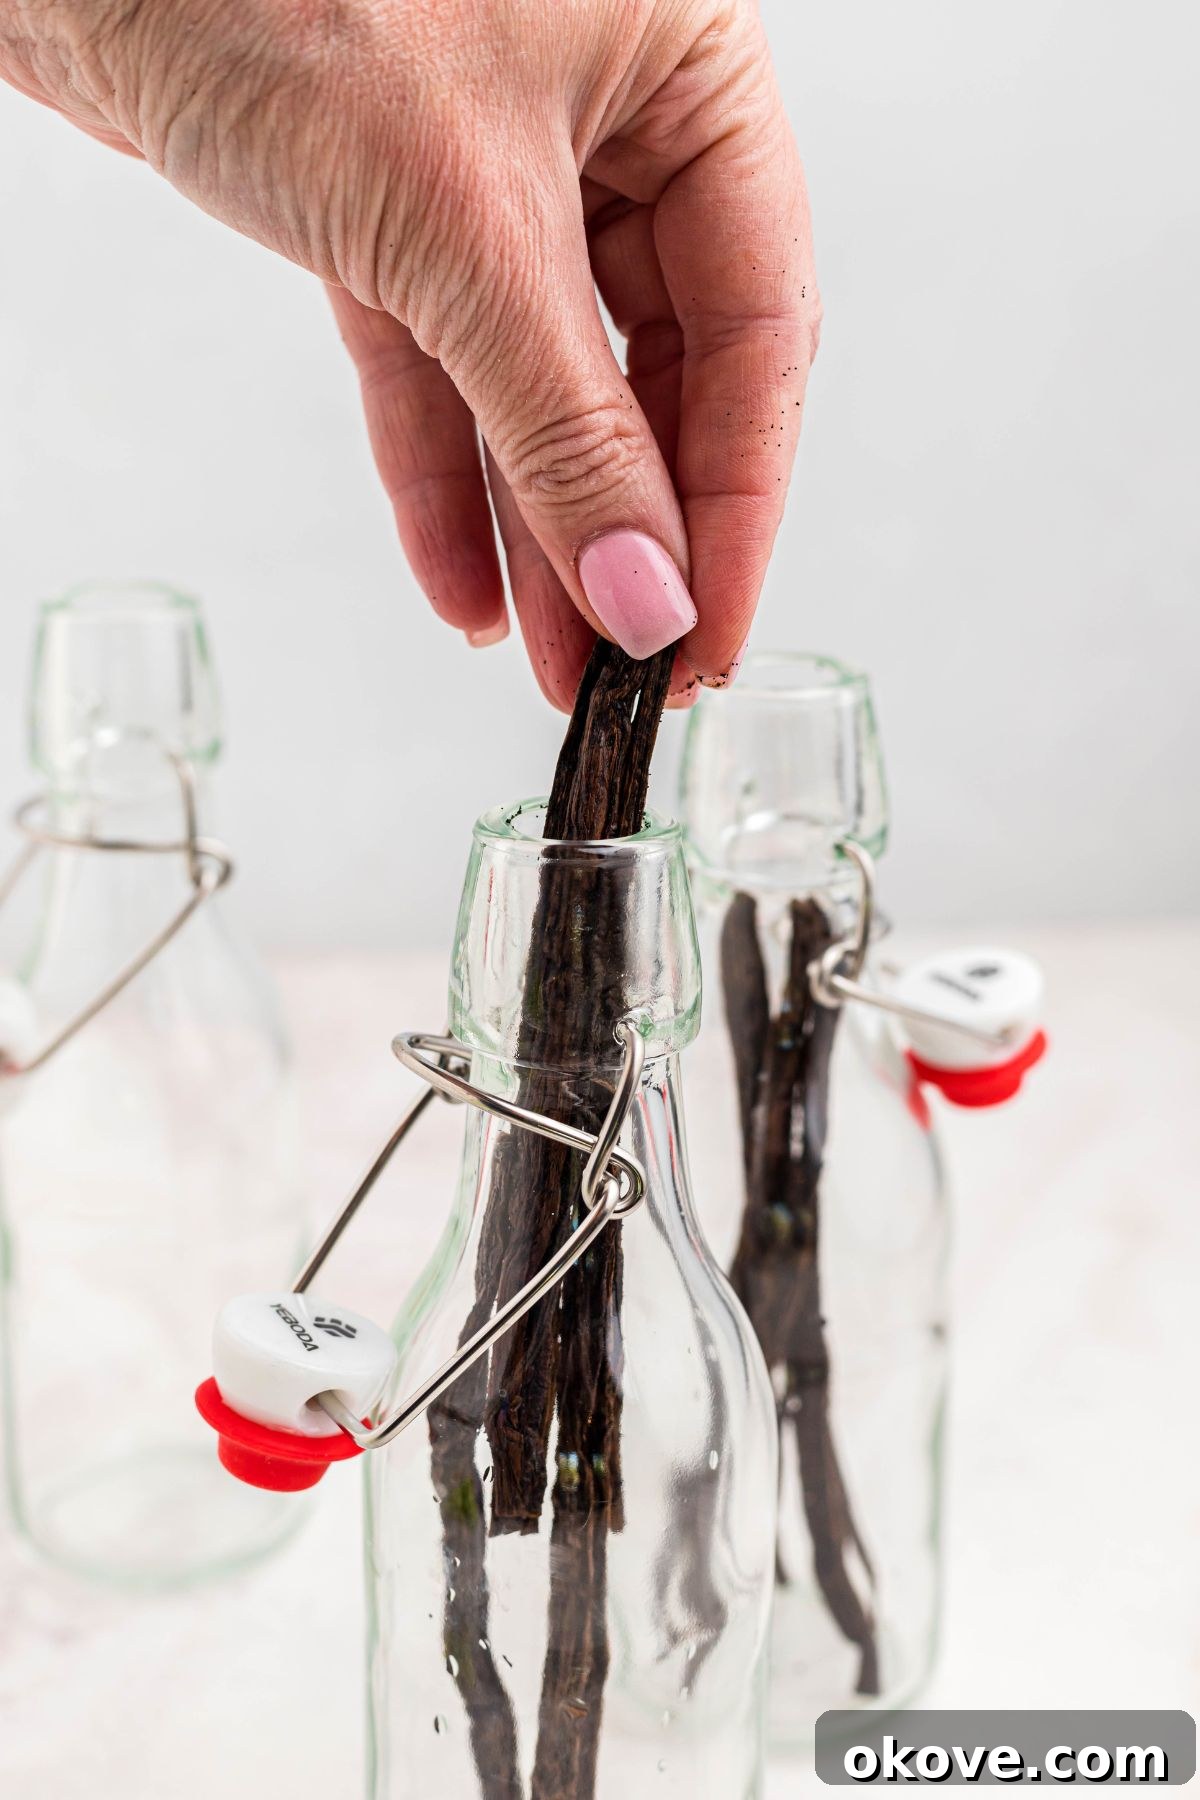
- STEP 2: Place Beans in Glass Bottles or Jars. Gently place the prepared vanilla bean pods into your clean, sterile glass bottles or jars. Aim for a general ratio of approximately 8-10 vanilla beans per 8 ounces (1 cup) of alcohol for a rich, robust ‘single-fold’ extract. If you cut the beans into smaller pieces, ensure they are distributed evenly at the bottom of the container. For a truly potent “double-fold” extract, you can increase this ratio significantly.
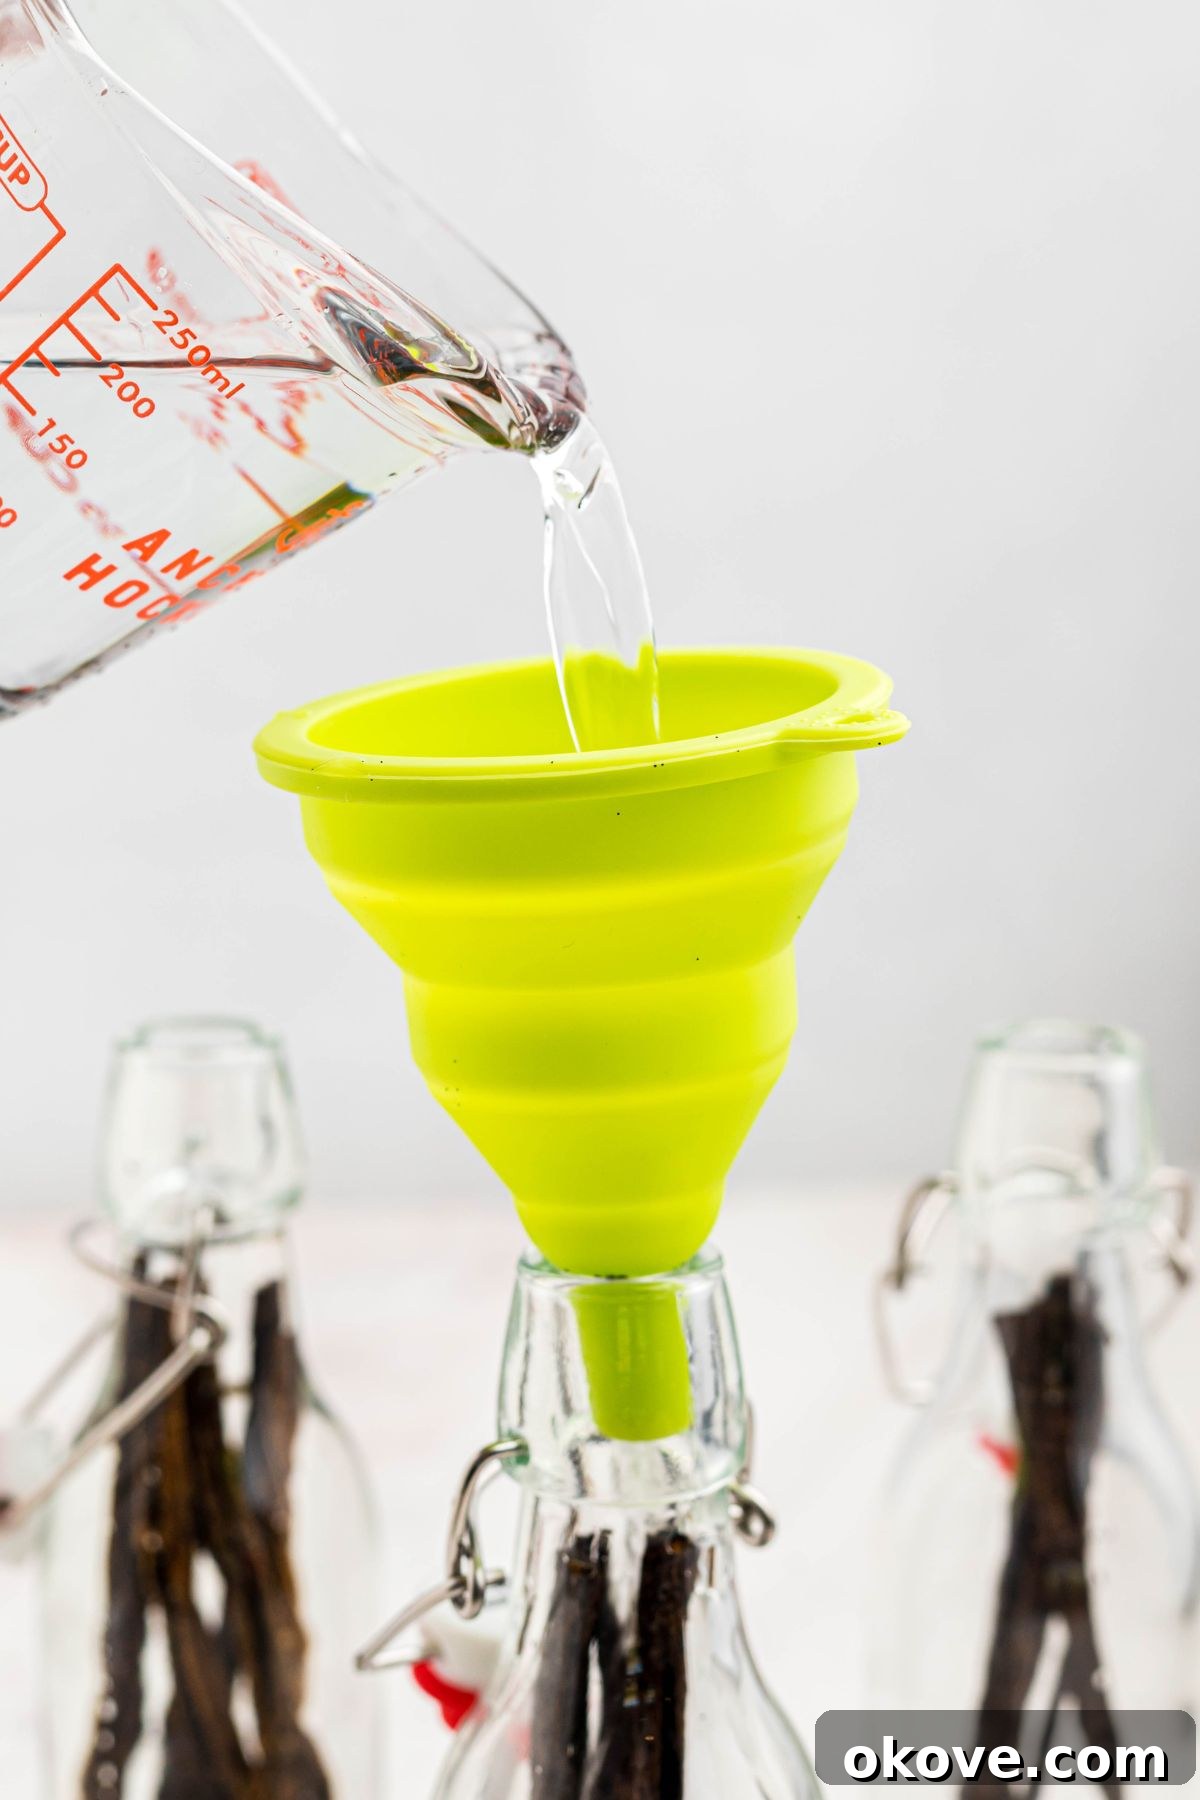
- STEP 3: Submerge Beans in Alcohol. Using a small funnel, carefully pour your chosen alcohol (such as vodka, rum, bourbon, or brandy) over the vanilla beans in each bottle until they are completely submerged. It’s crucial that the beans are fully covered by the alcohol to prevent any potential mold growth and to ensure even and continuous flavor extraction. Fill the bottle to leave a small headspace, about half an inch from the top, to allow for proper shaking without spillage.
- STEP 4: Tightly Seal, Shake Well, and Store. Tightly seal the bottles with their lids or corks. Give each bottle a good, vigorous shake to ensure the beans are well-coated and the infusion process begins immediately. Store your homemade vanilla extract in a cool, dark place, such as a pantry, cupboard, or basement, completely away from direct sunlight and any heat sources. This helps preserve the delicate flavor compounds. For optimal infusion, remember to shake the bottles gently every few days or at least once a week during the first few months to keep the extraction moving.
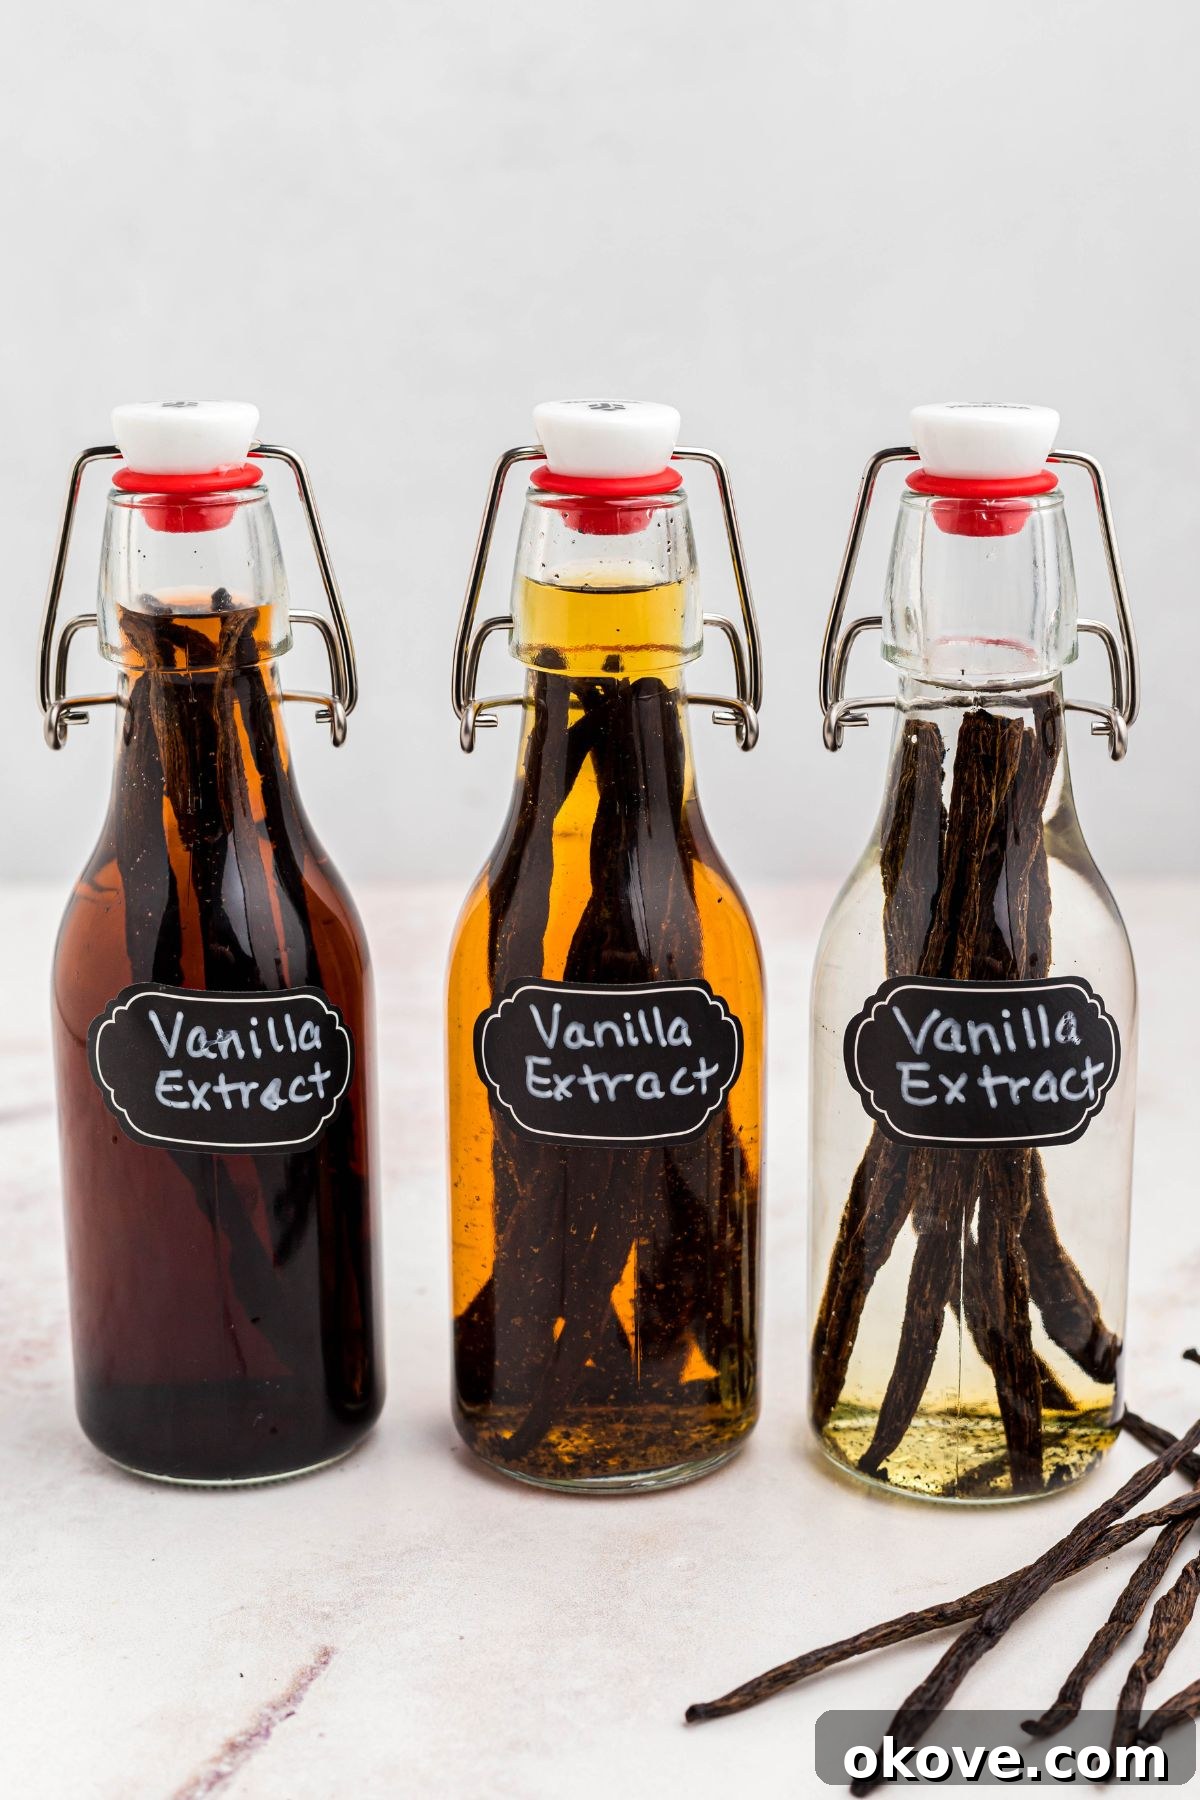
- STEP 5: Patience is Key – The Waiting Game. While your vanilla extract will begin to develop a noticeable flavor within a few weeks, it truly matures and reaches its full potential after at least 2 months. For the richest, most complex, and deeply nuanced flavor, I highly recommend waiting 6 months to a year, or even longer. The longer it sits, the deeper, darker, and more robust the vanilla essence becomes. Once it reaches your desired strength and aroma, it’s ready to be used in all your favorite recipes or transferred into smaller, beautifully labeled bottles for thoughtful gifting.
The Art of Infusion: Understanding Vanilla Extraction
The fascinating process of making vanilla extract is essentially a specialized form of infusion, where the alcohol acts as a powerful solvent to meticulously draw out the vanillin and hundreds of other aromatic compounds from the vanilla beans. Vanillin is the most recognized primary flavor compound, but it’s the interplay of a multitude of other subtle compounds that collectively contribute to the incredibly complex, rich, and truly unique aroma and taste of genuine vanilla. Over time, these intricate compounds slowly leach from the beans into the alcohol, transforming it into the rich, amber-colored liquid we cherish as vanilla extract.
This slow chemical exchange is precisely why patience is not just a virtue in this craft, but an absolute necessity. A rushed extract will inevitably be weak, one-dimensional, and lack the depth and complexity that defines a truly exceptional vanilla. The occasional shaking of the bottles helps to gently agitate the beans, ensuring continuous and thorough contact with the alcohol. This action promotes a more even, efficient, and complete extraction of all the precious flavor molecules. Furthermore, storing your infusing extract in a dark, cool place is paramount, as ultraviolet light and fluctuating temperatures can degrade the delicate flavor molecules, preserving the quality and potency of your precious homemade extract for years to come.
Creative Variations for Personalized Vanilla Extract
Once you’ve mastered the basic recipe for homemade vanilla extract, the world of possibilities truly opens up. Experiment with these creative variations to craft truly unique extracts that cater precisely to your taste preferences and specific baking needs, allowing your culinary imagination to soar:
- Explore Different Alcohol Bases: As previously discussed, trying different alcohols like premium vodka, robust bourbon, sweet rum, or even aromatic brandy will undoubtedly yield distinct flavor profiles. Consider a spiced rum for a warm, holiday-themed vanilla, or a delicate white rum for a lighter, sweeter, and more tropical note that works wonderfully in fruit desserts.
- Blend Vanilla Bean Varieties: Do not limit yourself to a single type of vanilla bean! Combine Madagascar and Tahitian beans for a perfectly balanced, sweet, and floral extract, or mix Mexican and Madagascar for a spicier, bolder blend that is absolutely perfect for chocolate-heavy desserts or rich custards.
- Infuse with Complementary Spices: For an extra layer of subtle flavor and aroma, consider adding whole spices to your infusion. Drop in one or two whole cinnamon sticks, a few star anise pods, a piece of dried orange peel, a couple of fragrant cardamom pods, or even a split tonka bean when you first start the infusion. These additions can create a wonderfully aromatic and complex extract, especially delightful for fall or holiday baking. Remember to remove these additional spices after a month or two, or once the desired flavor is achieved, to prevent them from overpowering the delicate vanilla essence.
- Sugar-Free Vanilla: For those who monitor their sugar intake, homemade vanilla is naturally sugar-free. Simply ensure your chosen alcohol base is also free of any added sugars, as some flavored alcohols might contain them.
- Double-Fold or Triple-Fold Extract: For an intensely flavored and highly concentrated extract, significantly increase the number of vanilla beans per ounce of alcohol. A standard ‘single-fold’ extract typically uses about 0.7 ounces of vanilla beans per 13 ounces of alcohol (approximately a 1:18 ratio by weight). ‘Double-fold’ uses twice that amount, and ‘triple-fold’ uses three times, resulting in a remarkably more potent flavor that is ideal for recipes where a strong vanilla presence is desired without adding too much liquid.
A Deeper Dive into Vanilla Bean Varieties
When I first ventured into making my own homemade vanilla extract, I spent considerable time researching which vanilla bean would yield the best results. While cost is often a significant factor, especially when purchasing in bulk, understanding the unique characteristics of each type allows for a more informed and satisfying choice that aligns with your culinary goals. Here’s a detailed look at some of the most popular and celebrated vanilla beans used for crafting premium extracts:
- Madagascar Vanilla Beans (Vanilla planifolia ‘Bourbon’): Often considered the gold standard and benchmark for vanilla flavor, these beans are predominantly grown in Madagascar and other islands in the Indian Ocean, hence the “Bourbon” designation (referring to the former Île Bourbon, now Réunion). They are renowned for their classic, incredibly rich, sweet, and buttery vanilla flavor profile, often accompanied by deep, creamy, and complex undertones. This robust and versatile flavor makes them the most popular and highly recommended choice for an all-purpose vanilla extract that shines in virtually any baking or dessert application, from simple cookies to intricate custards and ice creams.
- Tahitian Vanilla Beans (Vanilla tahitensis): Cultivated primarily in Tahiti, Papua New Guinea, and other South Pacific regions, Tahitian beans are botanically a different species from the Planifolia variety. They are typically plumper and contain fewer visible vanillin crystals but boast a higher concentration of other distinctive aromatic compounds. This composition gives them a unique, more floral, fruity, and delicate flavor profile, often described with alluring notes of cherry, licorice, anise, and even light caramel. They are exquisite in lighter desserts, fruit-based dishes, custards, or when you desire a more nuanced and perfumed vanilla presence that won’t overpower other delicate flavors.
- Mexican Vanilla Beans (Vanilla planifolia ‘Mexicana’): Hailing from Mexico, the original homeland of vanilla, these beans offer a distinctively bold, warm, and slightly smoky flavor. They often carry enticing hints of chocolate, nutmeg, and cinnamon, creating a more exotic and robust extract. Mexican vanilla is highly recommended for recipes featuring chocolate, coffee, or warm spices, as its deeper, more complex notes beautifully complement and enhance these rich flavors, adding an extra dimension to your baking.
- Ugandan Vanilla Beans (Vanilla planifolia): An increasingly popular choice among connoisseurs, Ugandan vanilla beans are a variety of the Planifolia species, similar to Madagascar, but often present a bolder, earthier, and intensely rich flavor. They frequently carry pronounced notes of dark chocolate, dried fruit, and sometimes a hint of figs or raisins, making them exceptionally well-suited for rich desserts, hearty custards, and even savory applications where a strong, dark vanilla profile is desired.
- Indian Vanilla Beans (Vanilla planifolia): Grown in various regions across India, these beans offer a unique combination of sweet, woody, and slightly fruity notes. Their flavor can be quite balanced and complex, often with earthy undertones. They can be a fantastic alternative for those looking to experiment beyond the more common varieties, providing a complex and intriguing flavor to extracts that stands out.
Ultimately, choosing the ‘best’ vanilla bean depends entirely on your personal preference and the intended culinary use of the extract. Many vanilla enthusiasts enjoy experimenting with different beans or creating their own custom blends to discover their perfect signature vanilla flavor.
Expert Tips for Making the Best DIY Vanilla Extract
Achieving truly exceptional homemade vanilla extract, a product that will elevate your baking for years, involves a combination of starting with quality ingredients and applying diligent care throughout the infusion process. Keep these expert tips in mind for the best results and a truly gourmet vanilla:
- Prioritize Quality Vanilla Pods: The flavor and potency of your extract are directly proportional to the quality of the beans you start with. Invest in plump, moist, and fragrant vanilla beans. While Grade A (gourmet) beans are visually stunning, Grade B (extract grade) beans are often more economical for extract making and still deliver excellent flavor due to their lower moisture content and higher concentration of vanillin.
- Embrace Patience: This is arguably the most crucial tip for superior vanilla. While you might be tempted to use your extract after just a few weeks, true, deep flavor development takes considerable time. Aim for at least 6 months of infusion, and ideally 12 months, for the richest, deepest, and most complex vanilla flavor profile. Think of it like aging a fine wine – the best things truly come to those who wait.
- Shake Regularly: Giving your bottle a gentle but thorough shake every few days or at least once a week helps to redistribute the vanilla beans and ensures that all parts of the pods are consistently exposed to the alcohol. This agitation promotes an even and efficient extraction of all the precious vanilla compounds, leading to a more potent and balanced extract.
- Top Off the Bottle: As you begin to use your homemade vanilla extract, you can easily ‘top off’ the bottle with more alcohol. This ingenious practice allows the original beans to continue infusing, effectively extending the life of your extract indefinitely. Just remember to add a few fresh beans every few ‘refills’ (perhaps after the liquid level has gone down by half a few times) to maintain optimal potency and flavor strength.
- Store in a Cool, Dark Place: Direct sunlight, exposure to air, and fluctuating temperatures are the enemies of delicate vanilla flavor. Keep your infusing and finished extract bottles in a pantry, a dark cupboard, or any cool, dark spot to protect its quality and prolong its shelf life. Light can degrade the delicate flavor compounds and alcohol, while heat can accelerate evaporation.
- Consider Scrape-and-Chop: Instead of simply splitting the beans, you can fully split each pod, scrape out the sticky vanilla seeds (the ‘caviar’) with the back of your knife, and then chop the empty pods into smaller pieces. Add both the scraped seeds and the chopped pods to the alcohol. This method exposes even more surface area, potentially speeding up the initial extraction and resulting in a beautiful, flecked extract with visible vanilla seeds throughout.
- Sterilize Your Bottles: Before starting, ensure all your glass bottles and jars are thoroughly cleaned and sterilized. This prevents any unwanted bacteria or contaminants from affecting your precious extract during the long infusion process.
Frequently Asked Questions About Homemade Vanilla Extract
Yes, absolutely! Once your first batch of extract is complete and you’ve used most of the liquid, you can certainly reuse the beans by adding fresh alcohol to the bottle. However, it’s important to note that the flavor potency will likely be a little lighter with each subsequent use, as the beans will have fewer vanillin compounds left to release. To maintain a strong flavor, you might want to add 1-2 fresh beans along with the old ones with each reuse cycle, or combine used beans with entirely fresh ones to create a new batch.
Yes, you can! Using flavored alcohol like a high-quality spiced rum, a bourbon with distinct caramel notes, or even a vanilla-flavored vodka can indeed enhance and add interesting layers to your extract’s flavor profile. Just be mindful that the inherent flavors from the alcohol will blend with the vanilla, creating a unique and complex extract. Experimentation is key here to find combinations and undertones that you truly love!
A generally accepted and excellent rule of thumb for a good quality ‘single-fold’ extract is to use approximately 8 vanilla beans per 8 ounces (1 cup) of alcohol. This ratio yields a rich, flavorful extract suitable for most baking. If you desire a more intense, “double-fold” vanilla, you can increase this to 12-16 beans per 8 ounces. I personally love making several batches at once, especially when preparing thoughtful holiday gifts for friends and family during Christmas!
Unfortunately, not really, especially if you’re aiming for true quality. Vanilla extract develops its complex flavor over time through a slow and gradual infusion process. While some quick methods suggest heating the mixture, this can often result in a ‘cooked’ flavor, diminish the delicate nuances of the vanilla, or even cause the alcohol to evaporate prematurely. For the best, most authentic, and deeply flavorful results, patience is truly key. Embrace the waiting game and let nature do its work!
When stored properly in a cool, dark place in an airtight container, homemade vanilla extract has an almost indefinite shelf life. The high alcohol content acts as a natural preservative, preventing spoilage. Over time, its flavor can even deepen, mellow, and improve, becoming more complex and robust with age, much like a fine spirit.
No, it’s not necessary to remove the vanilla beans once the extract has reached your desired strength. You can leave the vanilla beans in the bottle indefinitely. They will continue to slowly release flavor and keep the extract robust, often improving it over time. If you prefer a cleaner liquid or wish to use the beans for other purposes (like drying them to make vanilla sugar), you can strain them out, but many enthusiasts prefer to keep them in the bottle as a visual reminder of its homemade quality and ongoing infusion.
More Easy Recipes
Cakes
Butter Cake
Desserts
Cherry Dump Cake
Desserts
Chocolate Peanut Butter Cake
Desserts
Homemade Vanilla Extract
Homemade Vanilla Extract
Equipment
- Glass Bottles or Jars with Labels
- Small Funnel
Materials
- 8 Vanilla Bean Pods
- 8 ounces Vodka (rum, bourbon, or brandy may also be used)
Instructions
- Prepare the vanilla beans by splitting them lengthwise with a sharp knife to expose the seeds.
- Place the beans in your glass bottle or jar. Cut them into smaller pieces if needed to fit.
- Use a small funnel, and pour vodka (or your chosen alcohol) over the beans until fully submerged.
- Tightly seal the bottle and shake well. Store in a cool, dark place for at least 2 months, shaking every few days.
- Once the vanilla is ready, use in your favorite recipes or transfer into smaller bottles for gifting.
Notes
Nutrition
Carbohydrates: 0.2g |
Fat: 0.1g |
Sodium: 0.05mg |
Potassium: 0.05mg