
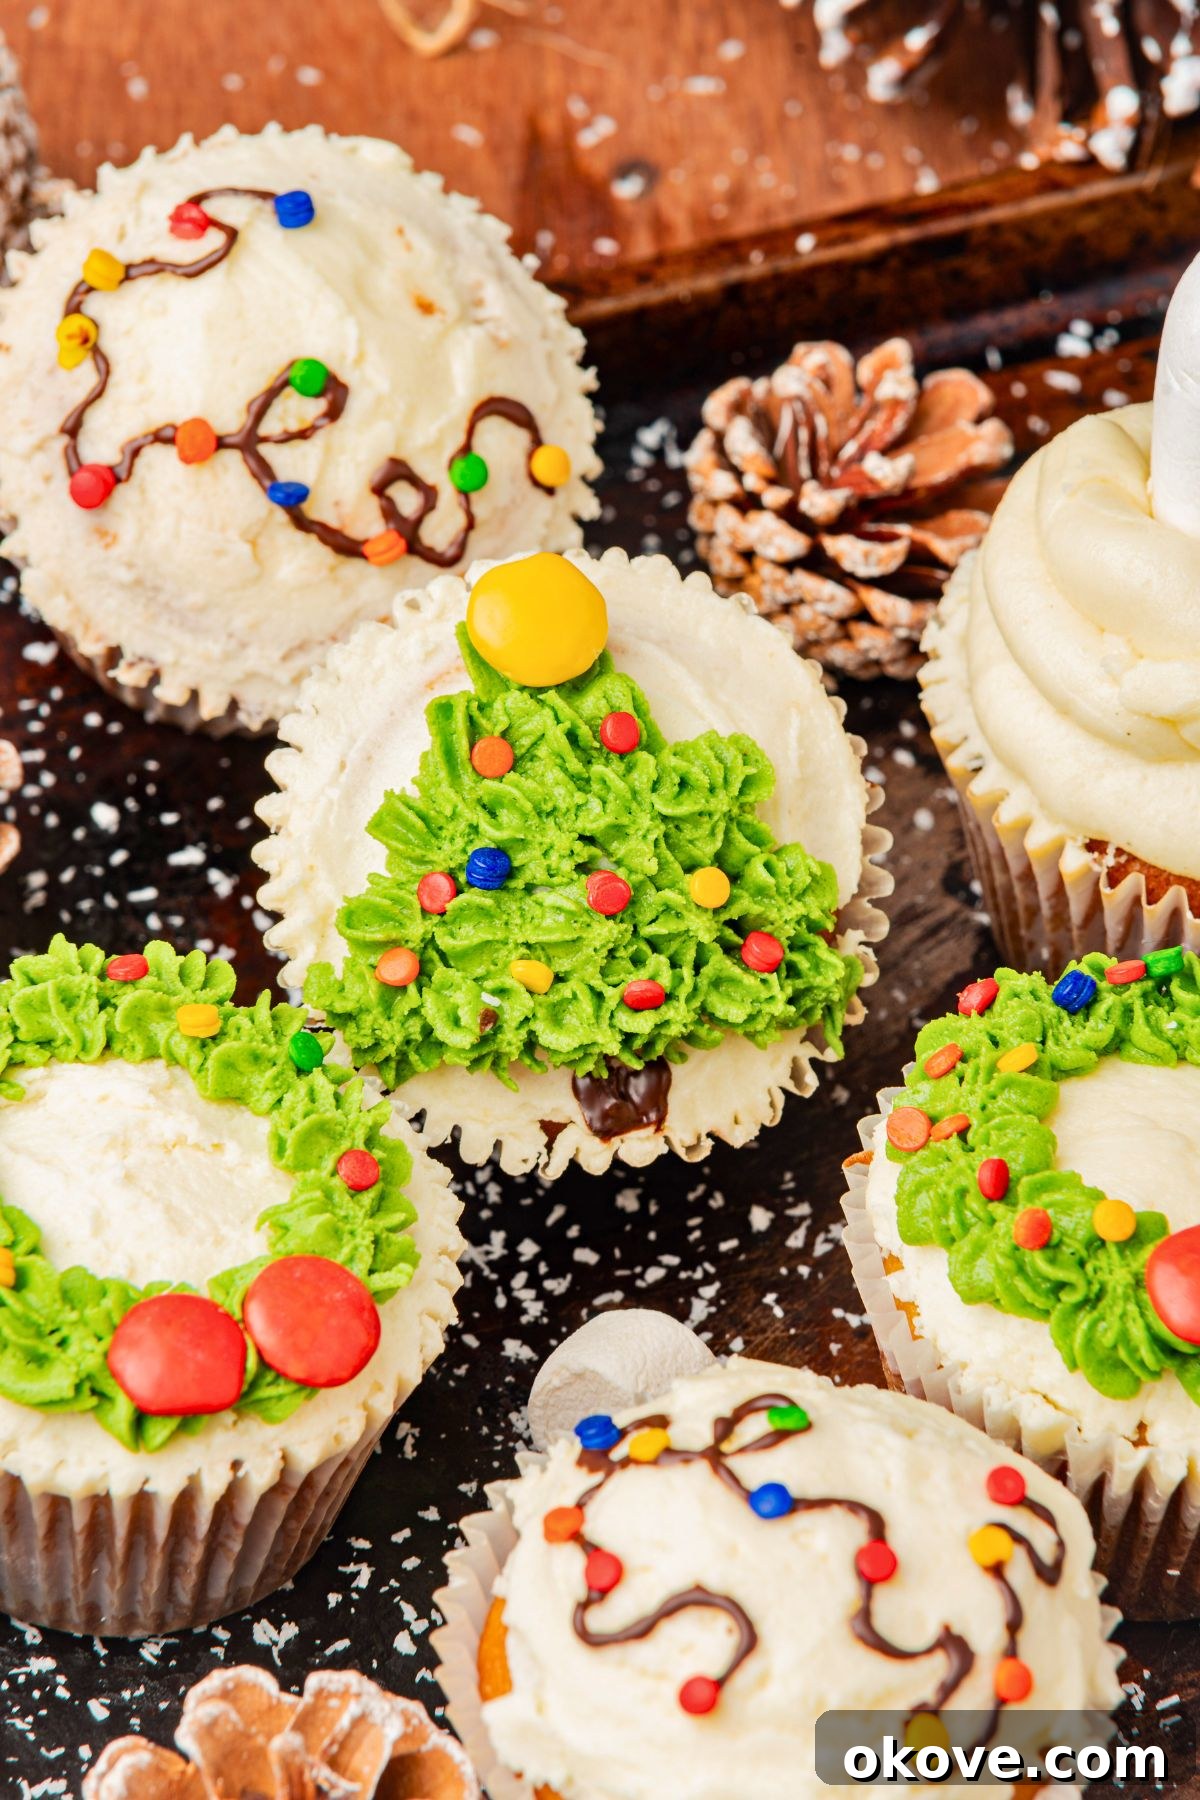
Delight in the festive spirit with our incredibly easy and utterly delicious Christmas Eggnog Cupcakes! These treats are more than just a dessert; they’re a celebration in every bite, perfectly capturing the warmth and joy of the holiday season. Each cupcake is a symphony of moist, tender crumb infused with the rich, creamy flavor of eggnog, crowned with a dreamy eggnog buttercream. But the magic doesn’t stop there – we’ll guide you through decorating these cupcakes with adorable holiday themes like whimsical snowmen, elegant Christmas wreaths, sparkling festive lights, and charming Christmas trees. Whether you’re a seasoned baker or just starting your holiday baking journey, this recipe is designed to be straightforward, fun, and guaranteed to impress your family and friends. Get ready to create edible works of art that are as delightful to look at as they are to eat!
The Ultimate Easy Christmas Eggnog Cupcakes Recipe
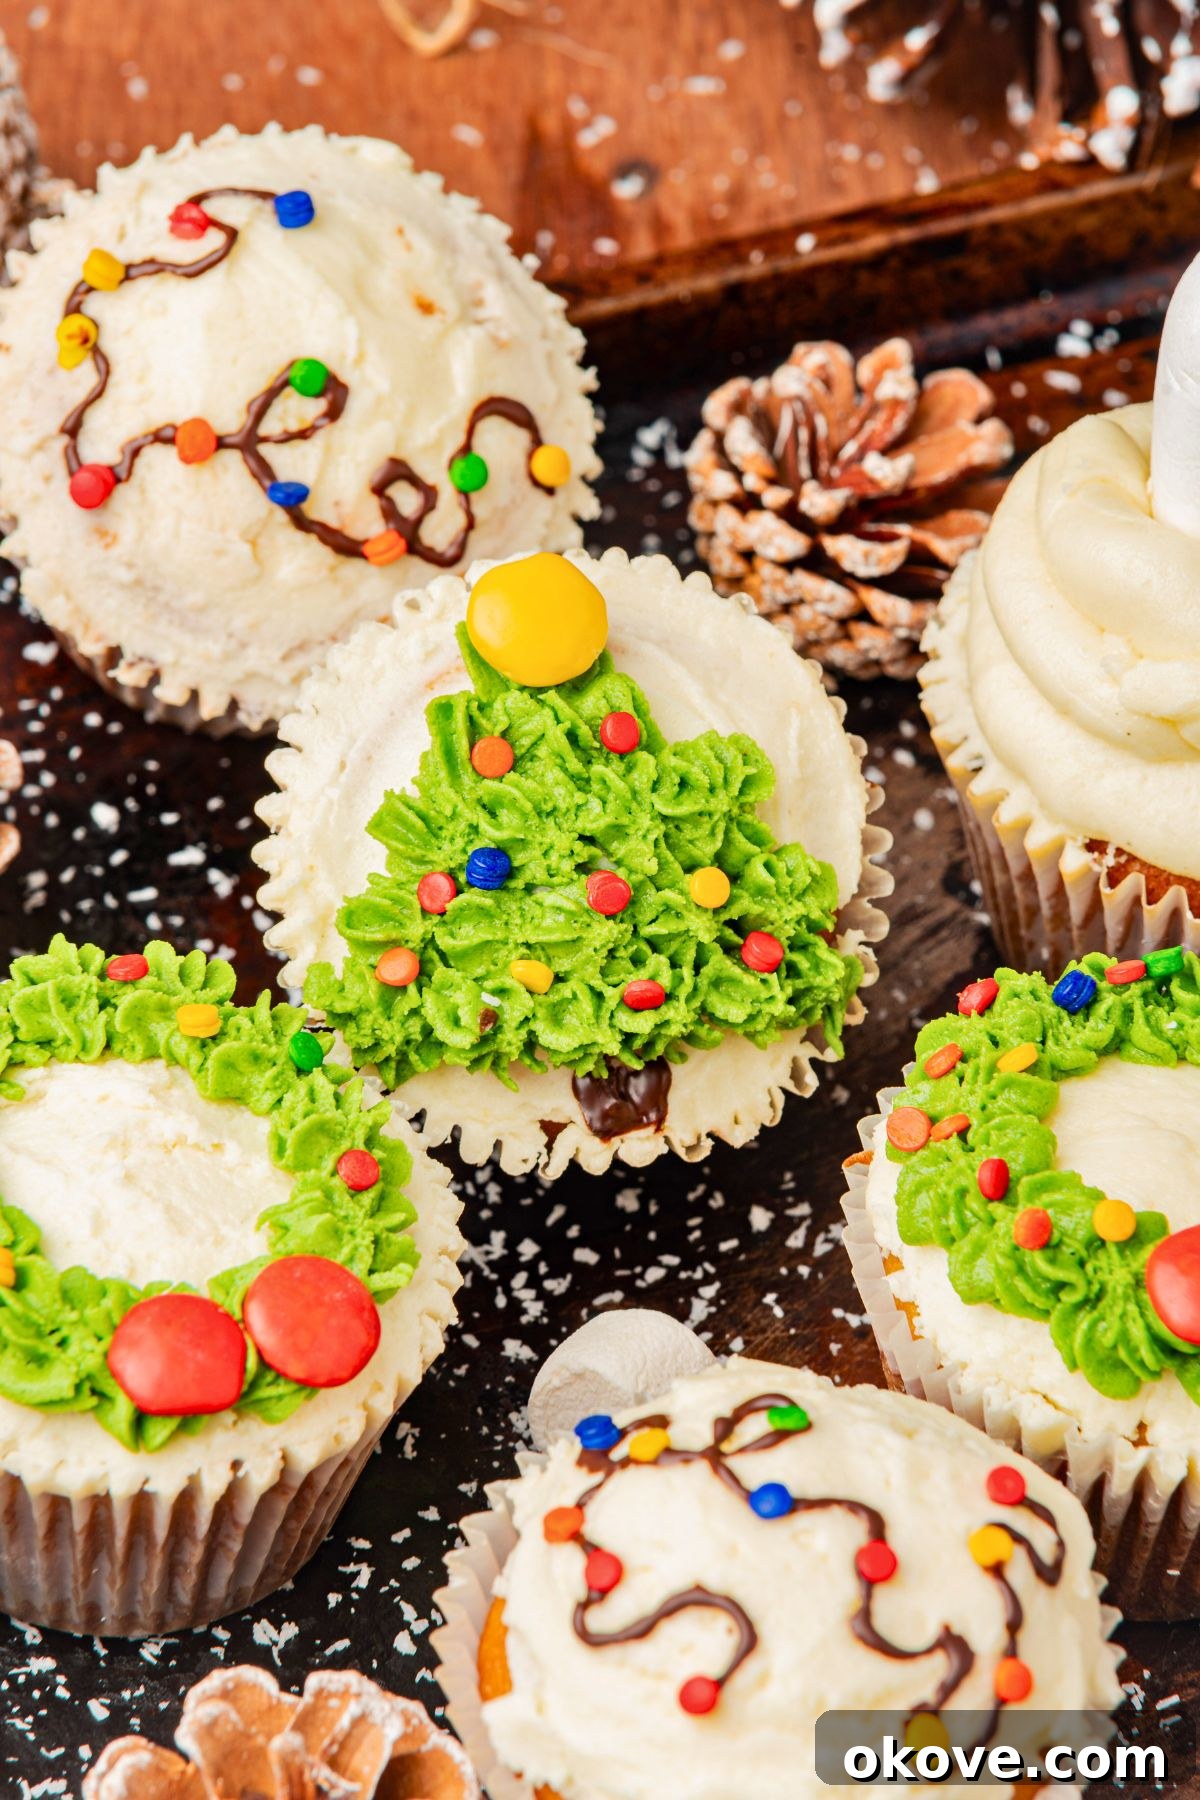
Get ready to infuse your holiday celebrations with an irresistible treat: our Easy Christmas Eggnog Cupcakes. This recipe takes the classic, beloved flavor of eggnog and bakes it right into a moist, tender cupcake batter, ensuring every mouthful is packed with festive cheer. But we don’t stop there! These delightful cupcakes are then generously topped with an incredible, creamy eggnog buttercream frosting, making them an absolute must-have for all your holiday parties, potlucks, and cozy family gatherings. They are the quintessential Christmas dessert, offering a delightful blend of rich flavor and light, fluffy texture that will have everyone reaching for more.
Beyond their exquisite taste, these eggnog cupcakes offer a wonderful opportunity for creative expression. Decorating them is a joy in itself, allowing you to personalize each one with enchanting holiday themes. Imagine a plate filled with cute snowmen, elegant green wreaths adorned with sprinkles, cheerful strings of Christmas lights, or charming miniature Christmas trees. This recipe provides endless possibilities to unleash your inner artist and add a personal touch to your holiday spread. Whether you’re hosting a grand holiday feast, searching for a fun family baking project, or simply want to spread some festive joy, these Christmas eggnog cupcakes are guaranteed to be the showstoppers of the season, creating lasting memories with every bite.
Essential Ingredients for Your Festive Eggnog Cupcakes
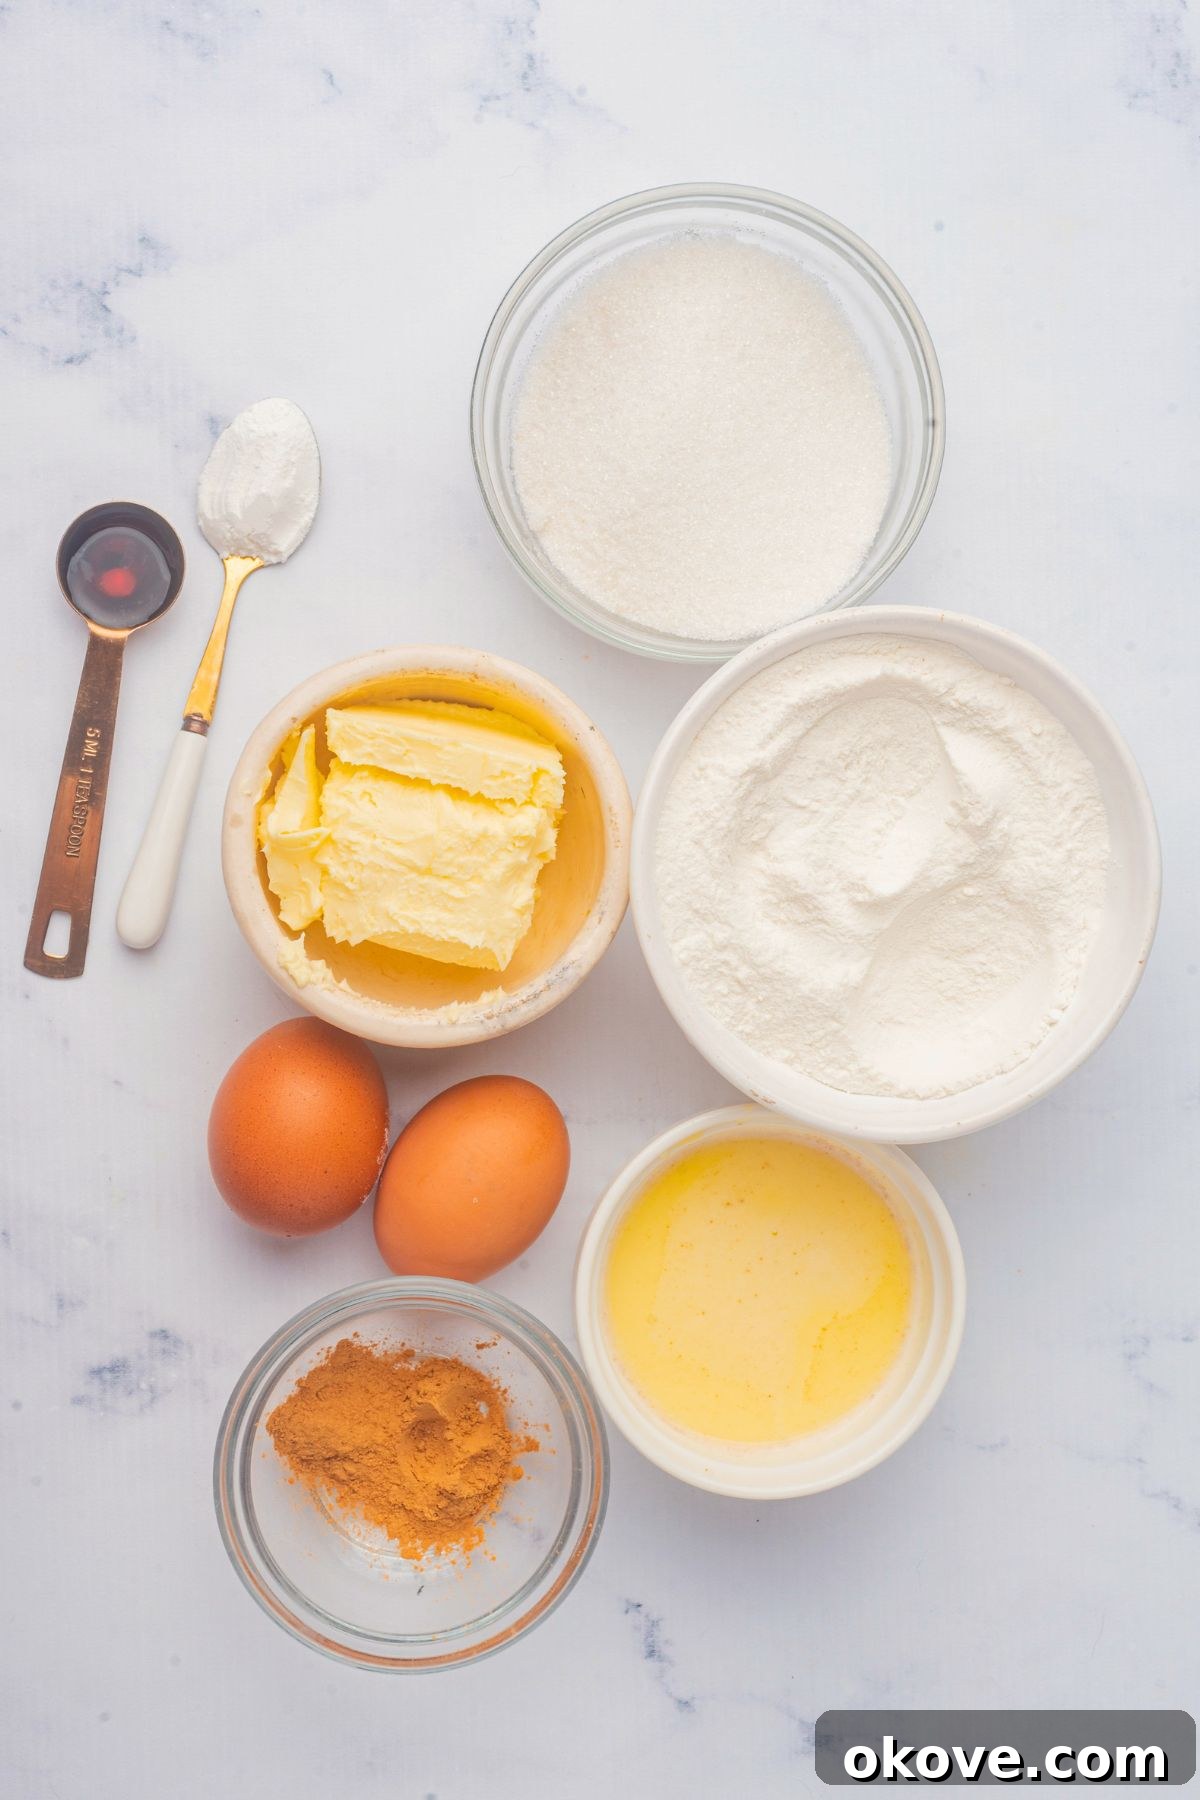
For the Moist Eggnog Cupcakes:
- Unsalted Butter, softened to room temperature: The foundation of rich, moist cupcakes. Using softened butter allows it to cream properly with sugar, incorporating air for a light texture.
- Granulated Sugar: Provides the perfect level of sweetness, balancing the festive spices and eggnog flavor.
- Large Eggs, at room temperature: Essential for structure and binding the ingredients, contributing to a tender and airy crumb. Room temperature eggs emulsify better with other ingredients.
- Eggnog (store-bought or homemade): The star ingredient, infusing the cupcakes with its signature creamy, spiced holiday flavor.
- Vanilla Extract: A flavor enhancer that complements the eggnog and adds a warm, aromatic note to the batter.
- All-Purpose Flour: The structural base for our cupcakes, yielding a tender and delicate crumb when measured correctly.
- Baking Powder: Our primary leavening agent, ensuring the cupcakes rise beautifully and achieve that desirable fluffy texture.
- Ground Cinnamon: Adds a subtle, warm spice that perfectly harmonizes with the eggnog, enhancing the festive profile.
For the Dreamy Eggnog Buttercream Frosting:
- Unsalted Butter, softened to room temperature: The creamy base of our luscious frosting. Softened butter whips up light and smooth.
- Powdered Sugar (confectioners’ sugar): Creates a silky-smooth frosting texture and adds sweetness without grittiness.
- Eggnog: Lends its creamy flavor and helps achieve the perfect frosting consistency. You can add more or less to reach your desired thickness.
- Green Gel Food Coloring (optional): Ideal for creating vibrant green frosting for wreath or Christmas tree decorations. Remember to reserve some white frosting for other designs!
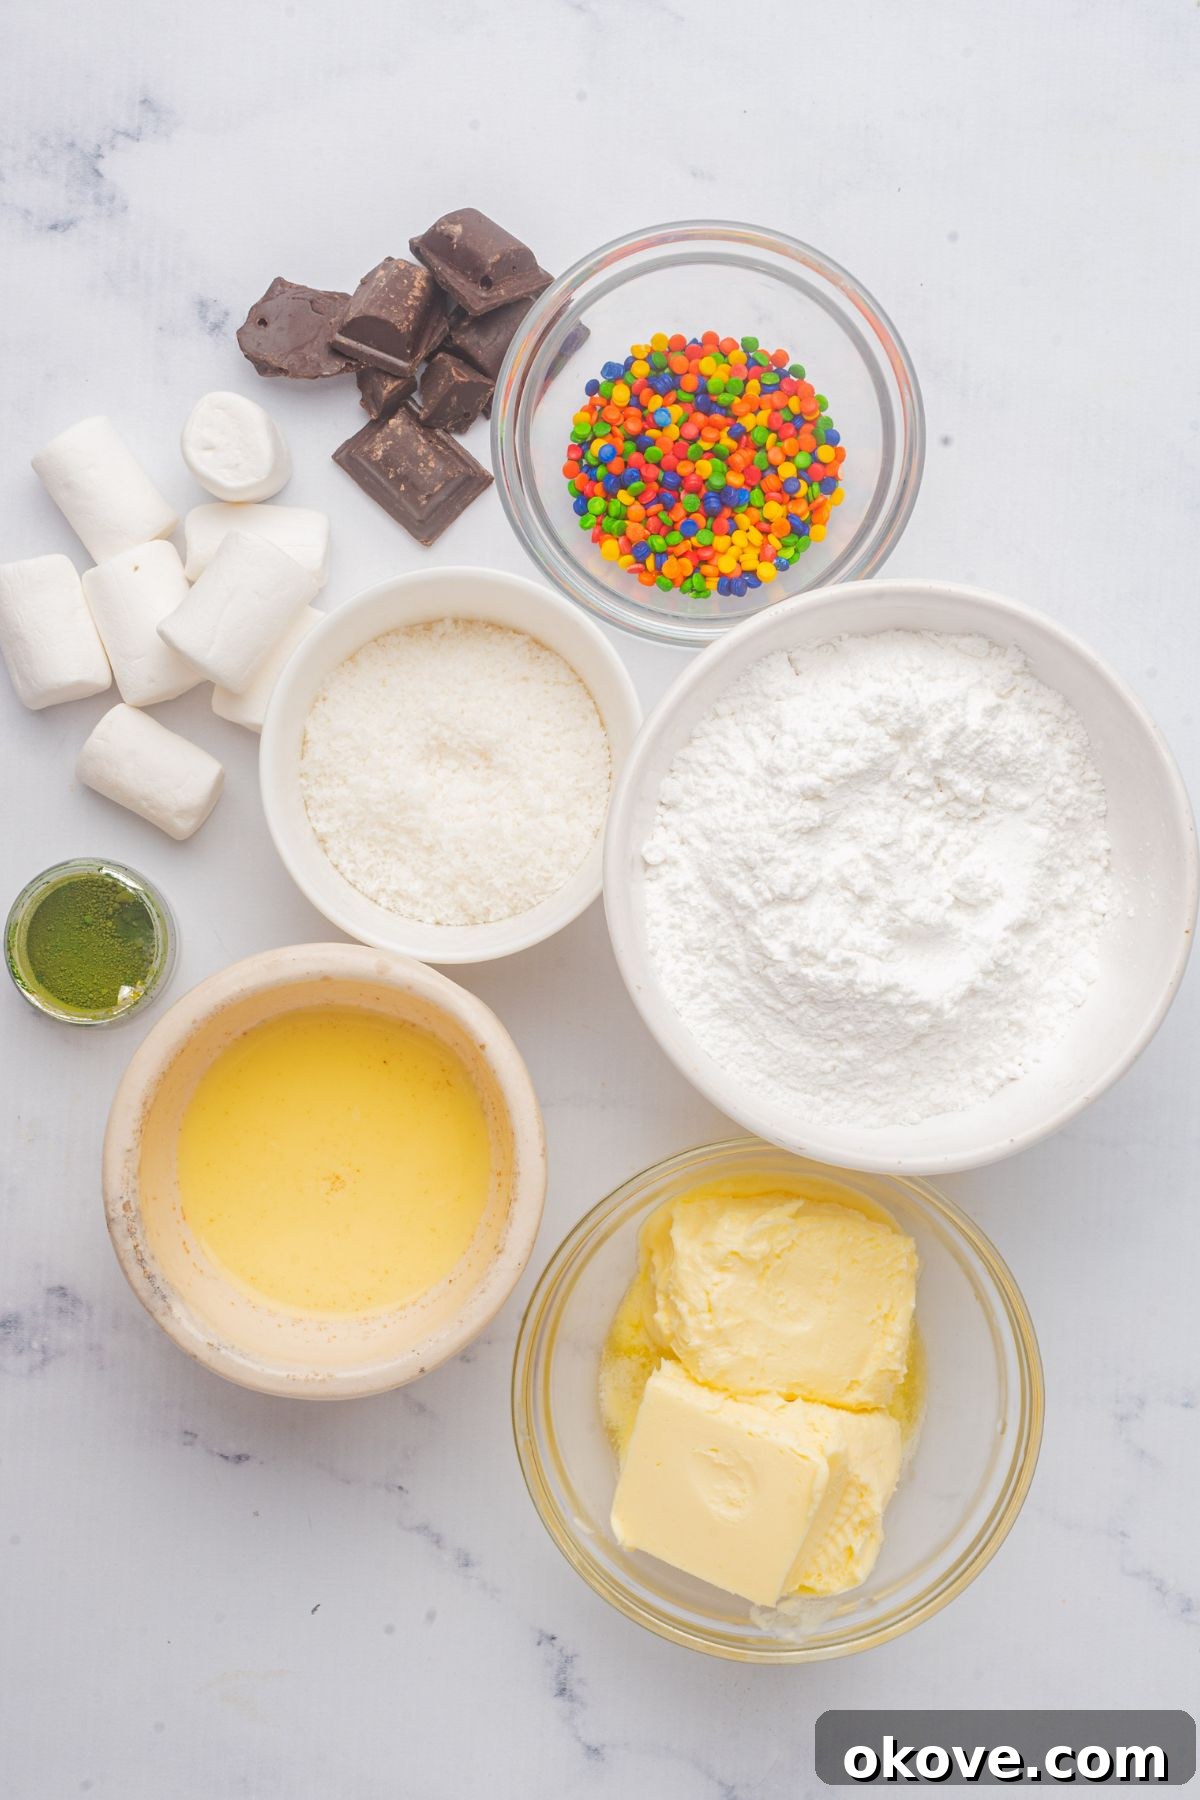
Creative Optional Decorations:
Unleash your creativity and personalize your holiday cupcakes with these fun embellishments:
- Colorful Sprinkles: A classic way to add a festive pop of color and texture to any holiday cupcake design.
- Dark Chocolate (melted): Perfect for drawing intricate details like snowman faces, tree trunks, or the wires for Christmas light strings.
- Mini Marshmallows: The ideal size for creating adorable snowman heads or adding a soft, snowy touch.
- Shredded Coconut: A fantastic way to mimic fresh fallen snow, adding a delightful texture and subtle coconut flavor.
- Orange Sprinkles (for snowman noses): Small details that bring your snowman characters to life.
Festive Eggnog Christmas Cupcake Variations & Substitutions
While the classic eggnog cupcake recipe is a crowd-pleaser, don’t hesitate to experiment and make it your own! Here are some ideas to add your unique touch:
- Miniature Cupcakes: For bite-sized delights perfect for a dessert platter, use a mini muffin tin. Remember to significantly reduce the baking time to approximately 12-15 minutes, or until a toothpick comes out clean. Keep a close eye on them as they bake quickly!
- Elevate the Flavor Twist: Enhance the holiday cheer by adding a dash of freshly grated nutmeg or a splash of rum extract (non-alcoholic versions are available) to the cupcake batter. These additions deepen the traditional eggnog spice profile and bring an extra layer of warmth. You can also experiment with a hint of cardamom or allspice for a unique twist.
- Alternative Frosting Options: If you prefer a less sweet or tangier contrast, consider using a classic cream cheese frosting instead of buttercream. The slight tanginess of cream cheese beautifully complements the rich eggnog flavor. You could also try a spiced brown butter frosting for a nutty, caramel-like depth.
- Time-Saving Box Mix Approach: In a rush but still want homemade taste? Start with a high-quality plain vanilla or yellow boxed cake mix. Substitute the water or milk called for in the box mix with eggnog to instantly infuse it with holiday flavor. For the frosting, you can use store-bought vanilla buttercream and mix in a few tablespoons of eggnog for that signature taste and a softer consistency. While homemade always tastes best, this is a fantastic shortcut for busy holiday schedules!
- Gluten-Free Adaptation: To make these cupcakes gluten-free, substitute the all-purpose flour with a 1:1 gluten-free baking flour blend that contains xanthan gum. Ensure all other ingredients are also gluten-free.
- Dairy-Free Option: For a dairy-free version, use plant-based butter (like vegan butter sticks), dairy-free eggnog (almond or oat eggnog), and plant-based milk in the buttercream if needed.
Step-by-Step Guide: How to Make Irresistible Eggnog Christmas Cupcakes
Creating these festive treats is a delightful process. Follow these detailed steps to ensure your cupcakes are perfectly moist, flavorful, and ready for decoration.
- Prepare Your Baking Station (STEP 1): Begin by preheating your oven to a precise 350 degrees F (175 degrees C). This ensures the oven is at the correct temperature for even baking. Line a standard 12-cup muffin tin with festive paper cupcake liners. Using liners not only makes for easy cleanup but also adds a charming presentation.
- Cream the Butter and Sugar (STEP 2): In a large mixing bowl, combine the softened unsalted butter and granulated sugar. Using an electric mixer (stand or hand-held), beat these ingredients together on medium-high speed for 2-3 minutes. Continue until the mixture is visibly light in color and fluffy in texture. This creaming process incorporates air, which is crucial for light and airy cupcakes.
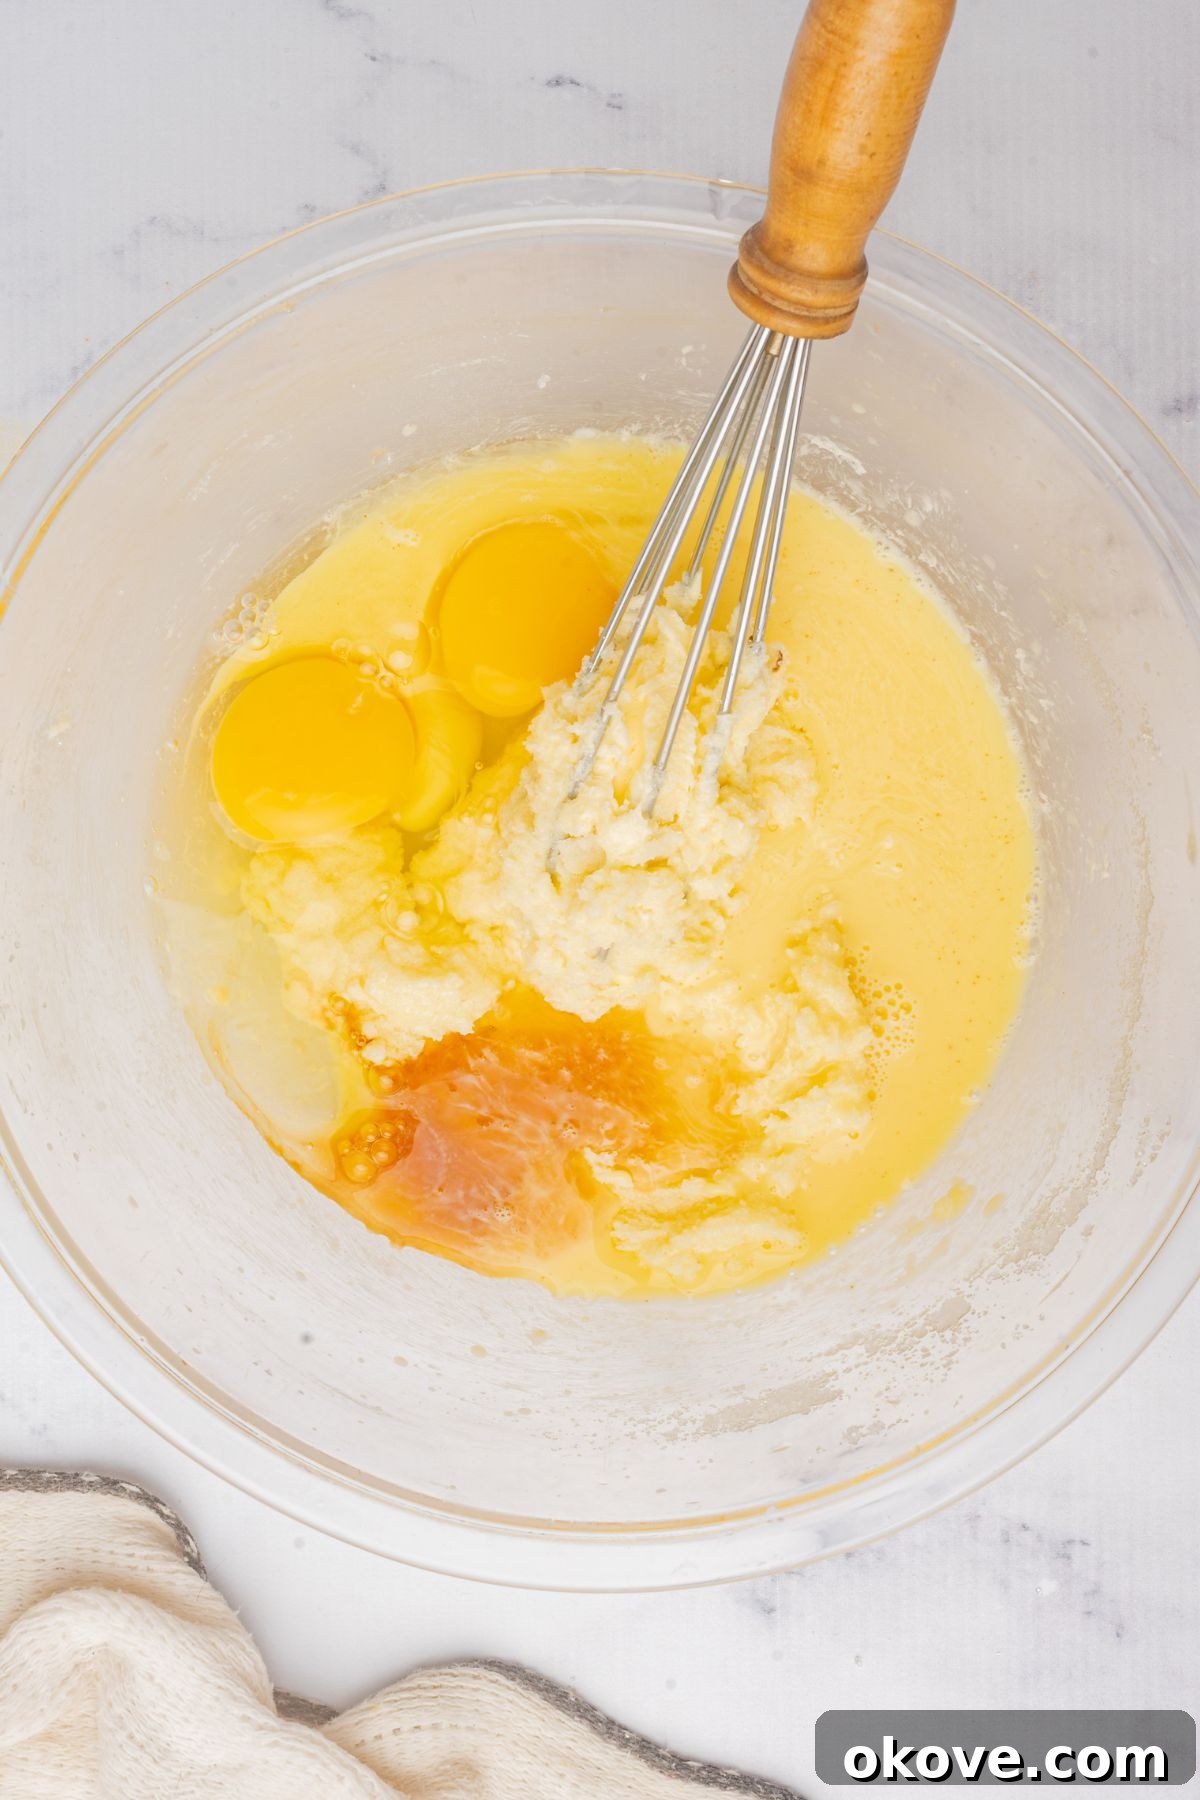
- Incorporate Wet Ingredients (STEP 3): Add the room temperature eggs one at a time, beating well after each addition until fully incorporated. Then, pour in the vanilla extract and the creamy eggnog. Continue mixing on low speed until all the wet ingredients are just combined. Be careful not to overmix at this stage to prevent a dense cupcake.
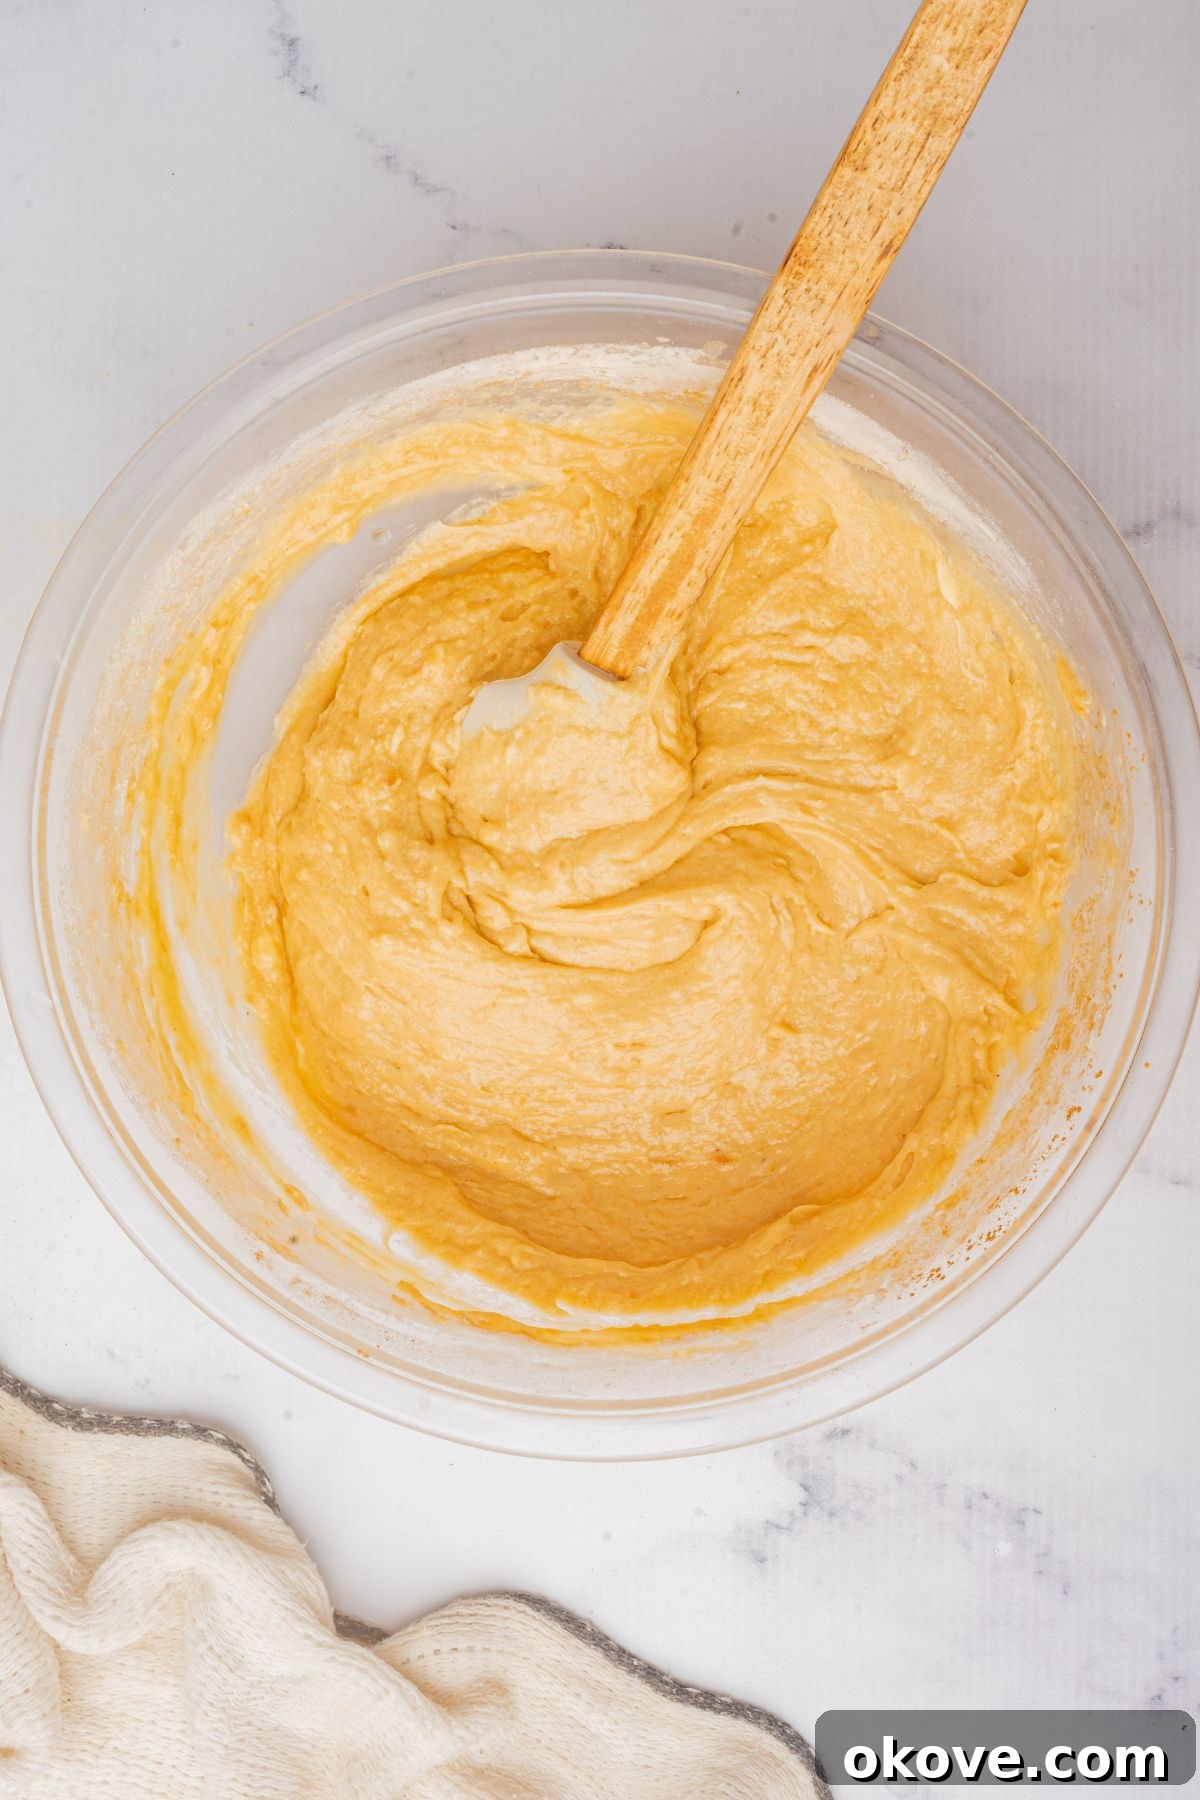
- Combine Dry Ingredients (STEP 4): In a separate bowl, whisk together the all-purpose flour, baking powder, and ground cinnamon. This ensures the leavening and spices are evenly distributed. Gently sift these dry ingredients into the wet mixture in the large bowl. Mix on the lowest speed just until no streaks of flour remain. Overmixing the batter can develop the gluten in the flour too much, leading to tough, chewy cupcakes rather than tender ones.
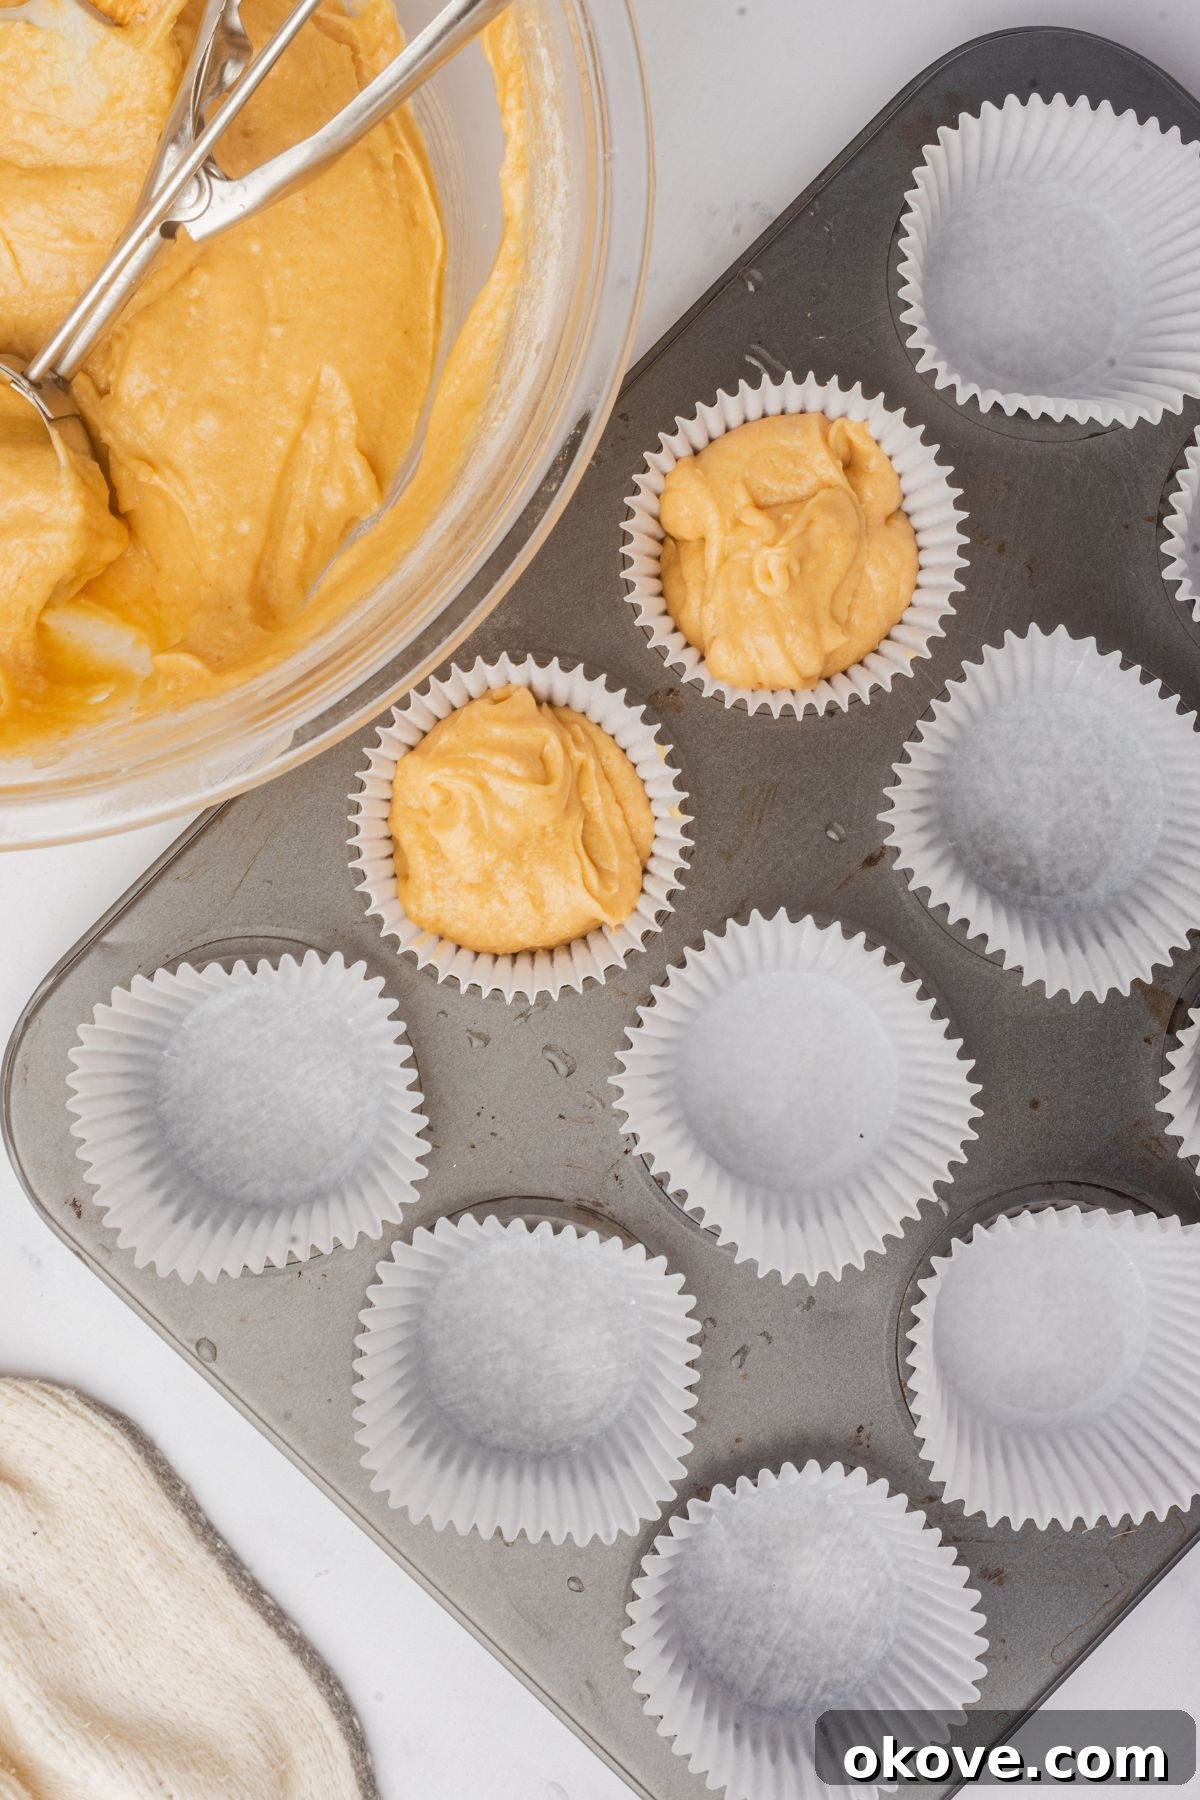
- Fill the Liners (STEP 5): Using an ice cream scoop or two spoons, divide the cupcake batter evenly among the prepared cupcake liners. Fill each liner approximately two-thirds full. This allows enough space for the cupcakes to rise without overflowing, ensuring a neat and uniform shape.
- Bake and Cool (STEP 6): Bake the cupcakes in your preheated oven for 18-20 minutes. To check for doneness, insert a toothpick into the center of a cupcake; it should come out clean. Once baked, remove the muffin tin from the oven and let the cupcakes cool in the pan for about 5 minutes. This brief cooling period helps them set. Then, carefully transfer the cupcakes to a wire rack to cool completely. It’s crucial for cupcakes to be entirely cool before frosting to prevent the buttercream from melting.
Crafting the Perfect Eggnog Buttercream Frosting
A perfect cupcake deserves a perfect frosting! This eggnog buttercream is light, airy, and bursting with holiday flavor.
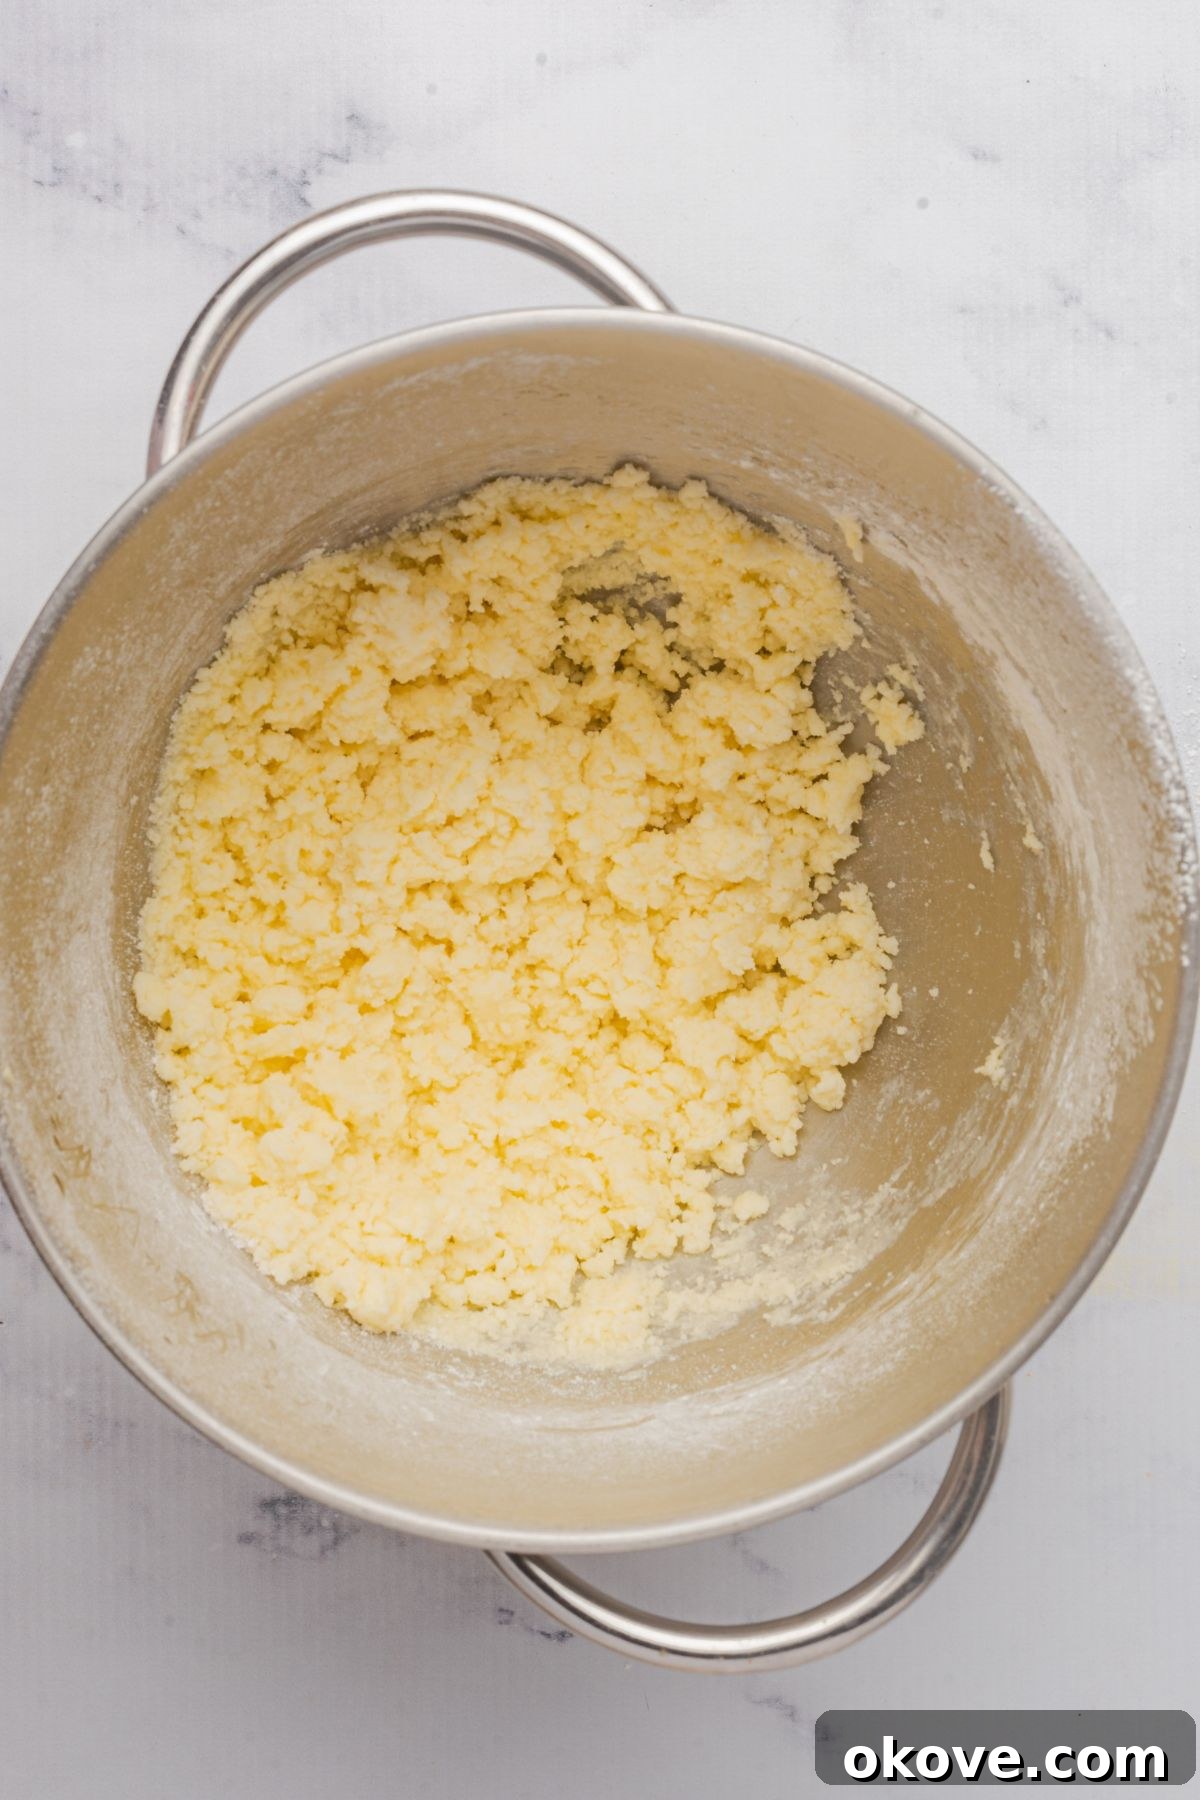
- Whip the Butter (STEP 7): In a clean mixing bowl, beat the softened butter with an electric mixer for 1-2 minutes until it’s incredibly smooth, pale, and creamy. This initial whipping is key to achieving a light and fluffy buttercream.
- Gradually Add Powdered Sugar: With the mixer on low speed, gradually sift in the powdered sugar, about half a cup at a time, beating until fully incorporated after each addition. Once all the sugar is added, increase the speed to medium-high and beat for another 2-3 minutes until the frosting is light and fluffy.
- Add Eggnog for Flavor and Consistency: With the mixer still running on low, slowly add the eggnog, one tablespoon at a time, until your desired consistency is reached. You might need slightly more or less depending on your butter and sugar. The frosting should be smooth, spreadable, and hold its shape well for piping.
- Color the Frosting (STEP 8): Set aside about 1/4 cup of the white buttercream for other decorations. To the remaining frosting, add a few drops of green gel food coloring. Mix on low speed until the color is uniform and vibrant. Gel food coloring provides intense color without altering the frosting’s consistency too much.
Creative Ways to Decorate Your Christmas Cupcakes
Now comes the most exciting part: transforming your delicious eggnog cupcakes into festive works of art! Here are four delightful holiday-themed decoration ideas to spark your creativity.
Charming Snowman Cupcakes
Create a snowy wonderland on top of your cupcakes! These adorable snowmen are simple to make and bring a smile to everyone’s face.
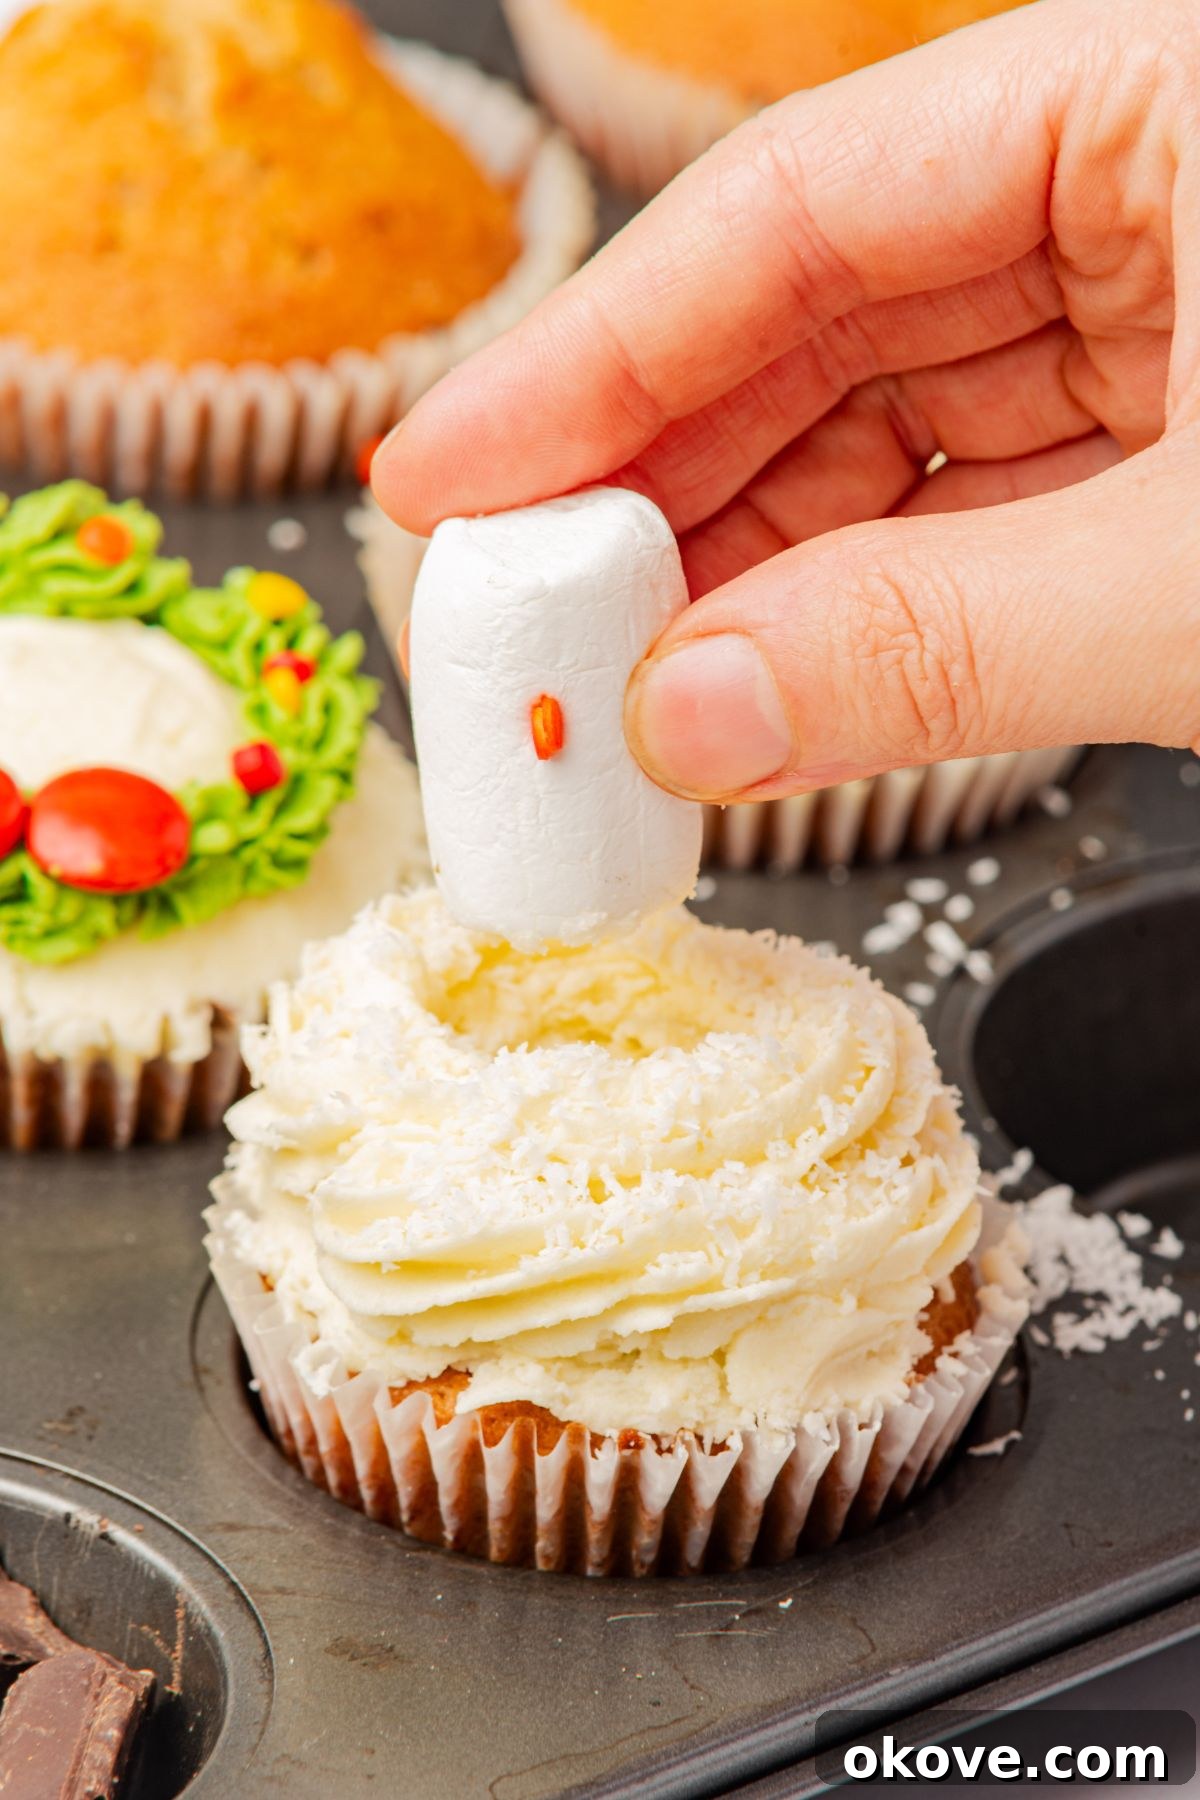
- Frost the Base: Using a round piping tip or simply a knife, spread or pipe a generous circle of white eggnog buttercream onto each cooled cupcake. This will form the snowman’s body.
- Add the Head: Gently press a mini marshmallow into the center of the frosted cupcake to create the snowman’s head.
- Melt Chocolate for Details: Melt a small amount of dark chocolate in a microwave-safe bowl (microwave in 15-second intervals, stirring in between). Transfer the melted chocolate to a small piping bag with a tiny hole, or simply use a toothpick or skewer dipped in the chocolate.
- Draw the Face: Carefully use the melted chocolate to draw two small dots for the eyes and a small curved line for the mouth on the marshmallow head.
- Give Him a Nose: Press a tiny orange sprinkle (or a small piece of orange candy) onto the marshmallow for the snowman’s carrot nose.
- Add Snowy Texture: For an extra touch of realism, sprinkle a bit of shredded coconut around the base of the snowman to mimic fresh snow.
Elegant Christmas Wreath Cupcakes
These festive wreaths are a classic and beautiful way to decorate your holiday cupcakes, adding a touch of traditional charm.
- Prepare the Cupcake Base: Ensure your cupcakes are completely cool. If the tops are domed, gently trim them flat with a serrated knife. Lightly spread a thin layer of white eggnog buttercream across the top of the cupcake as a base.
- Color the Green Frosting: If you haven’t already, mix green gel food coloring into a portion of your white eggnog buttercream until you achieve a vibrant holiday green.
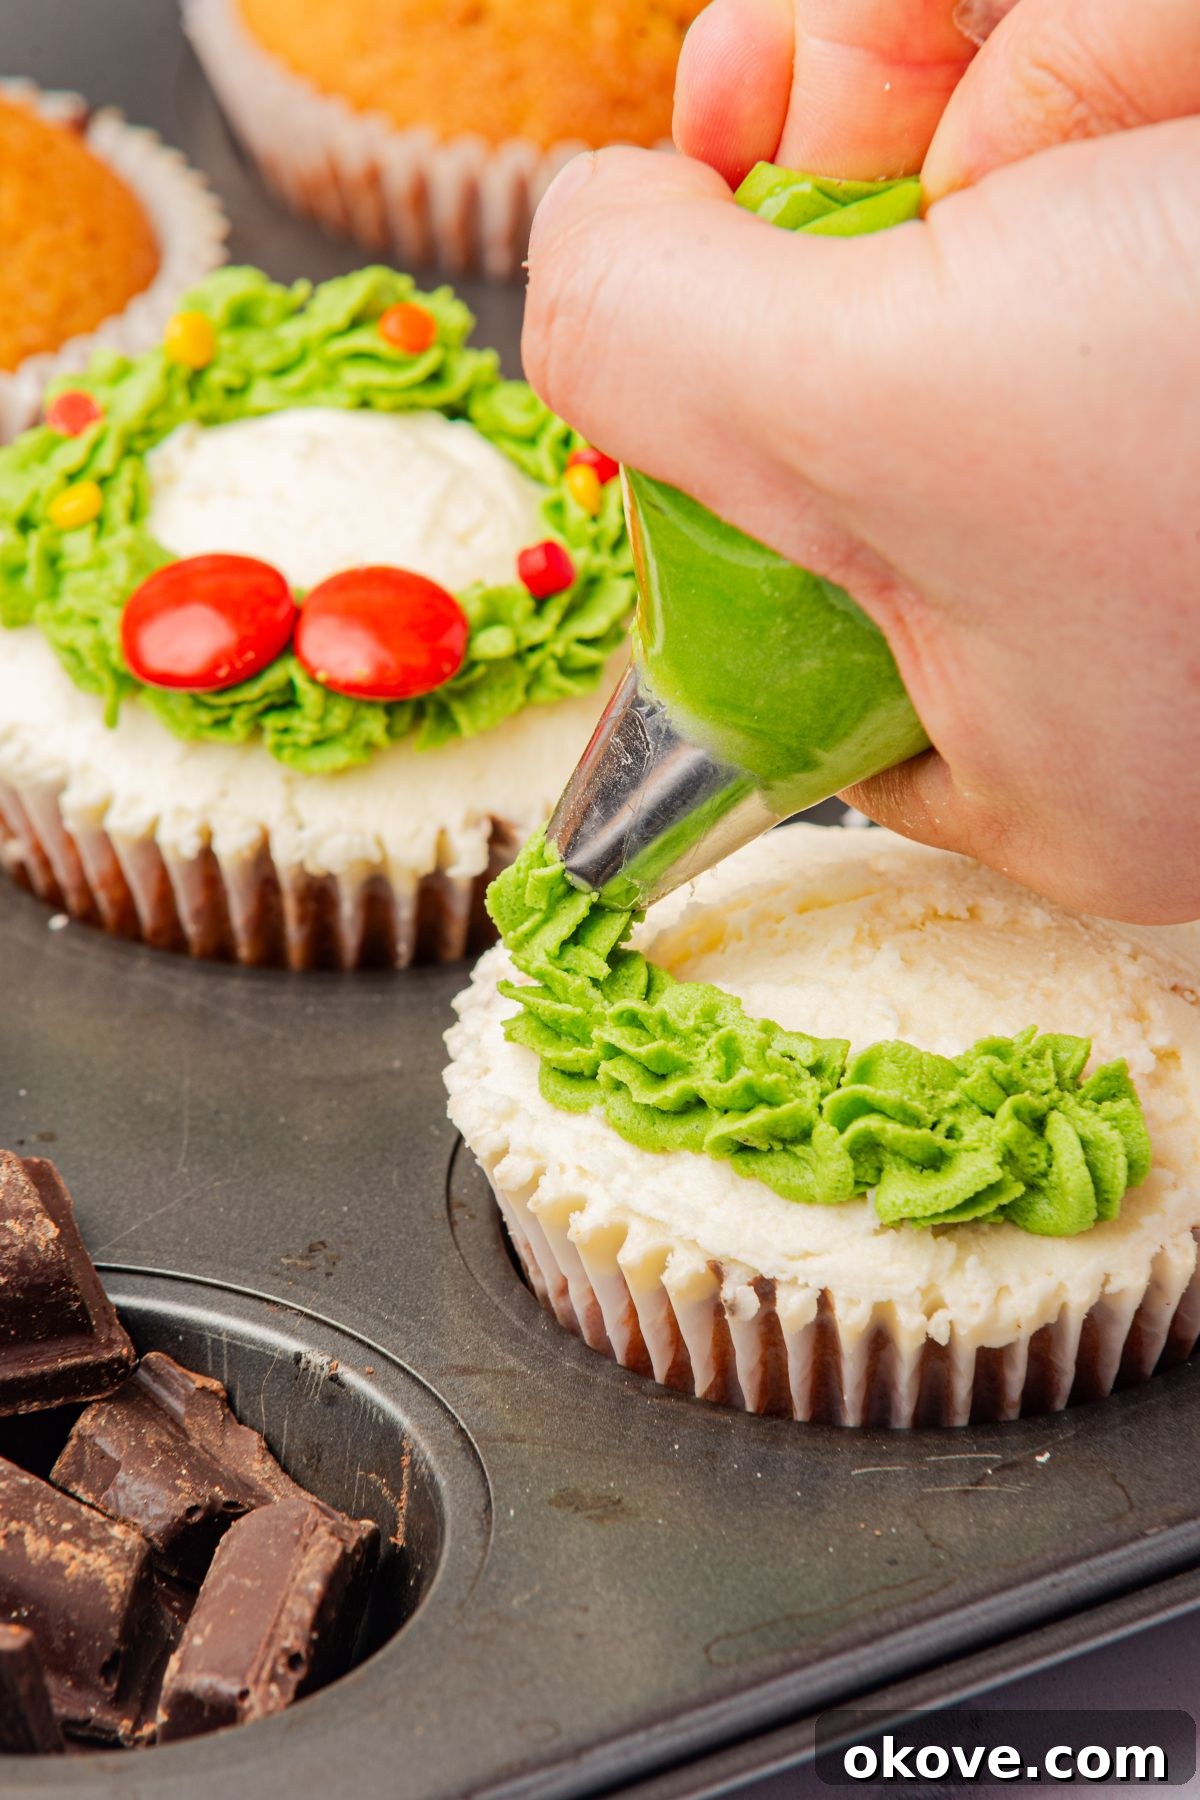
- Pipe the Wreath: Load the green frosting into a piping bag fitted with a small star tip (like Wilton 16, 17, or 21) or a leaf tip (like Wilton 349 or 66). Pipe small stars, rosettes, or leaves in a circular pattern around the edge of the cupcake, forming a beautiful wreath shape.
- Decorate with Ornaments: While the frosting is still fresh, gently press small red sprinkles, nonpareils, or tiny red candy beads onto the green wreath to mimic cranberries or ornaments.
Whimsical Christmas Lights Cupcakes
Brighten up your dessert table with cupcakes adorned with colorful, tangled Christmas lights!
- Create a Smooth Base: Trim the cupcake tops if necessary to create a flat surface. Spread a thin, even layer of white eggnog buttercream over the entire top of each cooled cupcake.
- Melt Dark Chocolate: Melt a small amount of dark chocolate as described for the snowman cupcakes. Transfer it to a very small piping bag (or a ziploc bag with a tiny snipped corner) or use a toothpick.
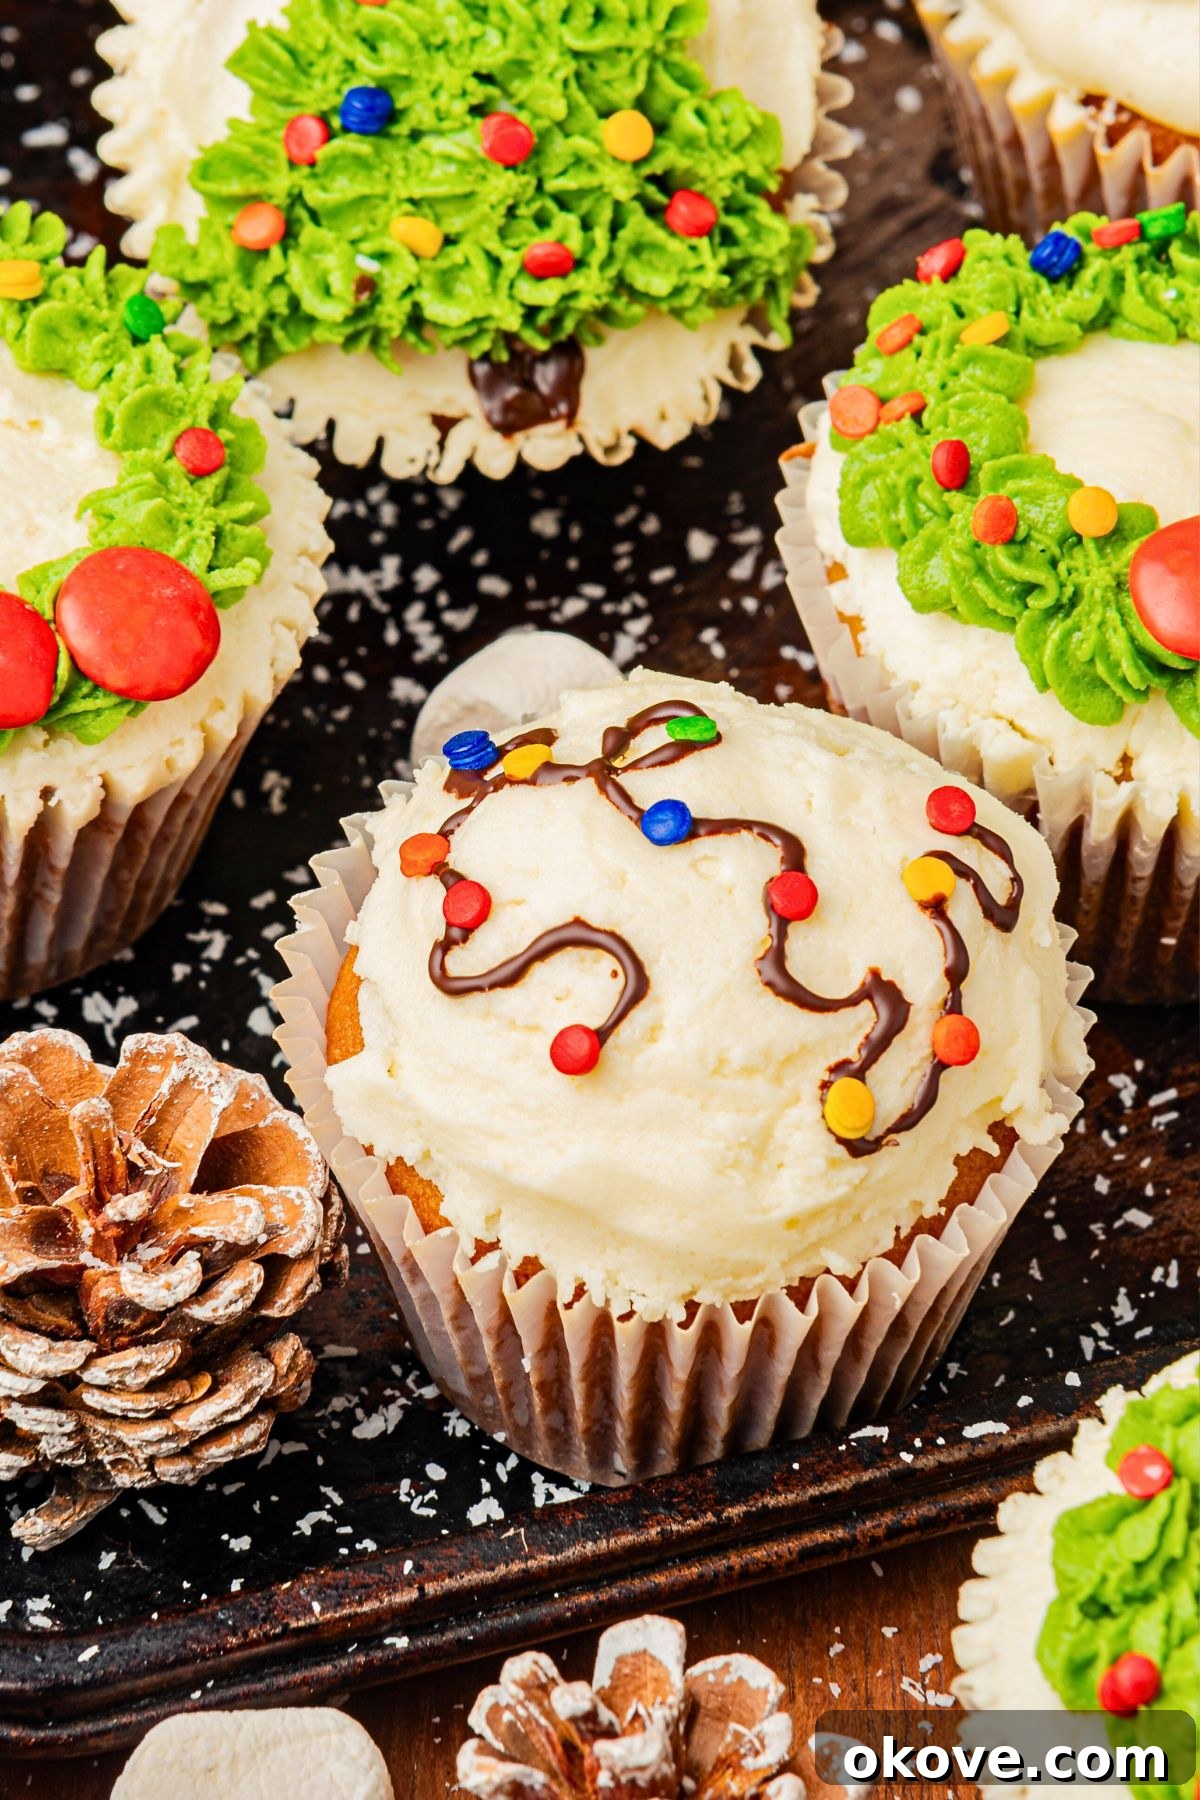
- Draw the Wiring: Using the melted dark chocolate, draw whimsical, swirling, or zigzag lines across the white frosting to create the illusion of tangled Christmas light wires. Get creative with the patterns!
- Add the Lights: Immediately after drawing the chocolate wires (before it sets), press colorful sprinkles (especially elongated ones or classic round ones) along the chocolate lines to represent the individual Christmas lights. The wet chocolate will act as an adhesive, ensuring the sprinkles stick.
Classic Christmas Tree Cupcakes
A miniature Christmas tree atop each cupcake is a delightful and iconic symbol of the holidays.
- Prepare the Cupcake Base: As with the wreath cupcakes, ensure your cupcake tops are flat. Spread a thin layer of white eggnog buttercream evenly over the top of each cupcake.
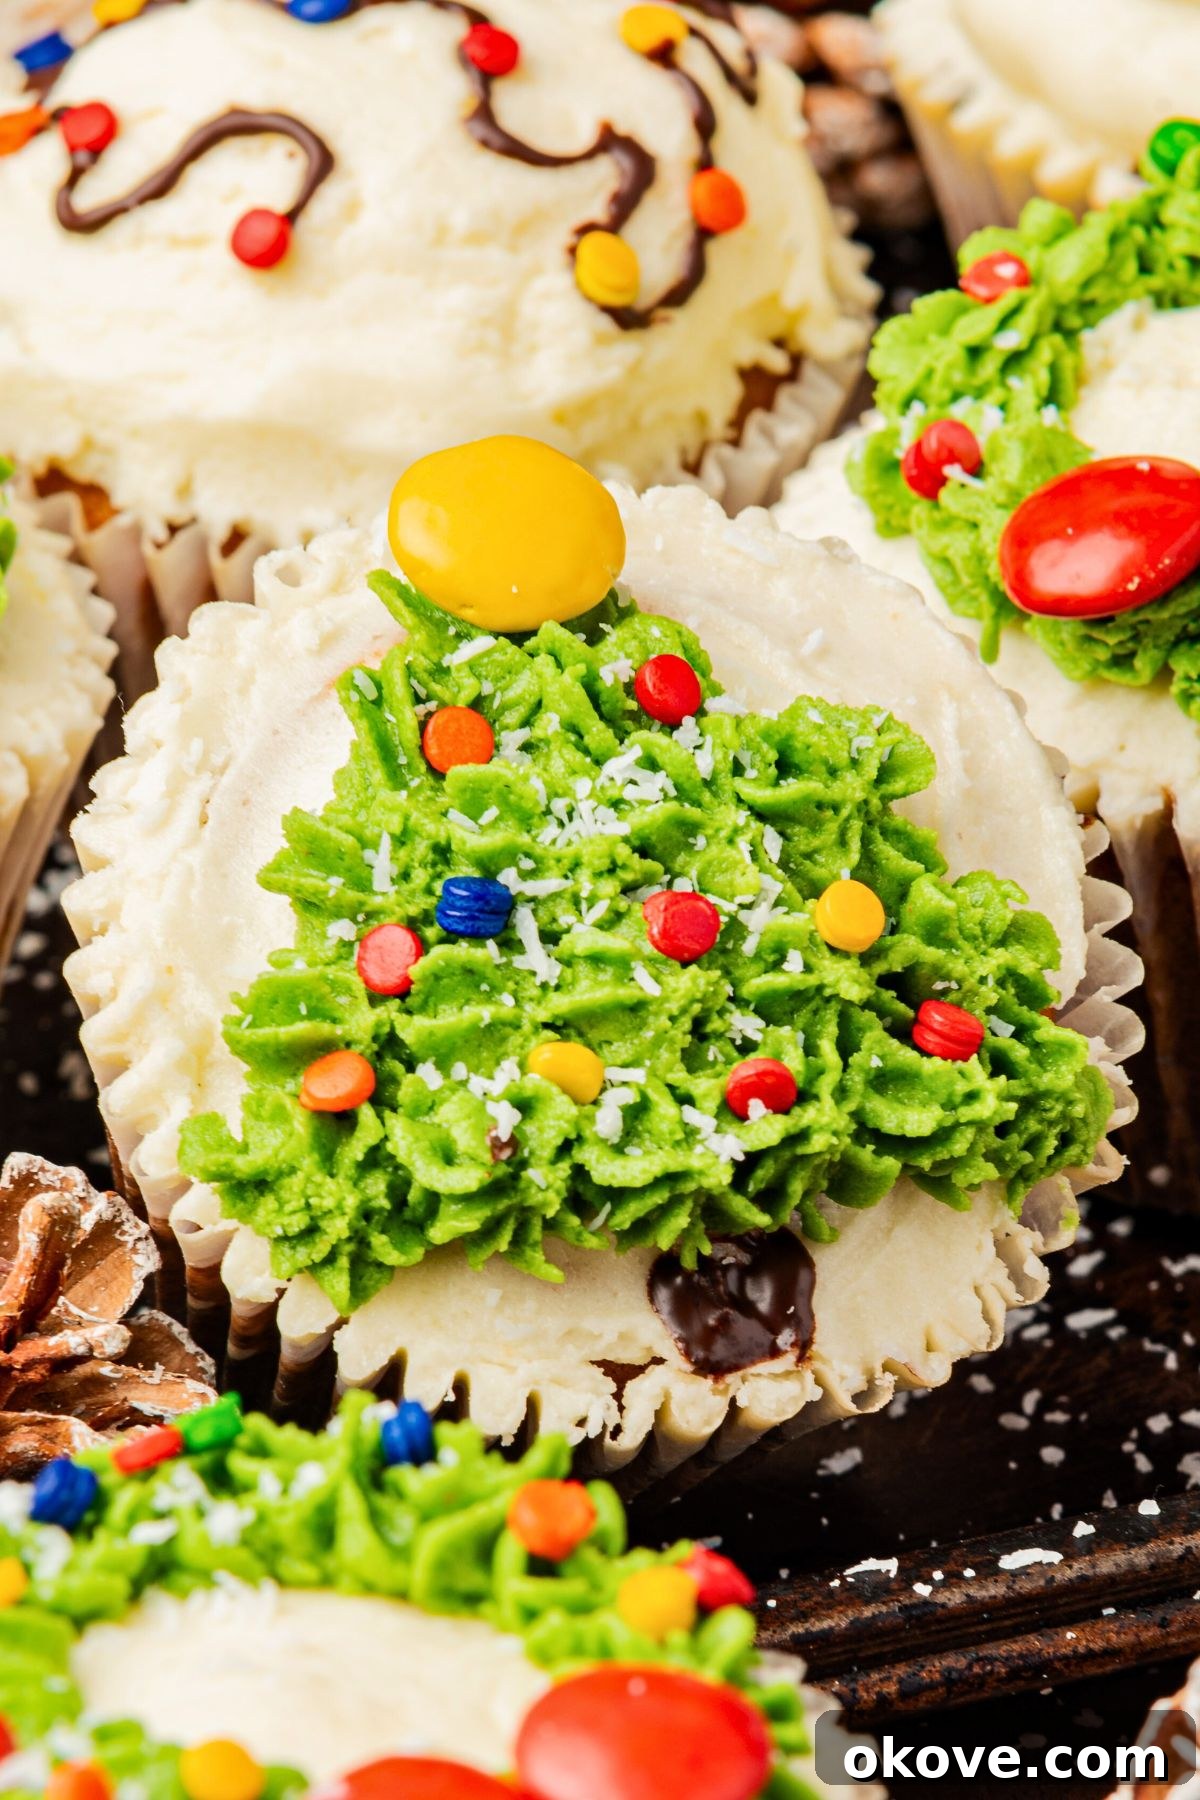
- Pipe the Tree: Fill a piping bag with your green eggnog buttercream, fitted with a small star tip (Wilton 16 or 17 are great for this). Starting from the outer edge of the cupcake, pipe concentric circles of stars or zigzags, gradually decreasing the size as you move upwards to form a conical Christmas tree shape. You can also pipe a few layers of overlapping star shapes directly upwards to build a tree.
- Decorate the Tree: Immediately adorn your green Christmas trees with small colorful sprinkles to act as festive ornaments. You can also use edible glitter for a shimmering effect.
- Add the Trunk: Melt a tiny bit of dark chocolate. Using a toothpick, draw a small brown trunk at the base of your piped Christmas tree.
If you’re new to piping and unsure which tips to use or how to create these looks, resources like Wilton’s Piping Tips 101 video are incredibly helpful for getting started! For a great cake decorator set or bakeware, explore options in my shop for all your baking needs!
Expert Tips for Baking the Best Eggnog Christmas Cupcakes
Achieving bakery-quality cupcakes at home is easier than you think with these simple tips:
- Embrace Room Temperature Ingredients: This is arguably the most crucial tip! Ensure your butter and eggs are at room temperature. Softened butter creams smoothly with sugar, incorporating more air for a lighter cupcake. Room temperature eggs emulsify better with the fats in the batter, resulting in a cohesive, smooth mixture and a more tender, uniform crumb.
- Avoid Overmixing the Batter: Once you add the dry ingredients to the wet, mix only until just combined. Overmixing develops the gluten in the flour, leading to dense, tough, and chewy cupcakes. A few lumps are perfectly fine!
- Cool Completely Before Decorating: Patience is a virtue here! Warm cupcakes will melt your beautifully crafted buttercream frosting, leading to a messy disaster. Ensure your cupcakes are completely cool to the touch, ideally chilling them in the refrigerator for a few minutes if you’re in a hurry.
- Customize Your Decorations: Don’t be afraid to get creative! Experiment with different piping tips to create unique textures and designs for your trees and wreaths. Play with a variety of colorful sprinkles, edible glitters, or even small candies to add your personal touch and make each cupcake truly unique.
- Measure Flour Accurately: For consistent results, always measure your flour using the spoon-and-level method. Spoon flour into your measuring cup until it’s overflowing, then level it off with a straight edge (like the back of a knife). Scooping flour directly from the bag can compact it, leading to too much flour and dry, crumbly cupcakes.
- Don’t Overfill Cupcake Liners: Filling liners more than two-thirds full can cause cupcakes to overflow, resulting in “mushroom tops” that are harder to frost. Stick to the recommended fill level for perfectly domed tops.
- Know Your Oven: Ovens can vary widely in temperature. If you find your cupcakes are baking too quickly or slowly, consider using an oven thermometer to verify your oven’s true temperature. This can make a big difference in baking success.
- Invest in Quality Ingredients: While shortcuts are sometimes necessary, using good quality butter, fresh eggs, and flavorful eggnog will elevate the taste of your cupcakes significantly.
Frequently Asked Questions (FAQs) About Christmas Eggnog Cupcakes
Absolutely! Store-bought eggnog works perfectly and is convenient, especially during the busy holiday season. If you have a favorite homemade eggnog recipe, that would also lend a delightful personal touch and even richer flavor to your cupcakes.
Due to the buttercream frosting, these cupcakes are best stored in an airtight container in the refrigerator. When stored properly, they should stay fresh and delicious for at least 3-4 days. For optimal taste and texture, allow them to come to room temperature for about 15-20 minutes before serving.
Yes, you can! For best results, freeze the unfrosted cupcakes. Once completely cooled, place them in a single layer in an airtight container or freezer bag. They can be frozen for up to 2-3 months. When you’re ready to enjoy them, thaw the cupcakes at room temperature for a few hours before frosting and decorating.
If you prefer not to use artificial food coloring, you have a few options. You can simply omit it and keep the frosting white, decorating with colorful sprinkles instead. For a subtle, natural green tint, you could try a small amount of matcha powder (it will impart a slight tea flavor) or spinach powder (though this can sometimes affect the taste). Alternatively, you can use naturally colored sprinkles for your green accents.
Cupcakes often sink due to several reasons: opening the oven door too early during baking, underbaking (not fully cooked in the center), overmixing the batter (which creates too much air that collapses), or using expired leavening agents (baking powder/soda). Ensure your oven temperature is accurate and bake until a toothpick comes out clean.
While you can prepare the batter a few hours in advance and store it in the refrigerator, it’s generally best to bake cupcakes immediately after mixing the wet and dry ingredients. Resting the batter too long can lead to less fluffy cupcakes, as the leavening agents start to lose their potency.
More Irresistible Holiday Desserts
Desserts
Grinch Fudge
Holidays
Classic Gingerbread Cookies
Holidays
Christmas Rice Krispie Treats
Desserts
Delightful Easter Cupcakes
Christmas Eggnog Cupcakes
Rebecca
9
20 mins
20 mins
30 mins
1 hr 10 mins
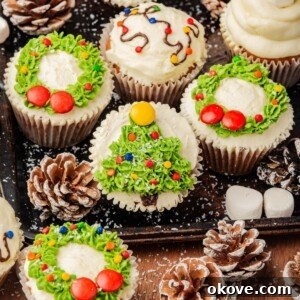
These easy Christmas cupcakes are a festive favorite I love to make during the holiday season. They’re moist, flavorful, perfectly spiced with eggnog, then topped with the most adorable decorations!
Equipment
- Cupcake Pan
- Large Mixing Bowls
- Electric Mixer (hand-held or stand mixer)
- Wire Rack
- Piping Bags and Tips (star, leaf, round)
- Microwave-safe Bowl (for melting chocolate)
- Toothpicks or Skewers
Ingredients
For the Cupcakes:
- 1/2 cup unsalted butter, softened to room temperature
- 3/4 cup granulated sugar
- 2 large eggs, room temperature
- 1/2 cup eggnog
- 1 teaspoon vanilla extract
- 1 1/2 cups all-purpose flour
- 1 teaspoon baking powder
- 1/4 teaspoon ground cinnamon
For the Eggnog Buttercream Frosting:
- 1/3 cup unsalted butter, softened to room temperature
- 1 3/4 cups powdered sugar
- 2 tablespoons eggnog, or milk (adjust for consistency)
Optional Decorations:
- Green gel food coloring
- Assorted sprinkles (colorful, orange for snowman nose)
- 2 tablespoons dark chocolate, for melting
- Mini marshmallows
- 2 tablespoons shredded coconut
Instructions
Cupcakes:
- Preheat your oven to 350°F (175°C) and line a 12-cup muffin tin with cupcake liners.
- In a large bowl, beat the softened butter and sugar with an electric mixer until light and fluffy, about 2-3 minutes.
- Add the eggs one at a time, beating well after each. Stir in the vanilla extract and eggnog. Mix until well combined.
- In a separate bowl, whisk together the flour, baking powder, and cinnamon. Sift these dry ingredients into the wet mixture. Mix on low speed until just combined, being careful not to overmix.
- Divide the batter evenly among the cupcake liners, filling each about 2/3 full.
- Bake for 18-20 minutes, or until a toothpick inserted into the center comes out clean. Cool the cupcakes in the pan for 5 minutes, then transfer them to a wire rack to cool completely before frosting.
Eggnog Buttercream Frosting:
- In a clean bowl, beat the softened butter for 1-2 minutes until smooth and creamy.
- Gradually sift in the powdered sugar, beating until combined.
- Add the eggnog one tablespoon at a time, beating until the desired smooth and fluffy consistency is reached.
- Set aside about 1/4 cup of the white buttercream. Mix green gel food coloring into the remaining frosting for decorating Christmas trees and wreaths.
Decoration Notes
Snowman Cupcakes:
Spread white frosting in a circle. Add a mini marshmallow for the head. Melt dark chocolate and use a toothpick to draw eyes and a mouth. Press an orange sprinkle for the nose. Sprinkle shredded coconut around the base for snow.
Christmas Wreath Cupcakes:
Frost cupcakes with a smooth, thin layer of white frosting (trim tops flat if needed). Fill a piping bag with green buttercream (using a small star or leaf tip, e.g., Wilton 16, 66) and pipe a circular wreath pattern. Decorate with small red sprinkles for berries.
Christmas Lights Cupcakes:
Spread a thin layer of white buttercream. Melt dark chocolate and use a toothpick or fine piping tip to draw wavy lines for light strings. Immediately place colorful sprinkles along the chocolate lines to represent lights before the chocolate sets.
Christmas Tree Cupcakes:
Spread a thin layer of white buttercream. Using green buttercream and a small star tip (e.g., Wilton 16, 17), pipe a Christmas tree shape, building up layers. Decorate with sprinkles for ornaments. Use melted dark chocolate to draw a small trunk at the base.
Nutrition Information (Approximate per serving)
443
kcal
60
g
5
g
21
g
13
g
1
g
6
g
1
g
97
mg
81
mg
103
mg
1
g
43
g
623
IU
0.3
mg
67
mg
2
mg
Nutrition information is automatically calculated, so should only be used as an approximation and is subject to variation based on specific ingredients and brands.
Additional Recipe Information
Cupcakes, Dessert, Holiday Treat
American, Holiday
Tried this festive recipe?
We’d love to see your beautiful creations! Mention @celebratingsimplyrecipes or tag #celebratingsimplyrecipes on Instagram. Happy holiday baking!