
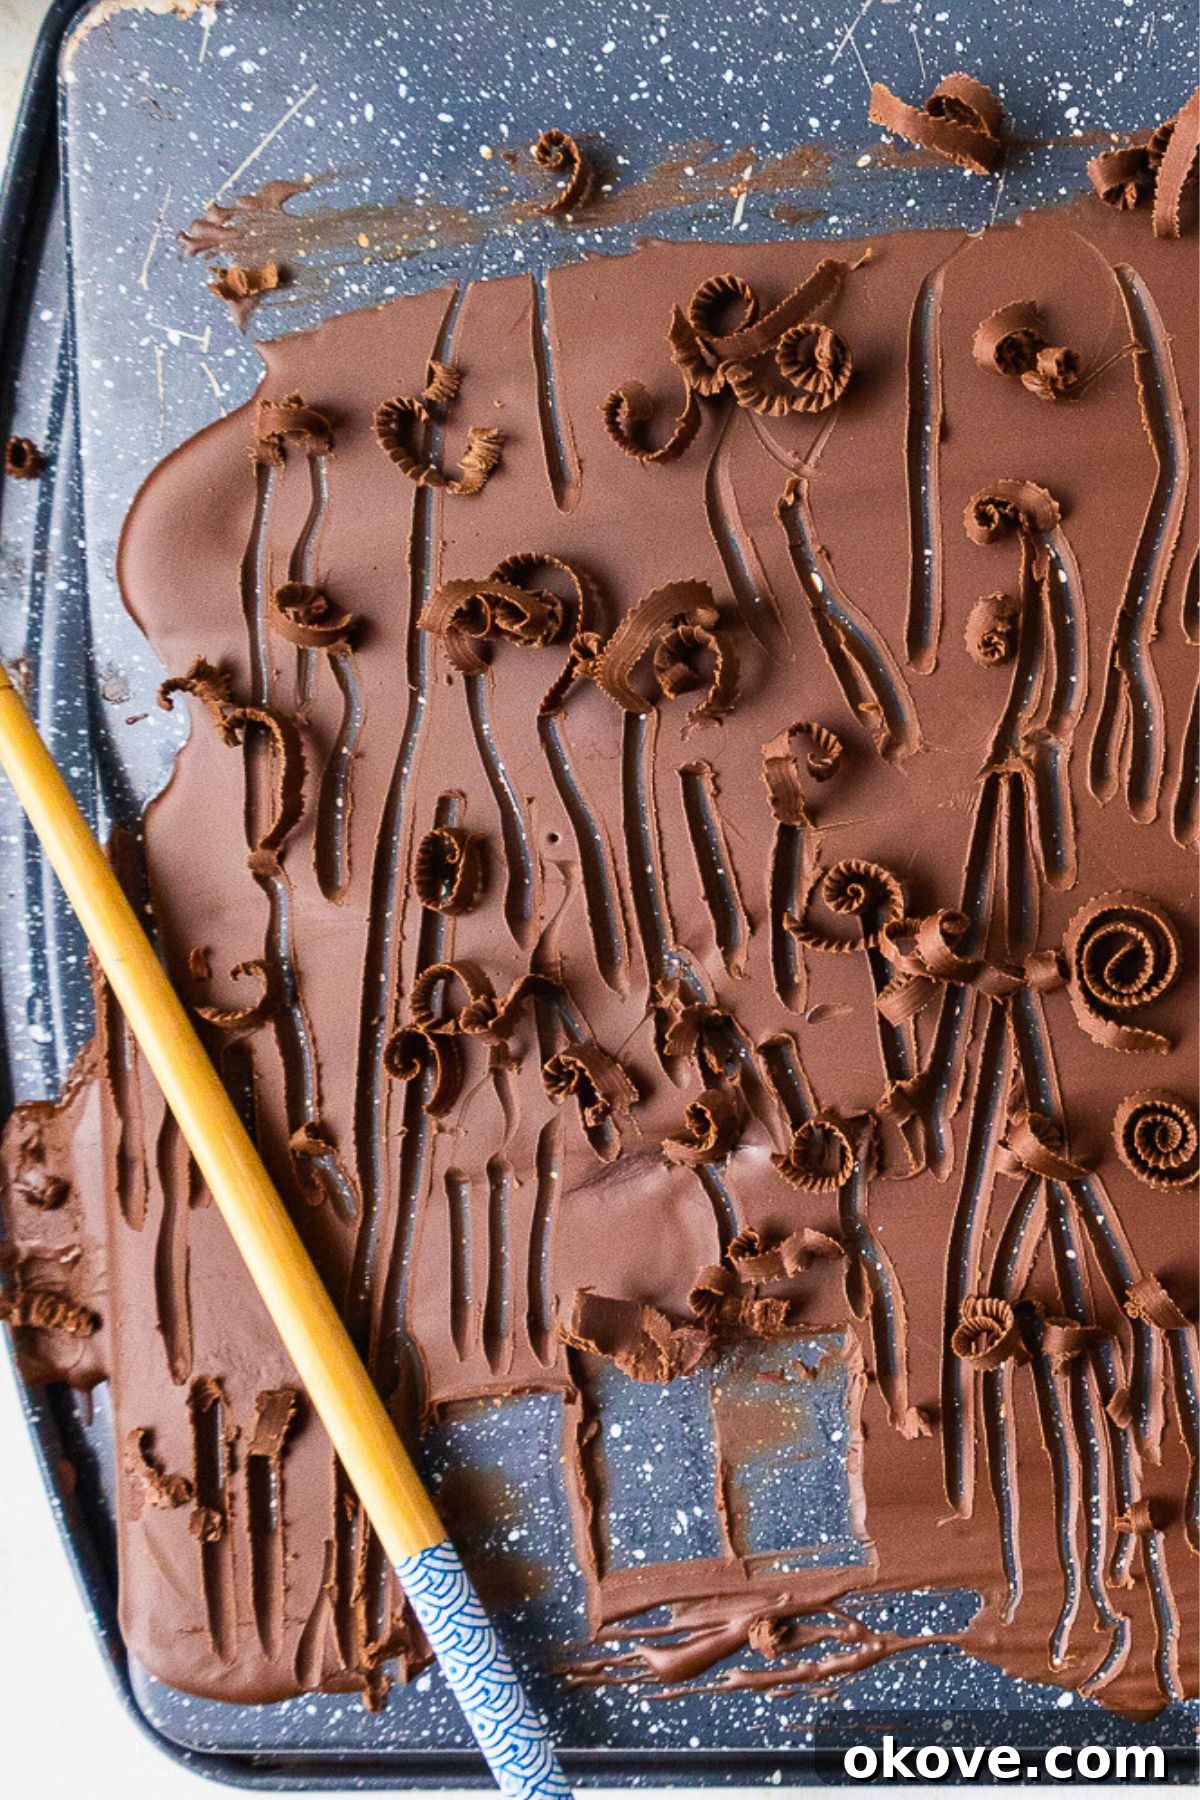
Chocolate curls are a simple yet stunning way to transform ordinary desserts into extraordinary culinary delights. Adding an elegant, professional touch to cakes, cupcakes, ice cream, and more, these delicate chocolate shavings are surprisingly easy to make right in your own kitchen. With just a couple of basic ingredients and a few straightforward steps, you can create a batch of beautifully crafted curls in minutes, ready to elevate any sweet treat. Forget expensive store-bought garnishes; mastering this accessible technique will open up a world of creative decorating possibilities and impress anyone who tastes your creations.
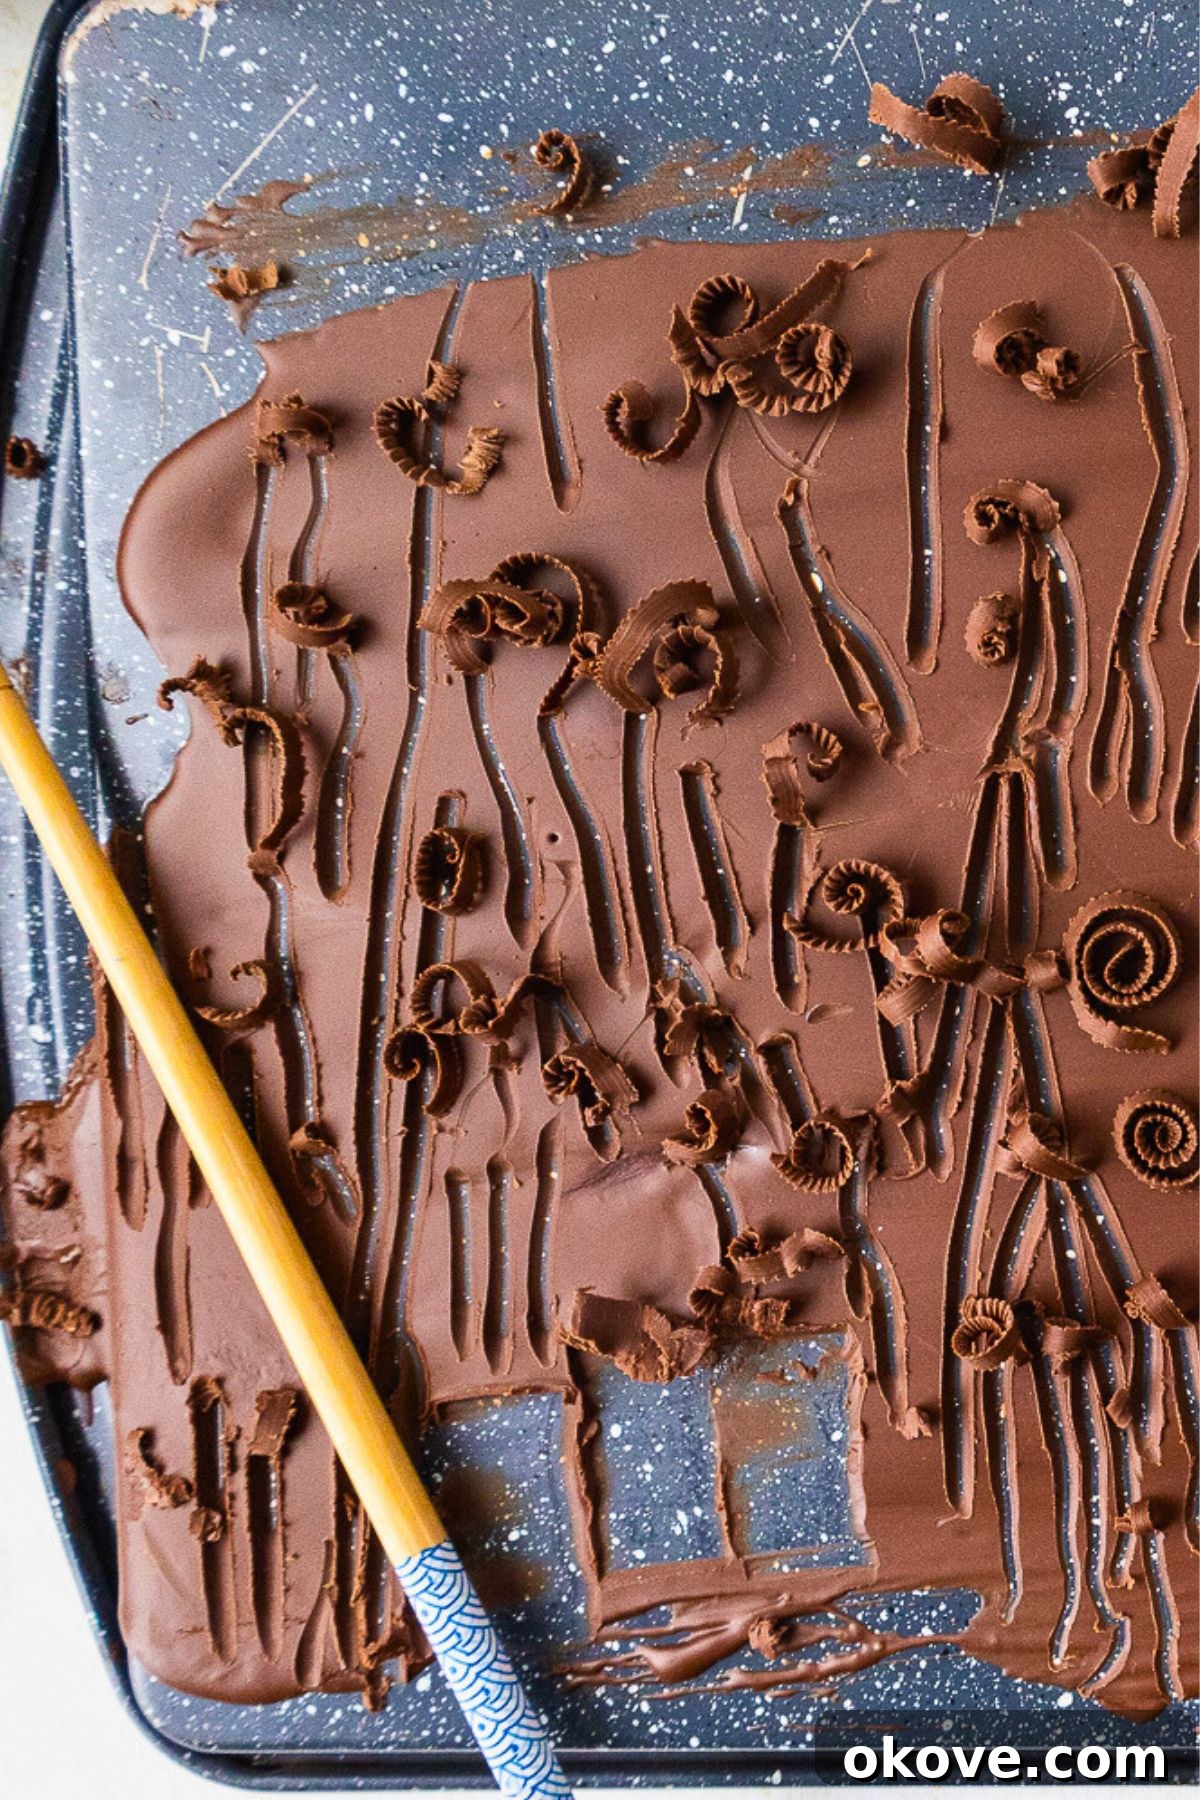
Mastering Easy Chocolate Curls: Elevate Your Dessert Decorations
Dreaming of decorating your desserts with those exquisite, delicate chocolate curls you often admire in high-end bakeries or patisseries? The excellent news is that crafting impressive chocolate curls at home is far simpler than you might envision. This comprehensive guide will walk you through a tried-and-true method to achieve perfect, aesthetically pleasing curls every single time. Whether you’re aiming for a polished, professional finish on a celebratory cake, adding flair to a batch of cupcakes, or simply want to introduce a touch of sophistication to an everyday dessert, this technique is a true game-changer. Homemade chocolate curls not only look fantastic but also offer a richer, fresher chocolate flavor compared to any pre-packaged alternatives, ensuring your desserts truly stand out.
Elevate your dessert game today by learning this fundamental decorating skill! By mastering the art of homemade chocolate curls, you can effortlessly transform a wide array of sweet treats into visually stunning masterpieces. Imagine topping creamy cheesecakes, luscious layer cakes, refreshing ice cream sundaes, or even garnishing a luxurious hot chocolate drink with these beautiful, melt-in-your-mouth chocolate shavings. The entire process is quick, incredibly rewarding, and requires minimal effort for maximum impact. Gather your essential ingredients and prepare to impress everyone with your newfound chocolate decorating prowess!
Essential Ingredients for Perfect Chocolate Curls
Creating exquisite chocolate curls requires surprisingly few ingredients, but the quality of these components plays a crucial role in achieving that coveted smooth, glossy finish and delightful texture. Here’s a detailed look at what you’ll need, along with expert tips for selecting the best options:
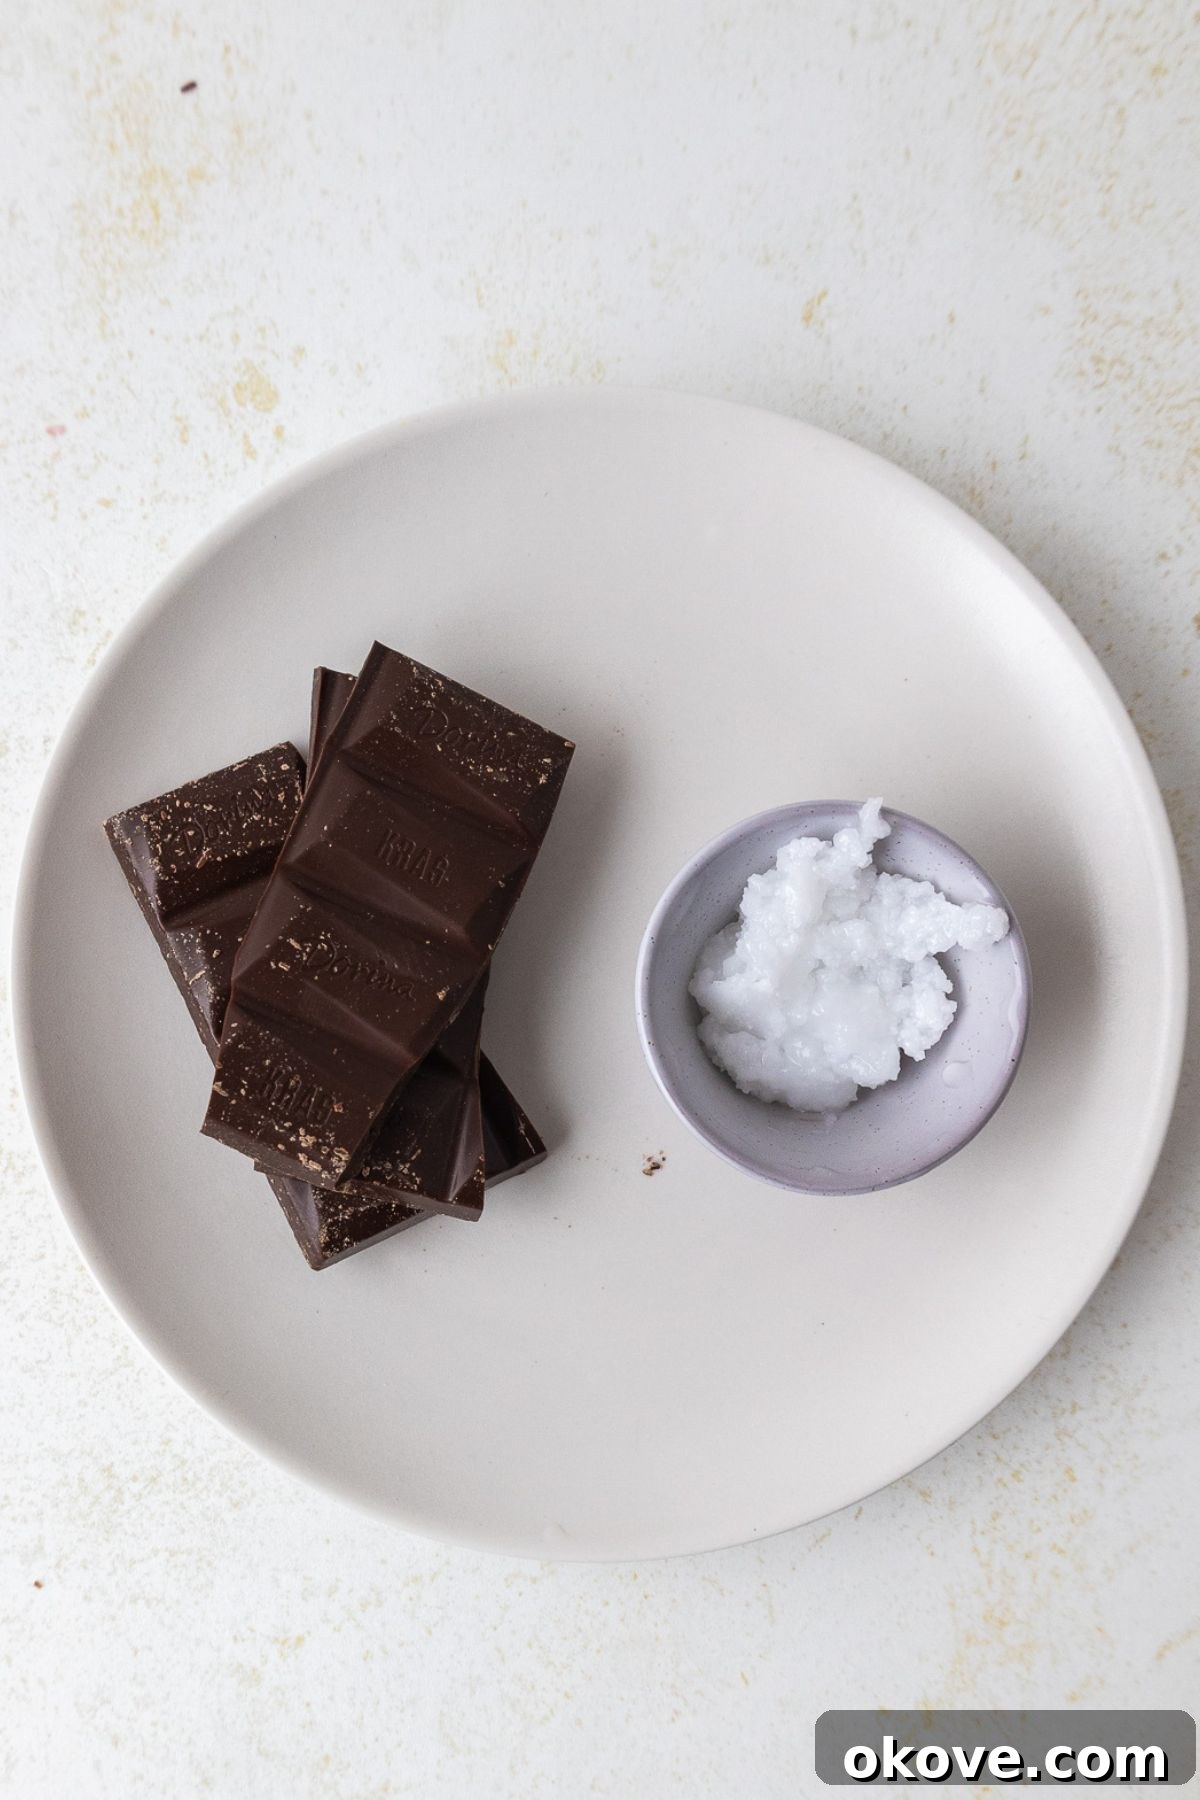
- High-Quality Chocolate (Dark, Milk, or White): You’ll need approximately 1/2 cup, which translates to about 6 ounces or 170 grams, of your preferred chocolate. The paramount factor here is “high-quality.” Superior chocolate melts more smoothly, is less prone to seizing, and holds its delicate shape beautifully when curled. Consider these options:
- Premium Chocolate Bars: Finely chopping a good quality baking bar (like couverture chocolate) often yields the most consistent and visually appealing results. These typically have a higher cocoa butter content.
- High-Quality Chocolate Chips: If using chips, opt for premium baking chips rather than standard eating chocolate chips. Eating chocolate chips often contain stabilizers (to help them retain their shape during baking) that can make smooth melting and curling more challenging.
- Compound Chocolate: While technically not “chocolate” in the purest sense (as it uses vegetable fat instead of cocoa butter), compound chocolate is an excellent choice for beginners. It’s much more forgiving and significantly easier to work with because it doesn’t require tempering and sets quickly and consistently.
- Coconut Oil: A small amount, typically just 1 teaspoon, is crucial for two primary reasons. Firstly, it significantly aids the chocolate in melting into a silky-smooth, pourable consistency, ensuring an even spread. Secondly, it contributes to a beautiful, lustrous, and glossy finish on your finished curls, making them look even more professional and appealing. You can use either refined or unrefined coconut oil; refined coconut oil has a neutral flavor, while unrefined will impart a subtle, pleasant coconut aroma.
Creative Variations and Flavor Combinations
Once you’ve confidently mastered the basic chocolate curling technique, feel free to unleash your creativity and experiment with these exciting variations to customize your chocolate curls, perfectly matching them to your dessert or desired theme:
- Oil Substitutions for Versatility: If coconut oil isn’t readily available, or if you simply prefer a completely neutral flavor profile, you can easily substitute it with other neutral-flavored oils. Excellent alternatives include vegetable oil, canola oil, grapeseed oil, or even a very light, flavorless olive oil. The primary goal of the oil is to facilitate smooth melting and impart a subtle sheen to the chocolate.
- Explore Diverse Chocolate Types: Don’t feel limited to just one type of chocolate!
- The Simplicity of Compound Chocolate: As previously mentioned, compound chocolate is a fantastic beginner-friendly option due to its inherently stable melting and setting properties. It’s commonly found in the baking or candy-making aisles of most grocery stores.
- Flavor Infusions for a Twist: For uniquely flavored curls, consider stirring in a few drops of food-grade extract (such as refreshing peppermint, nutty almond, bright orange, or classic vanilla) into your melted chocolate before spreading. Ensure the extract is oil-based to prevent the chocolate from seizing.
- Vibrant Colored Curls: To create eye-catching, festive curls, use white chocolate as your base. Tint it with oil-based food coloring (avoid water-based dyes, which will cause white chocolate to seize and become unusable). This opens up endless possibilities for holiday or themed desserts.
- Stunning Marbled Chocolate Curls: For a truly striking visual effect, combine two different types of melted chocolate. Melt white chocolate and either dark or milk chocolate separately. Carefully pour both melted chocolates onto your baking sheet. Then, using a wooden spoon or skewer, gently swirl them together just once or twice to create a beautiful, organic marbled pattern before allowing the mixture to cool and set.
- Quick & Easy Chocolate Bar Curls: In a pinch, when you need beautiful chocolate curls instantly, simply grab a standard milk chocolate candy bar (or your favorite type). The key is to ensure the chocolate bar is at room temperature – if it’s too cold, it will snap into pieces; if it’s too warm, it will smudge. Using a clean vegetable peeler, gently scrape along the long side of the chocolate bar. The consistent pressure and precise angle of the peeler will create lovely, delicate, and thin curls directly from the bar. This method is perfect for last-minute garnishes or a speedy treat.
Step-by-Step Guide: How to Craft Perfect Chocolate Curls
Creating flawless chocolate curls is a straightforward process that yields incredibly impressive results. Follow these detailed steps meticulously to ensure success and beautifully formed curls every time you try:
Phase 1: Preparation and Melting Your Chocolate
- Prepare Your Chocolate: Begin by finely chopping your chosen high-quality chocolate into small, uniform pieces. If you’re using chocolate chips, ensure they are good quality baking chips for optimal, smooth melting. Smaller, consistently sized pieces will melt more evenly and quickly, significantly reducing the risk of scorching or uneven textures.
- Melt the Chocolate with Oil: Place the finely chopped chocolate (or chips) into a microwave-safe bowl. Add 1 teaspoon of coconut oil to the bowl. Microwave the mixture in short, controlled intervals – typically 15 to 20 seconds at a time – stirring thoroughly and gently after each interval. Continue this process until the chocolate is completely smooth, glossy, and free of any lumps. It’s crucial not to overheat the chocolate, as this can cause it to seize (become grainy and unusable) or burn. As an alternative, for a more controlled melting process, you can melt the chocolate over a double boiler, stirring continuously until perfectly smooth.
Phase 2: Spreading and Achieving the Ideal Consistency
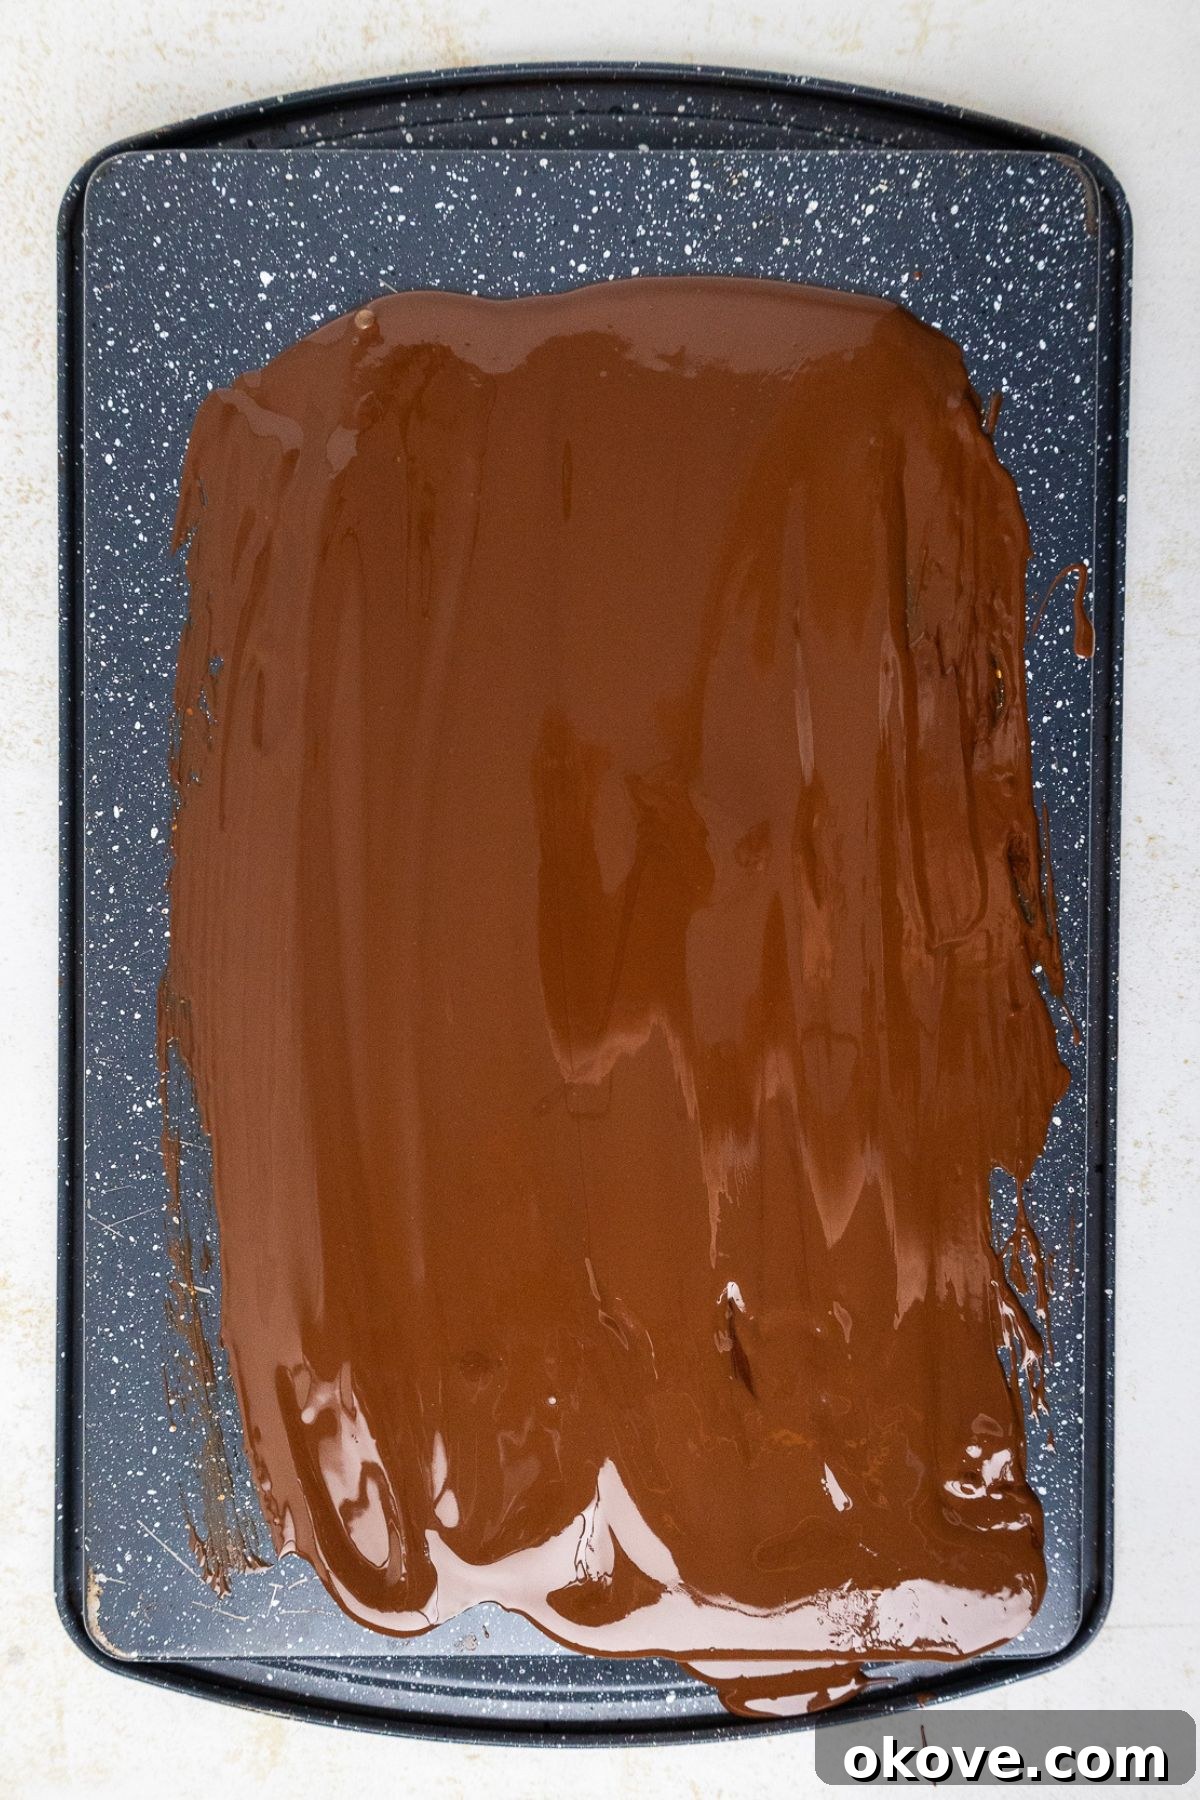
- Spread the Chocolate Thinly: Once your chocolate mixture is perfectly melted and smooth, carefully pour it onto a clean, flat, and cool surface. The back of a sturdy baking sheet is an ideal choice due to its smooth surface, but a marble slab or a large, sturdy cutting board also works exceptionally well. Using a metal offset spatula or a bench scraper, swiftly and evenly spread the chocolate into a very thin, uniform layer. The thinner and more consistent the layer, the more delicate, elegant, and perfectly formed your curls will be. Aim for a thickness of approximately 1 to 2 millimeters.
- Chill to the Right Pliable Consistency: This step is arguably the most critical for achieving perfectly formed curls. Carefully place the baking sheet with the thinly spread chocolate into the freezer for a brief period, usually about 3 minutes. The precise timing can vary based on your freezer’s temperature and the chocolate’s initial warmth. The primary goal is for the chocolate to firm up slightly but remain pliable and flexible.
- How to Check for Ideal Consistency: Gently press a clean fingertip onto the chocolate surface. If it leaves a clear indent and the chocolate still feels very soft and sticky, it’s too warm; it will only smudge when you attempt to curl it. If, however, the chocolate cracks or breaks instantly when pressed, it’s too cold and brittle, and will not curl effectively.
- Adjusting Temperature: If your chocolate is too soft, return it to the freezer for another minute and re-check. If it becomes too cold and brittle, remove it from the freezer and let it sit at room temperature for a minute or two until it reaches that perfect pliable consistency. The ideal state is firm enough to hold its shape but soft enough to bend without breaking.
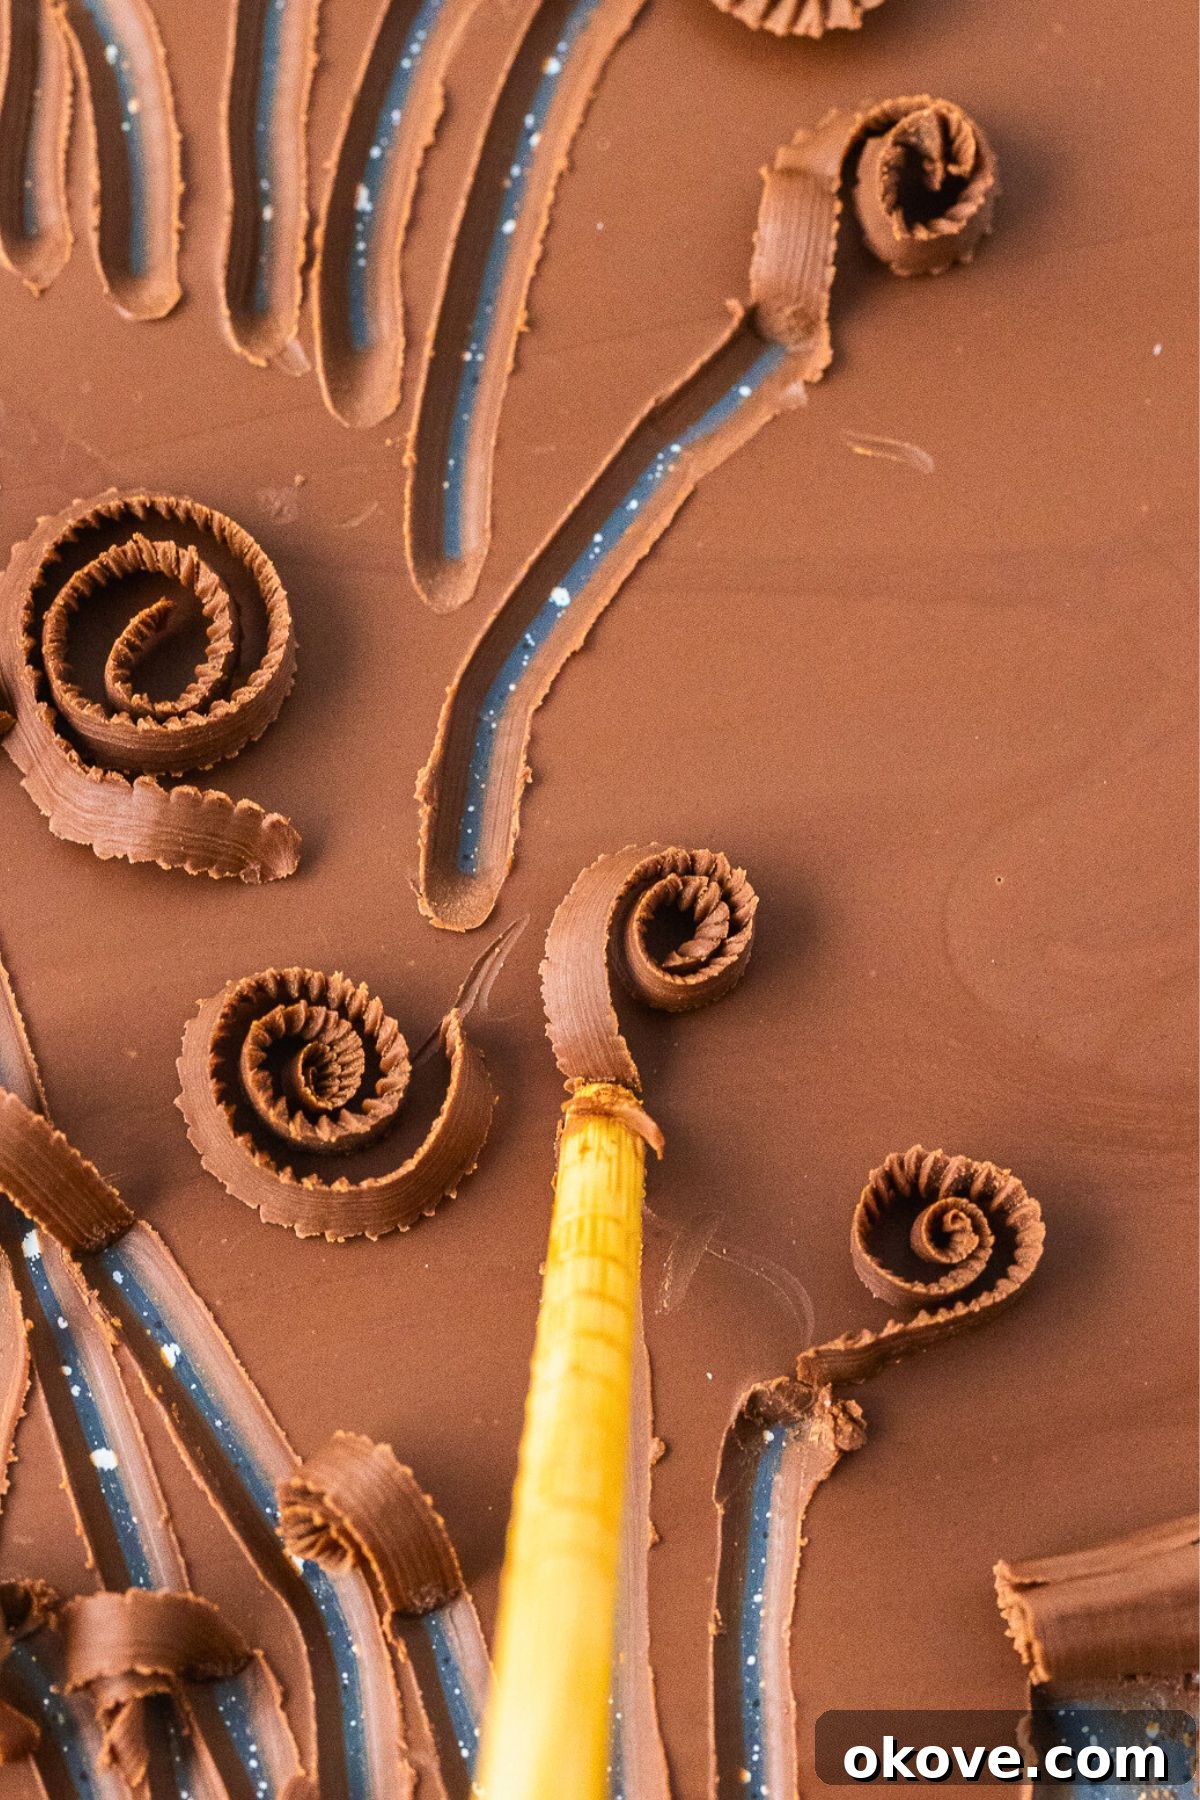
Phase 3: Crafting the Curls and Finishing Touches
- Create Your Curls: Now for the most satisfying part! The specific tool you use and the angle at which you apply it will directly influence the size, shape, and thickness of your finished curls.
- For Thin, Delicate Curls: Hold a chopstick or the flat side of a small wooden skewer at a very shallow angle (almost parallel to the chocolate surface). Apply gentle but firm, consistent pressure and scrape the surface of the chocolate away from your body. The thinly shaved layer of chocolate should gracefully peel up and curl into delicate spirals as you scrape.
- For Thicker, More Robust Curls: Use the sharp edge of a cheese knife, a metal spatula, or a bench scraper at approximately a 45-degree angle to the chocolate surface. Apply consistent, steady pressure and scrape along the chocolate’s surface. This technique will yield broader, more substantial curls with a satisfying presence.
- For Larger, Ribbon-Like Curls: An offset spatula or a wider bench scraper is an excellent choice for creating impressive, ribbon-like curls. Hold the tool at a slight angle and apply gentle, even pressure, allowing the chocolate to gracefully roll into elegant, larger ribbons as you push it across the surface.
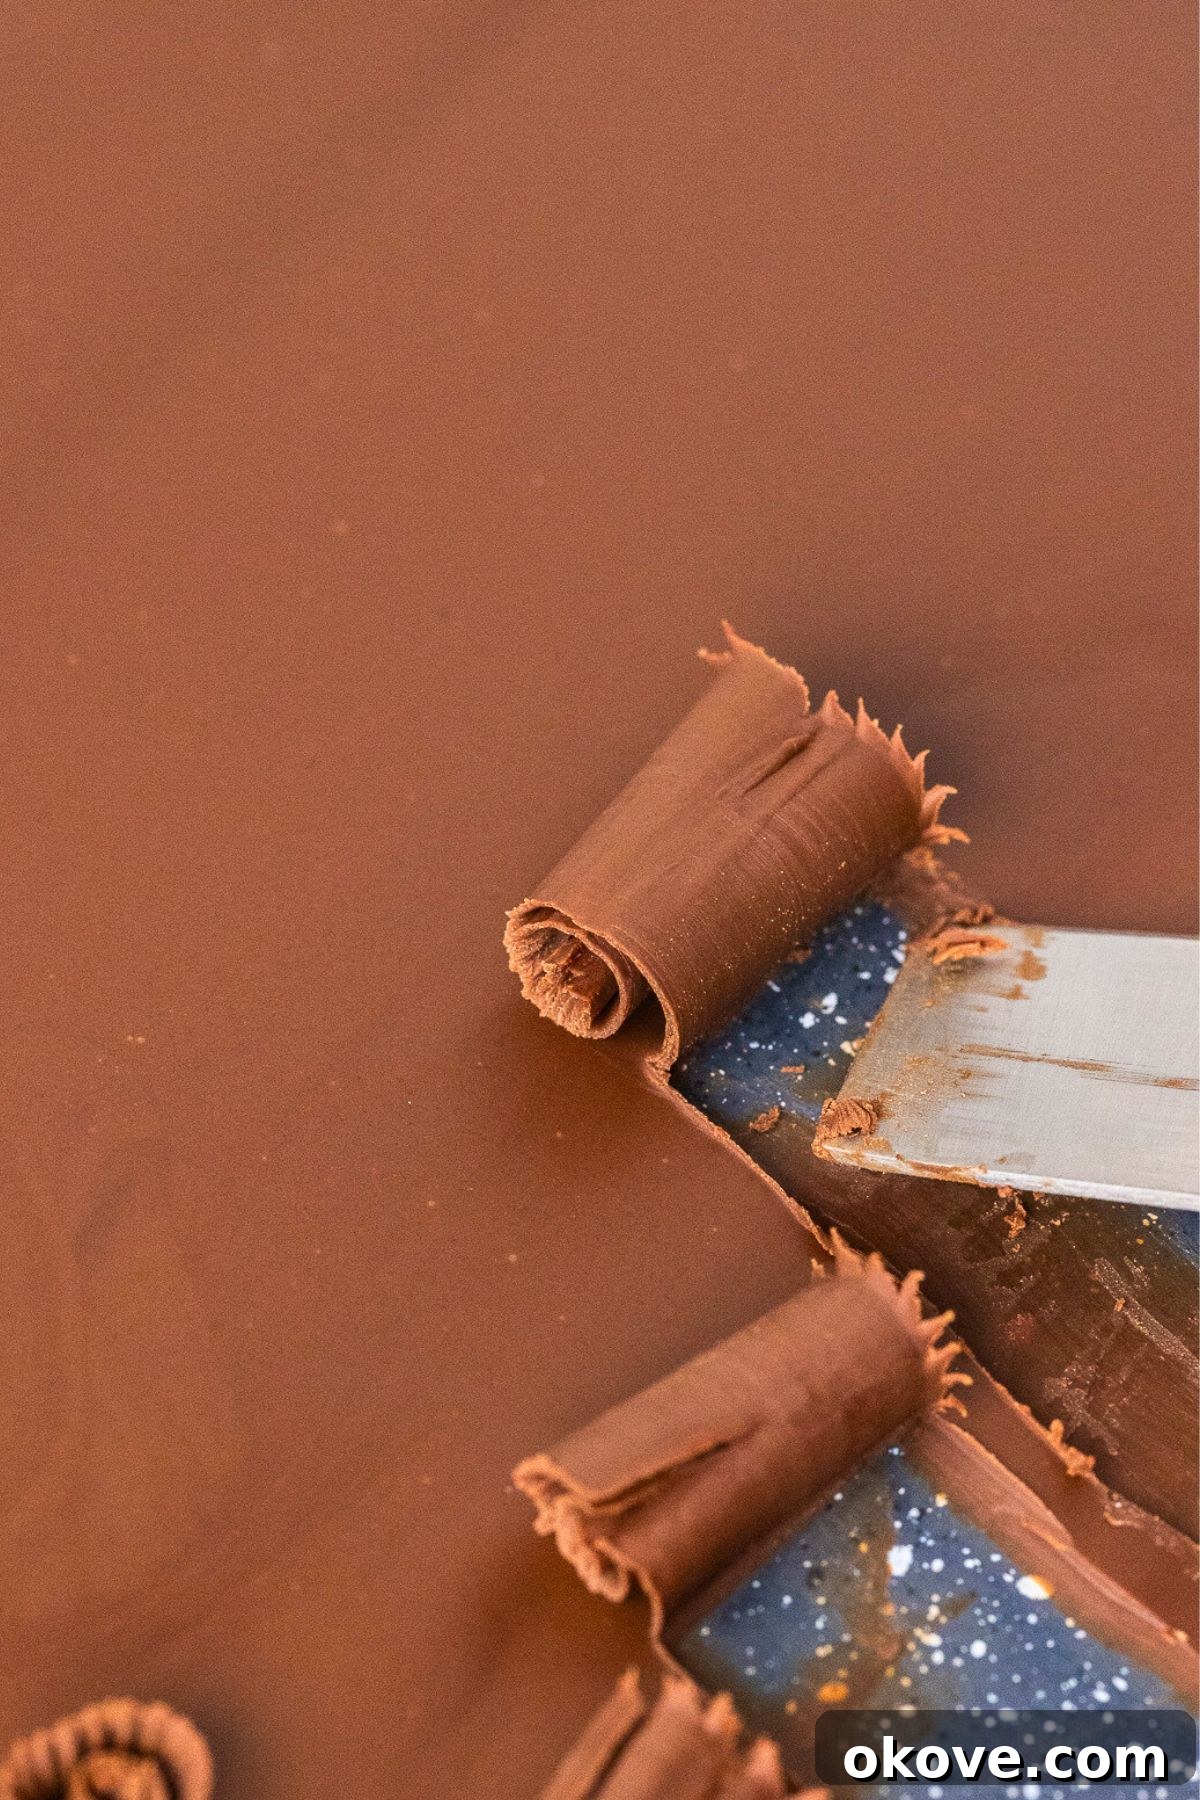
Phase 4: Setting and Optimal Storage
- Set the Curls Completely: Carefully transfer your freshly made chocolate curls to a clean plate or tray. Since they are still somewhat delicate and prone to melting, handle them with utmost care, perhaps using a thin spatula or your fingers if they are cool. Place the tray in the refrigerator for another 5-10 minutes. This final chill will fully harden the chocolate, making the curls stable, resilient, and less prone to melting or breaking when handled or added to desserts.
- Store for Later Use: Once the chocolate curls are completely hardened and firm, meticulously transfer them into an airtight container. Arrange them gently to avoid breakage. Store this container in the refrigerator until you are ready to use them. Properly stored, these beautiful homemade chocolate curls can maintain their freshness, shape, and flavor for up to 2 weeks, allowing you the convenience of preparing them in advance for any upcoming dessert projects or spontaneous cravings.
Expert Tips for Crafting Flawless Chocolate Curls
Achieving consistently beautiful chocolate curls can sometimes feel like a delicate art, but with these expert tips and insights, you’ll be creating stunning garnishes with confidence and ease:
- Prioritize High-Quality Chocolate: This tip cannot be overstated. Investing in high-quality chocolate (specifically, one with a good cocoa butter content) is paramount. Better chocolate melts more smoothly, sets more predictably, and ultimately yields curls that are not only more delicious but also more structurally sound and visually appealing. Avoid using waxy, low-quality chocolates that might crumble easily or impart a bland, artificial taste. Opt for premium baking bars or couverture chocolate for the best results.
- Work Swiftly in a Cool Environment: Chocolate is inherently sensitive to temperature. If you find yourself working in a warm kitchen, especially during the summer months or in hot climates (where chocolate softens incredibly fast!), your prepared chocolate might become too pliable too quickly, making curling difficult. To counteract this, try to work swiftly and, if possible, in the coolest part of your kitchen. Utilizing a fan set on a low setting (but not directly blowing onto the chocolate) or ensuring good ventilation can also be beneficial.
- Master the “Just Right” Consistency: This is arguably the trickiest yet most crucial aspect of successful chocolate curling. The chocolate needs to achieve a very specific consistency: it must be firm enough to hold its curl, yet soft enough to bend without snapping or breaking. It’s a fine balance between being fully set and still slightly yielding. If the chocolate is too hard, it will shatter into shards. If it’s too soft, it will simply smear and melt under your scraping tool. Practice will undoubtedly help you recognize this ideal “plastic” state. A reliable indicator is when a light thumbprint leaves an impression without causing the chocolate to crack.
- Troubleshooting Over-Hardened Chocolate: Don’t despair if your chocolate sheet becomes too firm! There are a couple of effective solutions. You can simply remove the baking sheet from the freezer and let it sit at room temperature for a few minutes, allowing the chocolate to gradually soften to the desired pliability. For a quicker fix, you can gently warm the back of the baking sheet with a hairdryer on a low setting, moving it constantly and evenly to prevent localized melting, until the chocolate reaches that perfect pliable consistency.
- Ensure a Pristine Work Surface: Before spreading your melted chocolate, make certain that your baking sheet or chosen work surface is perfectly clean, dry, and free of any crumbs or debris. Any trace of moisture can cause the chocolate to seize or create unsightly imperfections in your curls.
- Consider Chilling Your Tools: For an added advantage, you can lightly chill your scraping tools (chopsticks, spatulas, cheese knives) in the refrigerator for a few minutes prior to starting the curling process. This subtle cooling helps prevent the chocolate from prematurely sticking and melting onto your tools as you meticulously work to create your beautiful curls.
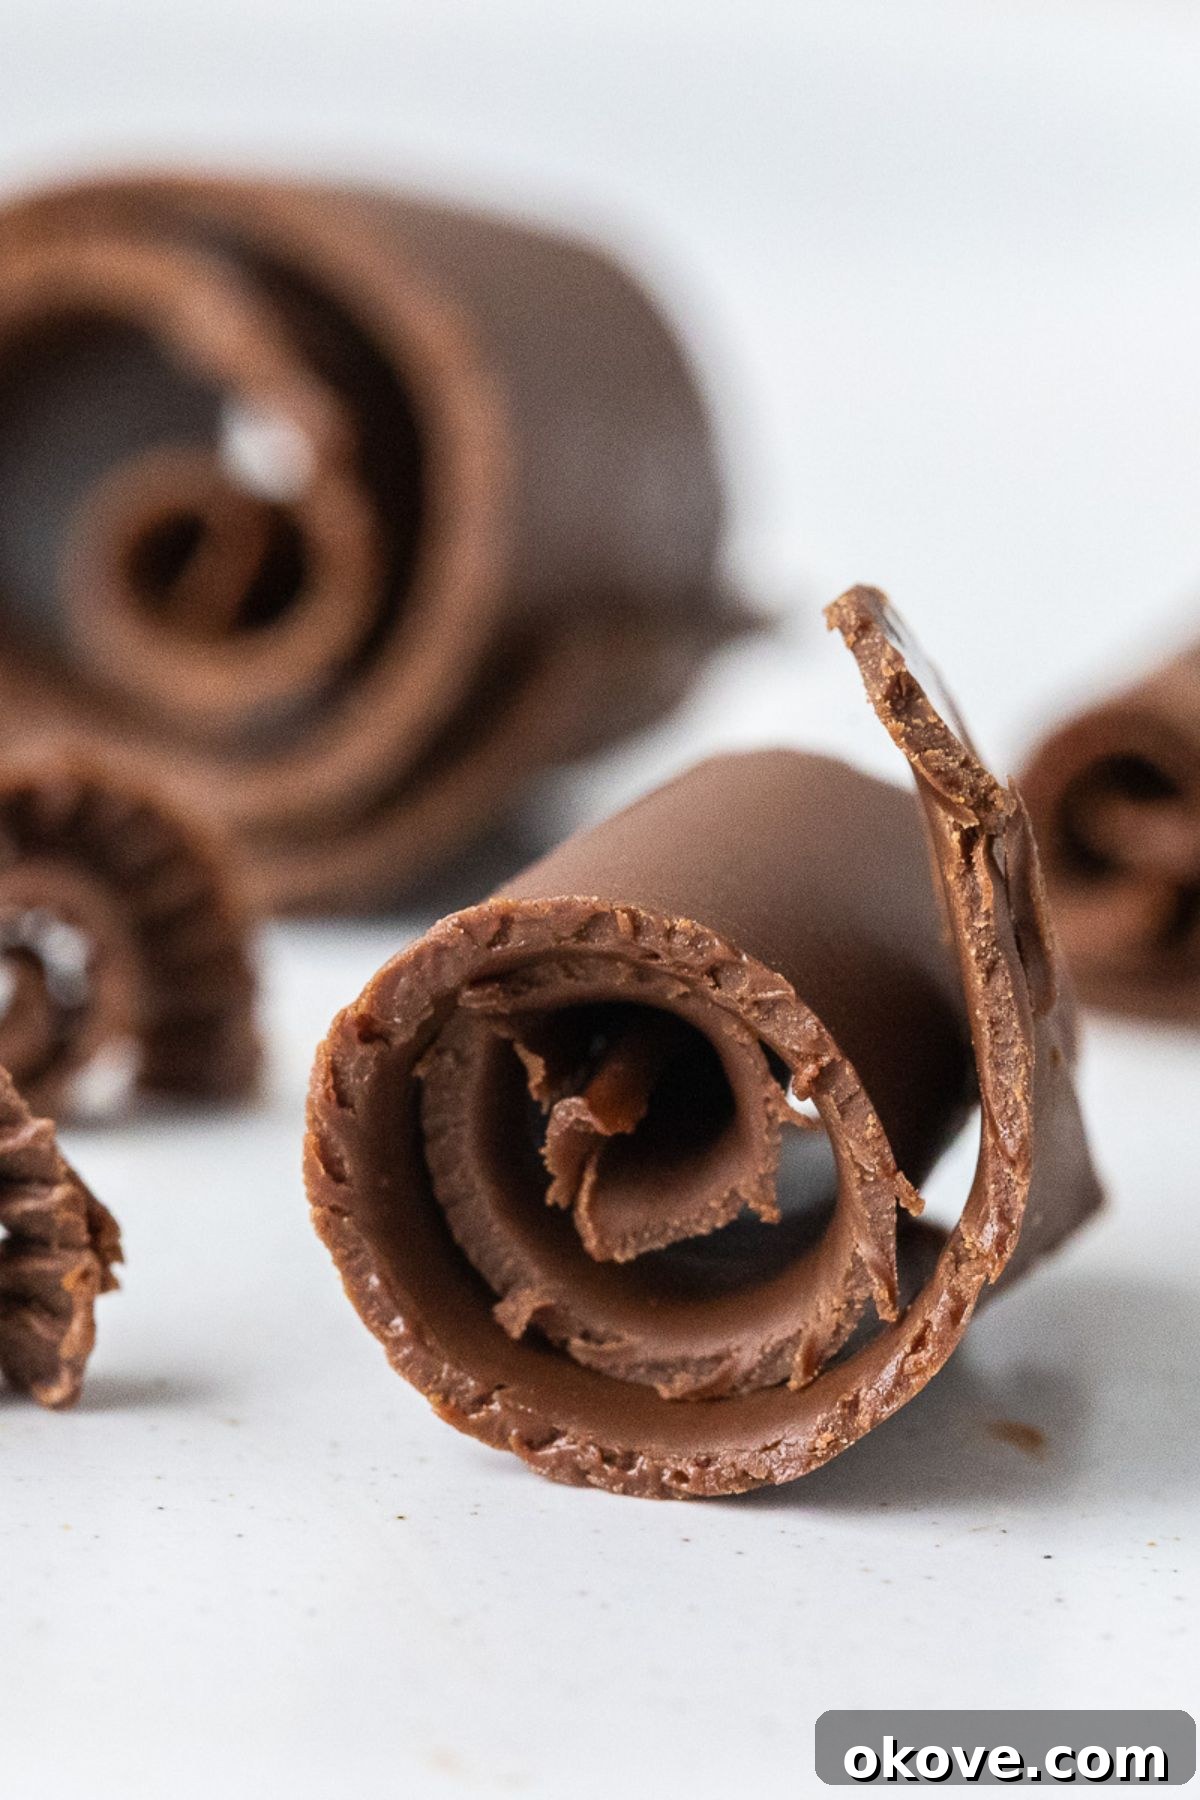
Frequently Asked Questions About Making Chocolate Curls
Absolutely! While coconut oil is often favored for its ability to create a very smooth texture and a beautiful glossy finish on the curls, you can certainly substitute it with other neutral-flavored oils. Vegetable oil, canola oil, grapeseed oil, or even a very light, unflavored olive oil will work well as alternatives. The key is to ensure the oil doesn’t possess a strong, distinct taste that would clash or compete with the delicious flavor of the chocolate itself.
This is a very common troubleshooting point, and it almost always boils down to the chocolate’s temperature and consistency. If your chocolate is too hard and brittle after chilling, it will merely break into small pieces or flakes rather than forming graceful curls. Conversely, if it’s too soft and warm, it will simply smudge and melt under your scraping tool, creating a messy streak. The absolute key is to find that “just right” pliable consistency. We recommend referring to Step 4 in our detailed instructions for precise guidance on how to check and adjust the chocolate’s temperature effectively. Often, a few minutes at room temperature or a quick, brief chill in the freezer can swiftly rectify the problem.
Once your beautiful chocolate curls are fully hardened and stable, meticulously transfer them into an airtight container. Arrange them gently to prevent any breakage. It is best to store this container in the refrigerator. This storage method will effectively prevent them from melting, sticking together, or absorbing any undesirable odors from other foods. When stored properly in this manner, homemade chocolate curls can maintain their freshness, perfect shape, and delicious flavor for an impressive duration of up to 2 weeks. For optimal results, always avoid storing them in humid environments, as excess moisture can cause chocolate to “bloom” (develop a whitish film) or become undesirably sticky.
For the most consistent and stunning results, high-quality baking chocolate bars (whether dark, milk, or white chocolate) with a good proportion of cocoa butter are generally considered the best. They melt exceptionally smoothly and yield beautiful, uniform curls that have a pleasant snap. While chocolate chips can certainly work, it’s advisable to choose premium brands, as standard eating chips often contain stabilizers designed to help them retain their shape during baking, which can make them harder to melt smoothly and curl effectively. Compound chocolate is also an excellent, incredibly easy-to-handle option, particularly recommended for beginners due to its forgiving nature.
Yes, absolutely! If you are already familiar and proficient with the process of tempering chocolate, employing tempered chocolate will undoubtedly yield the most professional, glossy, and snap-perfect curls imaginable. Tempered chocolate curls are also significantly more resistant to melting at room temperature, making them ideal for decorations that need to hold up longer. The fundamental method of spreading and chilling the chocolate would remain largely similar to our guide, but the initial melting process would, of course, strictly follow precise tempering guidelines. Our method here provides a simplified approach that doesn’t strictly require tempering but still produces excellent and visually appealing results for the home baker.
More Delightful Chocolate Recipes to Explore
Appetizers
Decadent Chocolate Hummus
Desserts
Rich Chocolate Peanut Butter Cake
Holidays
Delightful Hot Cocoa Bombs
Desserts
Addictive Oreo Popcorn
Loved this guide? Pin it to save for later!
Pin It Now
Print Recipe
Elegant Homemade Chocolate Curls
Create stunning, delicate chocolate curls with ease using just two simple ingredients. Perfect for garnishing cakes, cupcakes, and any dessert, adding a professional and beautiful touch that will impress.
Equipment
- Baking Sheet
- Microwave-safe bowl
- Metal Spatula or Bench Scraper
- Chopstick, Offset Spatula, or Cheese Knife (for curling)
Ingredients
- 6 ounces (approx. 1/2 cup) high-quality chocolate (dark, milk, or white chocolate chips or finely chopped bar)
- 1 teaspoon coconut oil (or preferred neutral oil like vegetable or canola oil)
Instructions
- Melt Chocolate: Finely chop chocolate if using a bar. In a microwave-safe bowl, combine the chocolate and coconut oil. Microwave in 15-second intervals, stirring thoroughly after each, until the mixture is completely smooth and glossy.
- Spread Thinly: Pour the melted chocolate onto the clean, flat back of a baking sheet. Using a metal spatula or bench scraper, spread the chocolate into a very thin, even layer, aiming for about 1-2 millimeters thick.
- Chill to Perfect Consistency: Place the baking sheet with the chocolate into the freezer for approximately 3 minutes. Test the consistency by gently pressing with a clean finger: it should leave a distinct indent but not be overly soft or brittle. Adjust chilling time as needed (a little longer in the freezer if too soft, a minute or two at room temperature if too hard).
- Create Curls: Using your chosen tool (a chopstick for thin curls, a cheese knife for thicker curls, or an offset spatula for large ribbons), gently scrape the chocolate surface at a consistent angle away from you. This motion will cause the chocolate to peel up and curl beautifully.
- Final Set: Carefully transfer the freshly made curls to a clean plate or tray. Place the tray in the refrigerator for another 5-10 minutes to allow the chocolate to fully harden and stabilize.
- Store: Once the curls are completely firm, carefully transfer them into an airtight container. Store this container in the refrigerator for up to 2 weeks until you are ready to use them.
Notes
- For the best flavor and smoothest, most attractive curls, always use a high-quality chocolate.
- Work as quickly as possible, especially if your kitchen environment is warm, as chocolate tends to soften rapidly.
- The chocolate’s consistency is the key to success: it must be firm enough to hold its shape but pliable enough to curl without breaking. If it becomes too hard, let it sit at room temperature for a moment or gently warm the back of the tray with a hairdryer on a low setting.
Unleash Your Inner Chocolatier!
With this comprehensive guide, you now possess all the knowledge and practical techniques needed to create stunning homemade chocolate curls. Gone are the days of serving plain desserts! Embrace the incredible elegance and delightful texture that these beautiful garnishes bring to any occasion, transforming ordinary treats into extraordinary culinary experiences. Don’t hesitate to experiment with different types of chocolate, vibrant colors, and varying sizes to truly personalize your culinary creations and reflect your unique style. We encourage you to share your magnificent chocolate curl masterpieces with friends, family, and online communities – you’re sure to inspire others!