
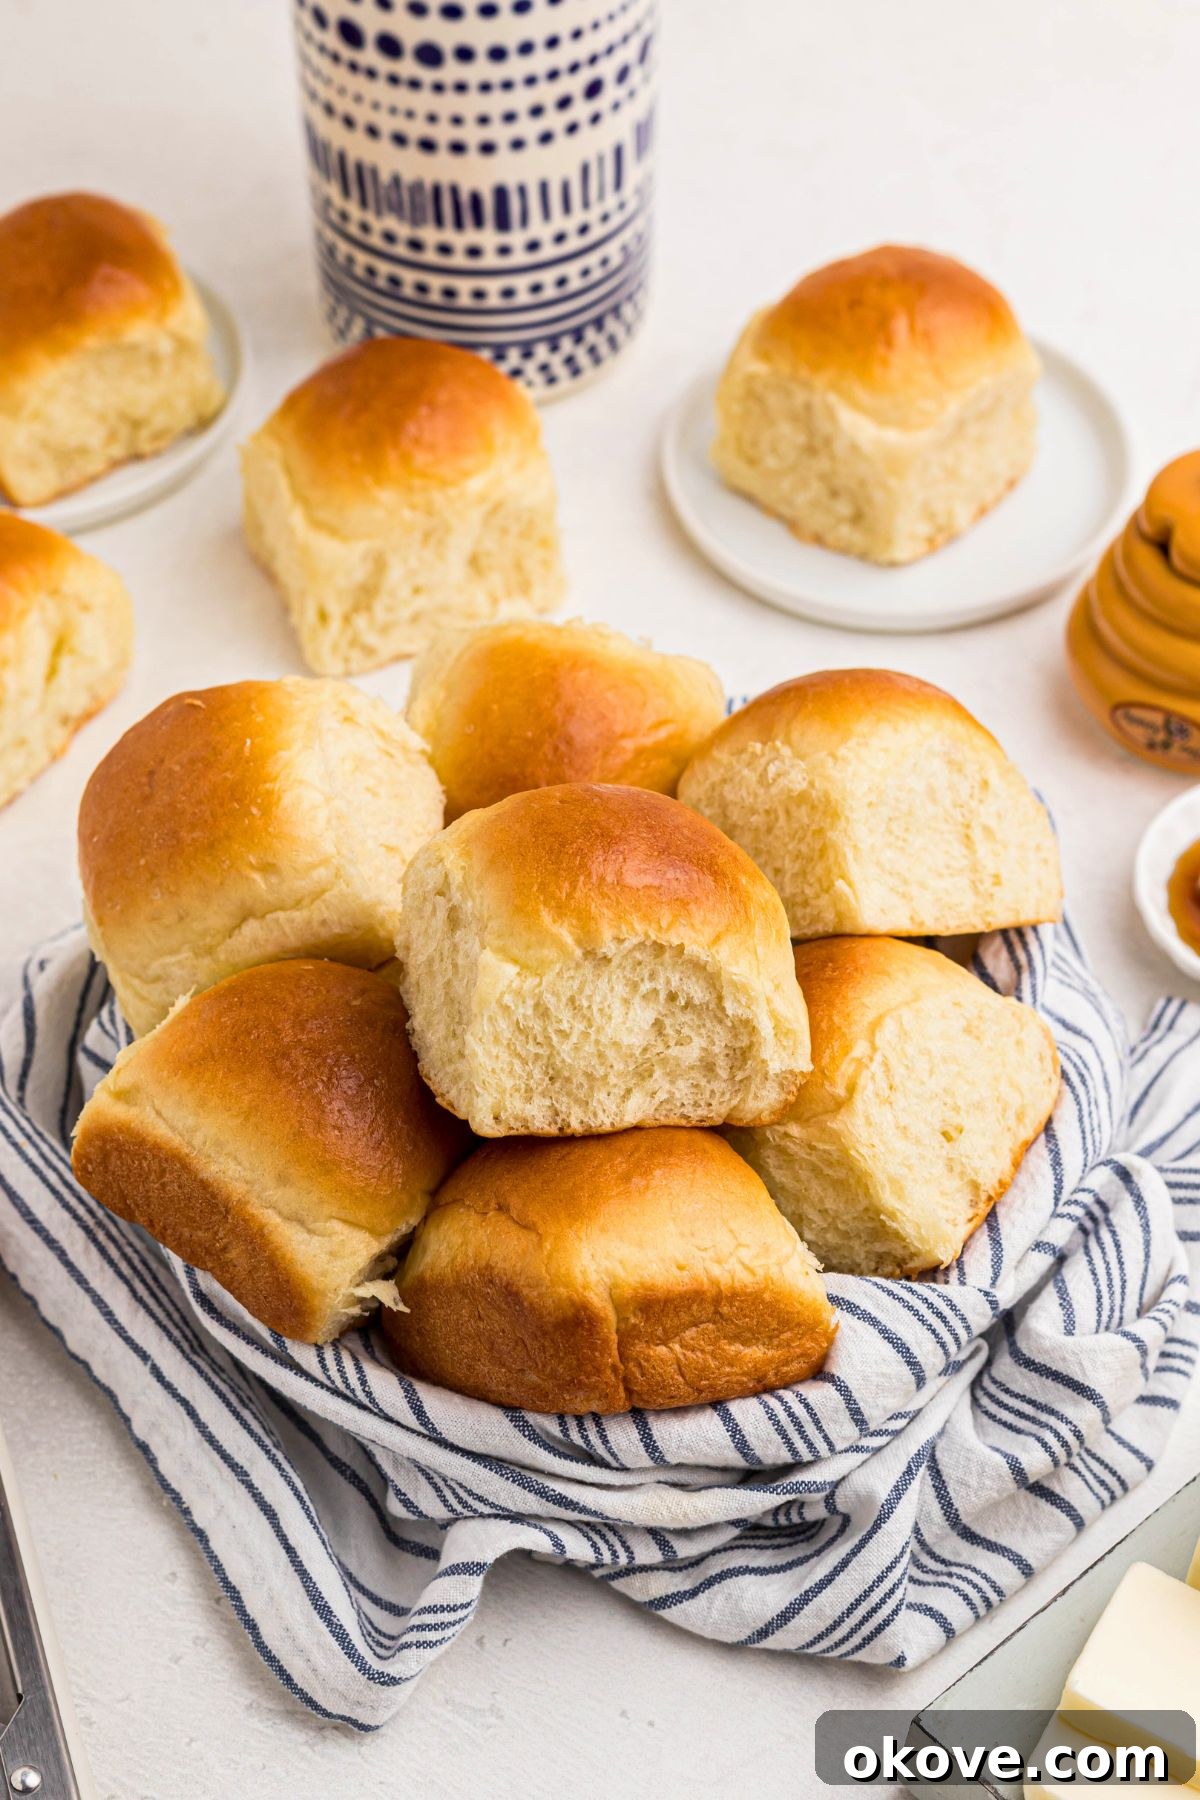
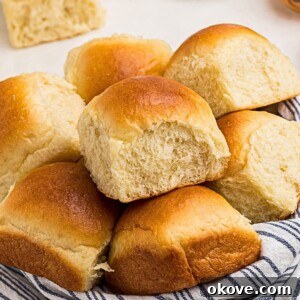
There’s nothing quite like the comforting aroma of freshly baked bread filling your home, and these **easy homemade dinner rolls** deliver that magical experience every single time. Wonderfully soft, incredibly fluffy, and boasting a rich, homemade flavor, these golden delights are an absolute family favorite. Whether served warm from the oven with a generous smear of butter or as a perfect accompaniment to a hearty meal, they are always the first to disappear from the table. This simple recipe proves that baking delicious bread from scratch can be both accessible and incredibly rewarding, even for those new to yeast baking.
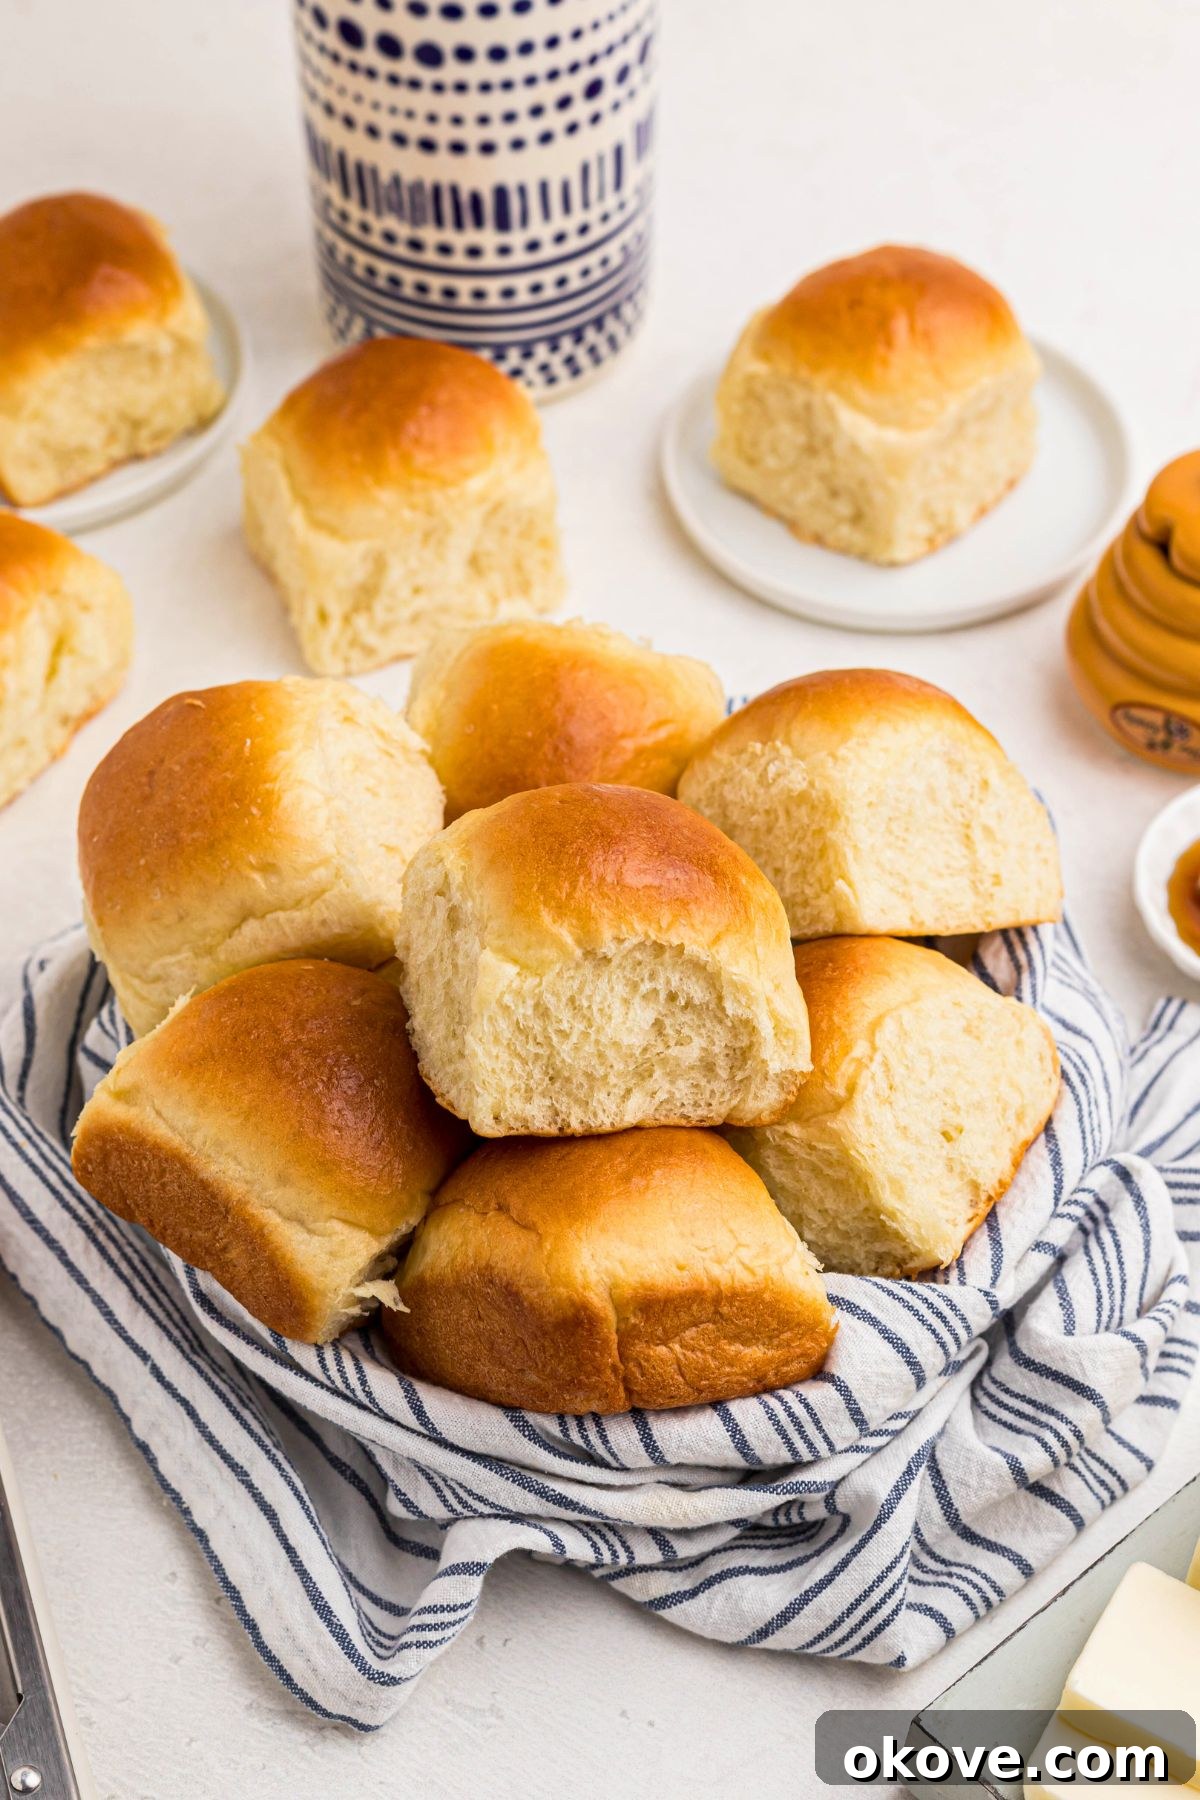
“The irresistible scent of fresh, homemade rolls wafting from the oven is truly a comfort like no other!”
-Becky
This tried-and-true dinner roll recipe yields light, tender, and incredibly versatile rolls. They are the ideal choice for elevating any occasion, from grand holiday meals like Thanksgiving and Christmas to adding a touch of homemade warmth to your everyday weeknight dinners. Best of all, you can whip up a batch of these exquisite rolls in under two hours using just a few common pantry staples, and there’s no need for a specialized bread machine. This recipe simplifies the art of bread-making, making it enjoyable for even novice bakers and a quick-prep option for busy households. Get ready to impress your family and friends with these irresistible, golden-brown beauties.
If you appreciate easy yet flavorful side dishes that complement any main course, be sure to explore some of our other popular recipes. Our **Garlic Roasted Baby Potatoes** offer a savory, tender bite, while the **Roasted Green Beans** are a simple and healthy classic. For a festive touch, our **Cranberry Orange Sauce** adds a burst of freshness, and the **Grape Jelly Meatballs** are a surprisingly delicious appetizer or side. Each recipe is designed to be straightforward, packed with flavor, and perfect for sharing around any table.
Table of Contents
- Why These Easy Dinner Rolls Are a Must-Try
- Key Ingredients for Perfect Dinner Rolls
- Exciting Recipe Variations for Dinner Rolls
- Step-by-Step Guide to Homemade Dinner Rolls
- Baking Success: Expert Tips for Dinner Rolls
- Understanding Yeast: Active Dry vs. Instant (Rapid Rise)
- Frequently Asked Questions About Dinner Rolls
- More Delicious Side Dish Recipes
- The Full Dinner Rolls Recipe Card
Why These Easy Dinner Rolls Are a Must-Try
There are countless reasons why these **soft and fluffy dinner rolls** have become a beloved staple in so many homes. Beyond their incredible taste and texture, their simplicity is truly what sets them apart. Imagine serving warm, golden-brown rolls that you made from scratch, filled with that unmistakable homemade goodness. This recipe demystifies bread baking, proving that you don’t need a professional bakery or hours of intricate work to achieve outstanding results. They’re perfect for impressing guests at a holiday gathering, providing a comforting side for a family dinner, or simply enjoying as a snack with your favorite spread. Their versatility is unmatched, pairing beautifully with everything from hearty stews and roast chicken to light salads and soups. Plus, the process itself, from the initial activation of the yeast to the delightful aroma filling your kitchen, is an incredibly satisfying and therapeutic experience. These rolls aren’t just food; they’re an experience of home comfort and culinary joy, designed to be accessible to bakers of all skill levels.
Key Ingredients for Perfect Dinner Rolls
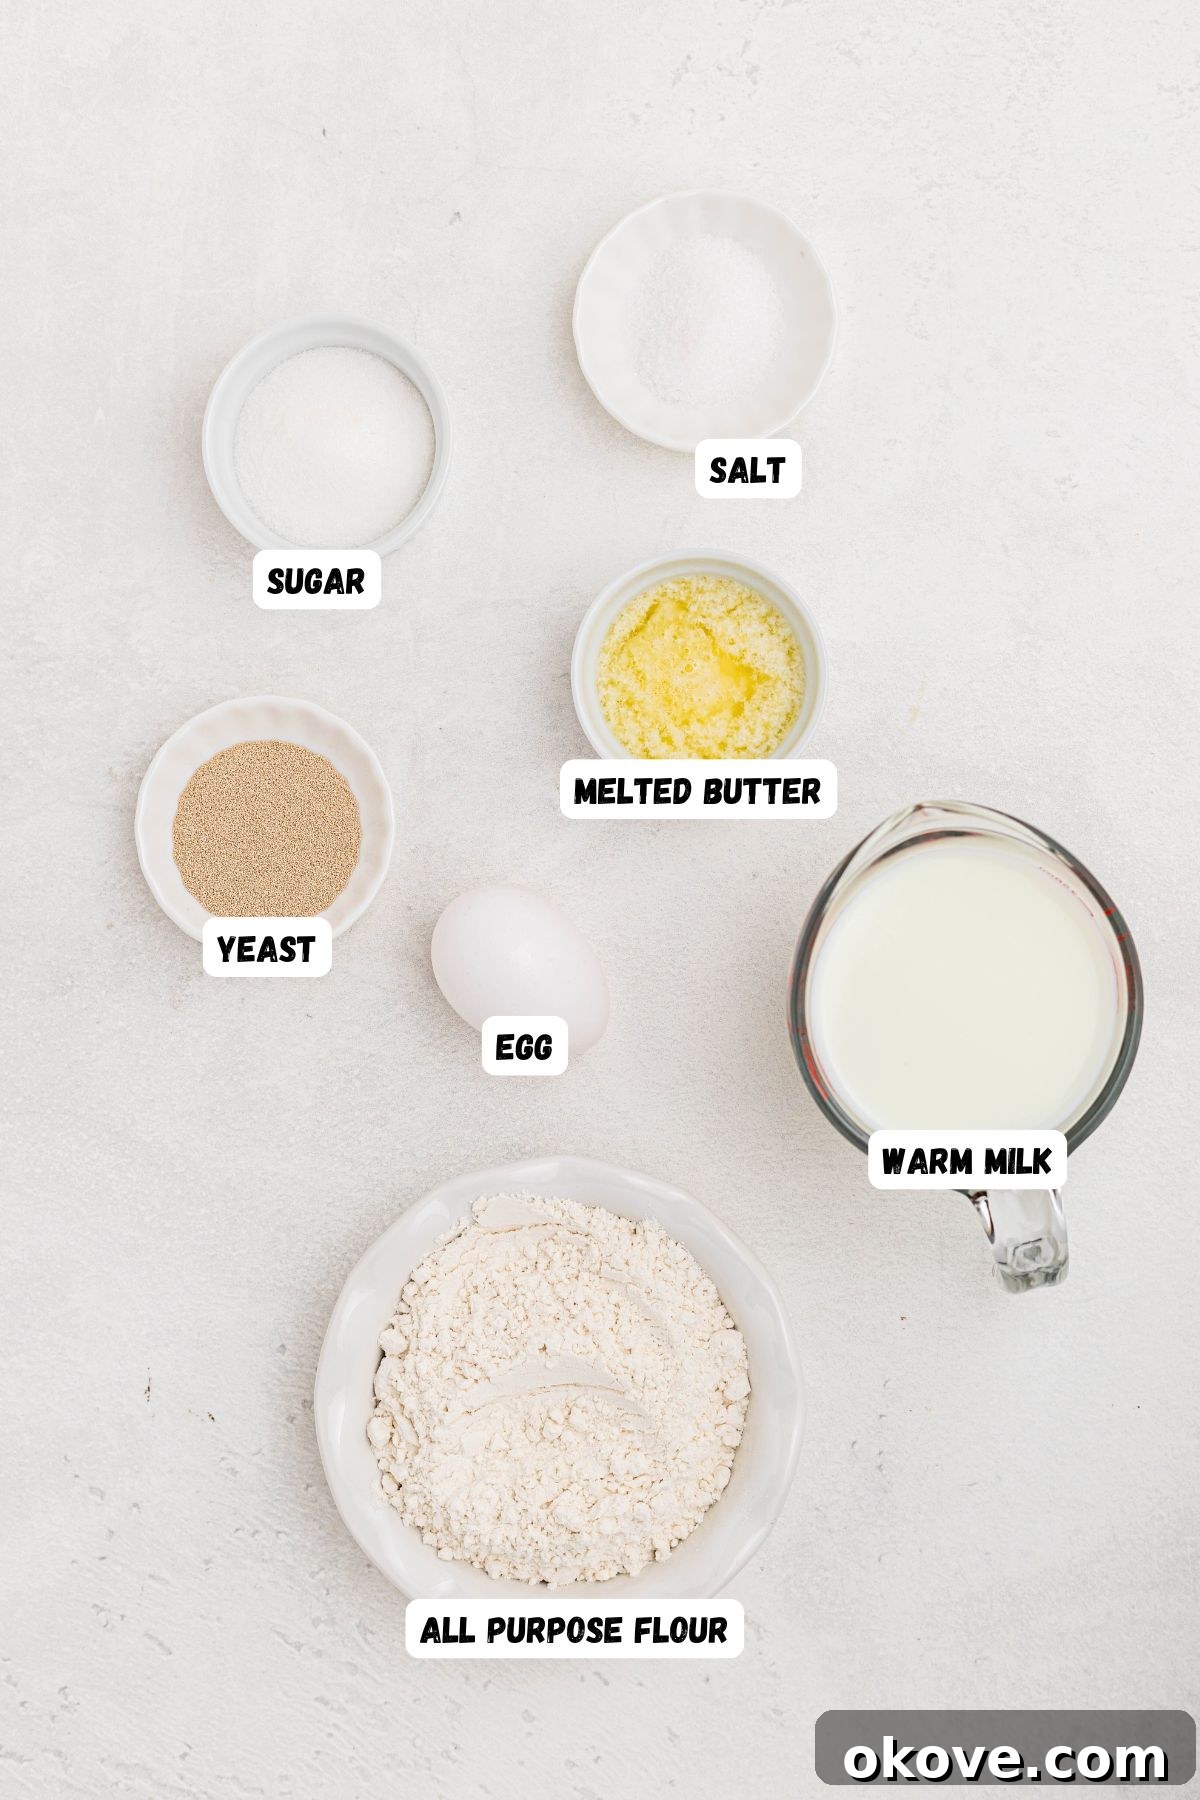
Creating truly exceptional dinner rolls begins with a selection of high-quality, basic ingredients. Each component plays a vital role in achieving that perfect soft texture, rich flavor, and beautiful golden crust. Here’s a closer look at what you’ll need and why each element is crucial for baking success:
- Active Dry Yeast: This is the magic behind the rise! Active dry yeast contains living microorganisms that, when activated by warm liquid and fed by sugar, ferment to produce carbon dioxide. These gas bubbles are what cause your dough to rise, resulting in a light and airy texture. Using one packet (approximately 2 1/4 teaspoons) is typically the perfect amount for a batch of 12 rolls, ensuring optimal leavening and flavor development.
- Warm Milk: The ideal temperature for activating active dry yeast is around 105-115°F (40-46°C). Milk, specifically, adds richness and a tender crumb to the rolls, contributing to their luxurious texture. It also helps to create a slightly sweeter flavor and contributes to a beautiful brown crust compared to using water. Always check the temperature carefully to avoid killing the yeast (too hot) or not activating it (too cold).
- Granulated Sugar: Beyond just sweetening the dough, sugar is crucial for “feeding” the yeast, providing the necessary fuel for it to activate and multiply efficiently. This not only aids in the rising process but also contributes to the beautiful golden-brown color of the crust during baking and enhances the overall flavor profile of the rolls.
- Large Egg: The inclusion of an egg is a secret weapon for achieving an even softer and richer texture. Eggs add moisture, fat, and protein to the dough, resulting in a more tender crumb, increased elasticity, and a slightly more golden hue. While you *can* make rolls without it, an egg truly elevates them to the next level of deliciousness, making them wonderfully pillowy.
- Unsalted Butter: Butter is essential for adding incredible richness and a depth of flavor to your dinner rolls that can’t be replicated. Using unsalted butter allows you to control the salt content precisely within the recipe. Melted butter also helps tenderize the dough, improves its elasticity, and contributes to a lovely, moist interior.
- All-Purpose Flour: The foundation of your rolls! All-purpose flour provides the necessary gluten structure for the dough to trap the yeast’s gas, allowing the rolls to rise and hold their shape. This recipe calls for 2 1/2 cups for the main dough, plus an additional 1/4 to 1/2 cup for lightly flouring your work surface during kneading. This prevents sticking without making the dough too stiff or dry, ensuring a light crumb.
- Kosher Salt: Salt is vital for enhancing the flavor of the rolls, preventing them from tasting bland, and balancing the sweetness from the sugar. It also plays a crucial role in controlling the yeast’s activity, preventing it from rising too quickly and ensuring a well-structured dough with a consistent texture.
For precise measurements and detailed instructions on how to combine these ingredients for the perfect dough, refer to the complete recipe card found further down the page.
Exciting Recipe Variations for Dinner Rolls
While the classic homemade dinner roll is a masterpiece in itself, this versatile dough provides an excellent canvas for creative culinary experimentation. Don’t be afraid to customize your batch to suit your taste, the occasion, or simply to add a delightful twist to your meal. Here are some delightful variations to inspire your baking adventures:
- Honey Butter Rolls: For an added touch of sweetness and pure indulgence, incorporate 1 tablespoon of high-quality honey directly into the dough along with the warm milk and sugar. After baking, brush the hot rolls with a lavish mixture of melted butter and a touch more honey for an irresistible, sticky-sweet glaze that will have everyone reaching for seconds.
- Garlic Herb Rolls: Elevate your rolls with aromatic savory notes perfect for pairing with Italian dishes or roasted meats. Mix in ½ teaspoon of garlic powder and 1 teaspoon of your favorite dried herbs (such as Italian seasoning, dried parsley, or a fragrant blend of rosemary and thyme) into the flour before kneading. The flavors will infuse beautifully throughout the dough.
- Sweet Hawaiian-Style Rolls: Craving that signature Hawaiian sweetness and pillowy texture? Add 1 tablespoon of honey plus 2 tablespoons of pineapple juice to the liquid ingredients before combining with the dry. The pineapple juice contributes a subtle fruity tang and extra tenderness, beautifully mimicking the beloved store-bought version.
- Cheesy Rolls: For a deliciously savory and gooey twist, sprinkle about ¼ to ½ cup of shredded cheddar cheese (or a blend of your favorite cheeses like mozzarella, Parmesan, or a spicy Monterey Jack) over the shaped dough balls just before their second rise or right before baking. The cheese will melt into a golden, bubbly topping.
- Mini Sliders: Perfect for appetizers, lunch boxes, or small sandwiches! Instead of dividing the dough into 12 larger pieces, aim for 15–18 smaller, uniform rolls (each approximately 1.5 ounces). Bake them in a slightly larger baking dish (or two smaller ones) to create a pull-apart style. These are ideal for mini burgers, pulled pork sliders, or deli meat sandwiches.
- Sesame Seed Topping: For a classic bakery-style finish, brush the risen dough balls with a light egg wash (one egg beaten with a tablespoon of water) and generously sprinkle with toasted sesame seeds before baking. This adds a subtle nutty flavor, a pleasant textural crunch, and an appealing visual element.
- Everything Bagel Rolls: For a bold, savory kick that’s great for breakfast or brunch, use the egg wash method mentioned above and generously sprinkle with everything bagel seasoning before baking. The combination of garlic, onion, poppy seeds, and sesame seeds is truly irresistible.
Step-by-Step Guide to Homemade Dinner Rolls
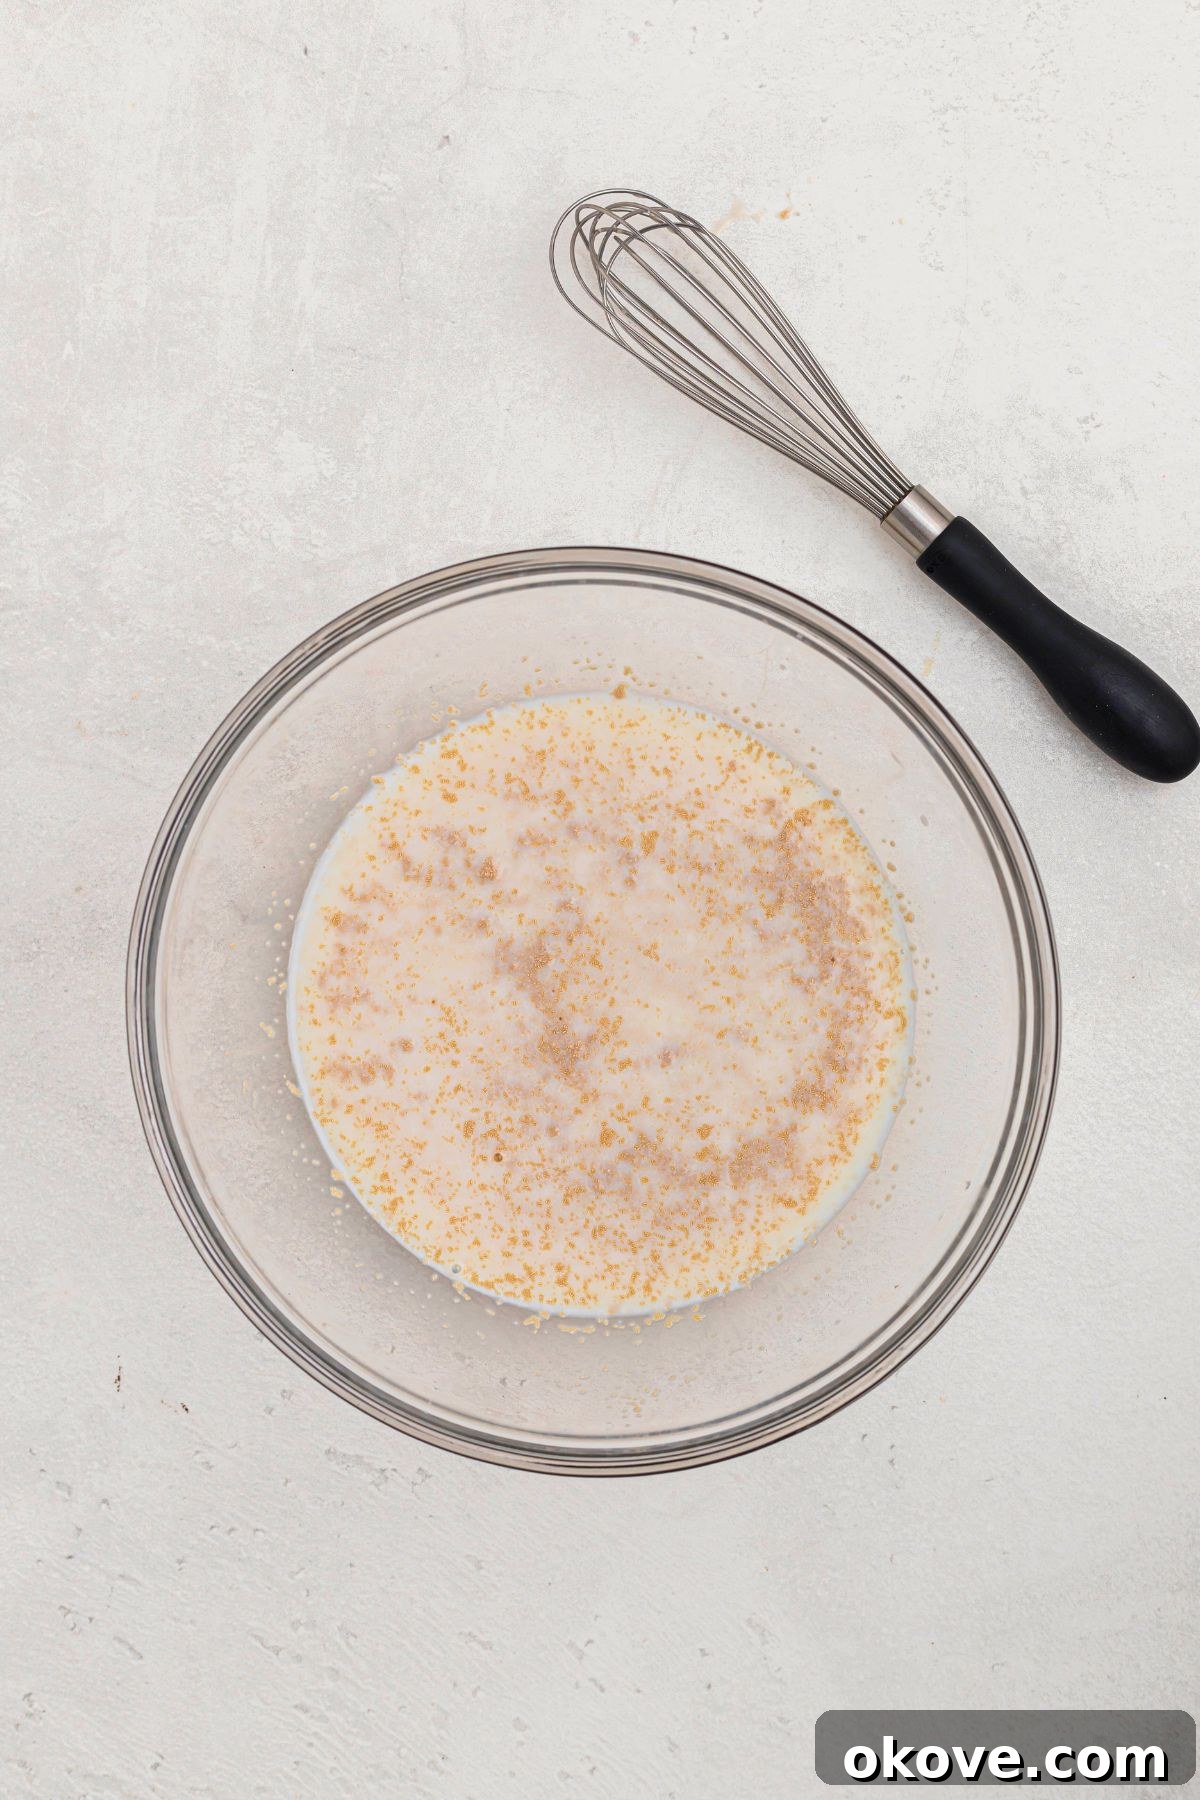
- Activate the Yeast: In a large mixing bowl, combine the carefully measured warm milk (ensure it’s between 105-115°F / 40-46°C using a thermometer), granulated sugar, and active dry yeast. Stir gently with a spoon or whisk until the sugar and yeast appear mostly dissolved. This initial step, often called “blooming” the yeast, is crucial to ensure your yeast is alive and ready to work its magic.
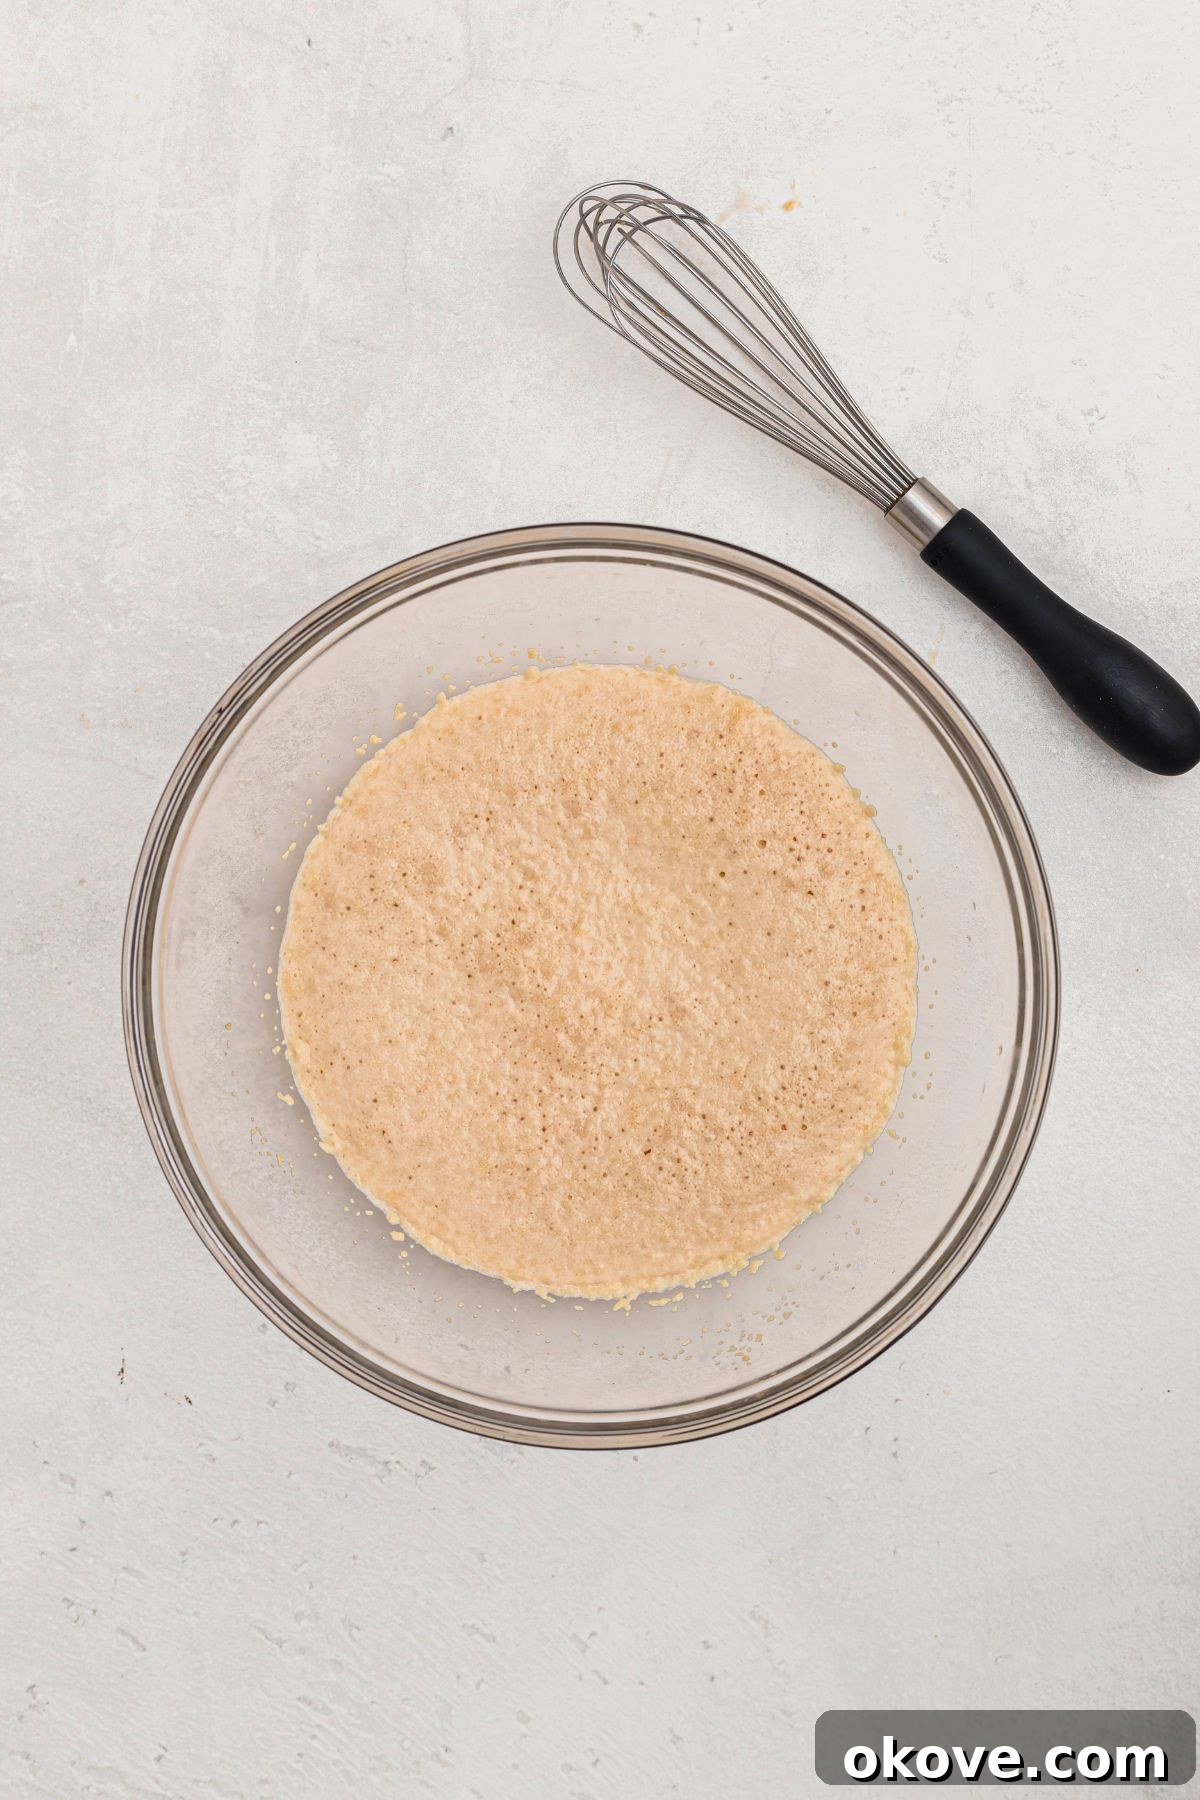
- Proof the Yeast: Allow the mixture to sit undisturbed for 5 to 10 minutes. During this time, the yeast will feed on the sugar and produce carbon dioxide, creating a distinct foamy, bubbly layer on the surface. This foam is a clear and reassuring sign that your yeast is active and viable, ensuring the dough will rise beautifully. If no foam appears, your yeast may be old or the milk temperature was incorrect, and it’s best to start over with fresh yeast.
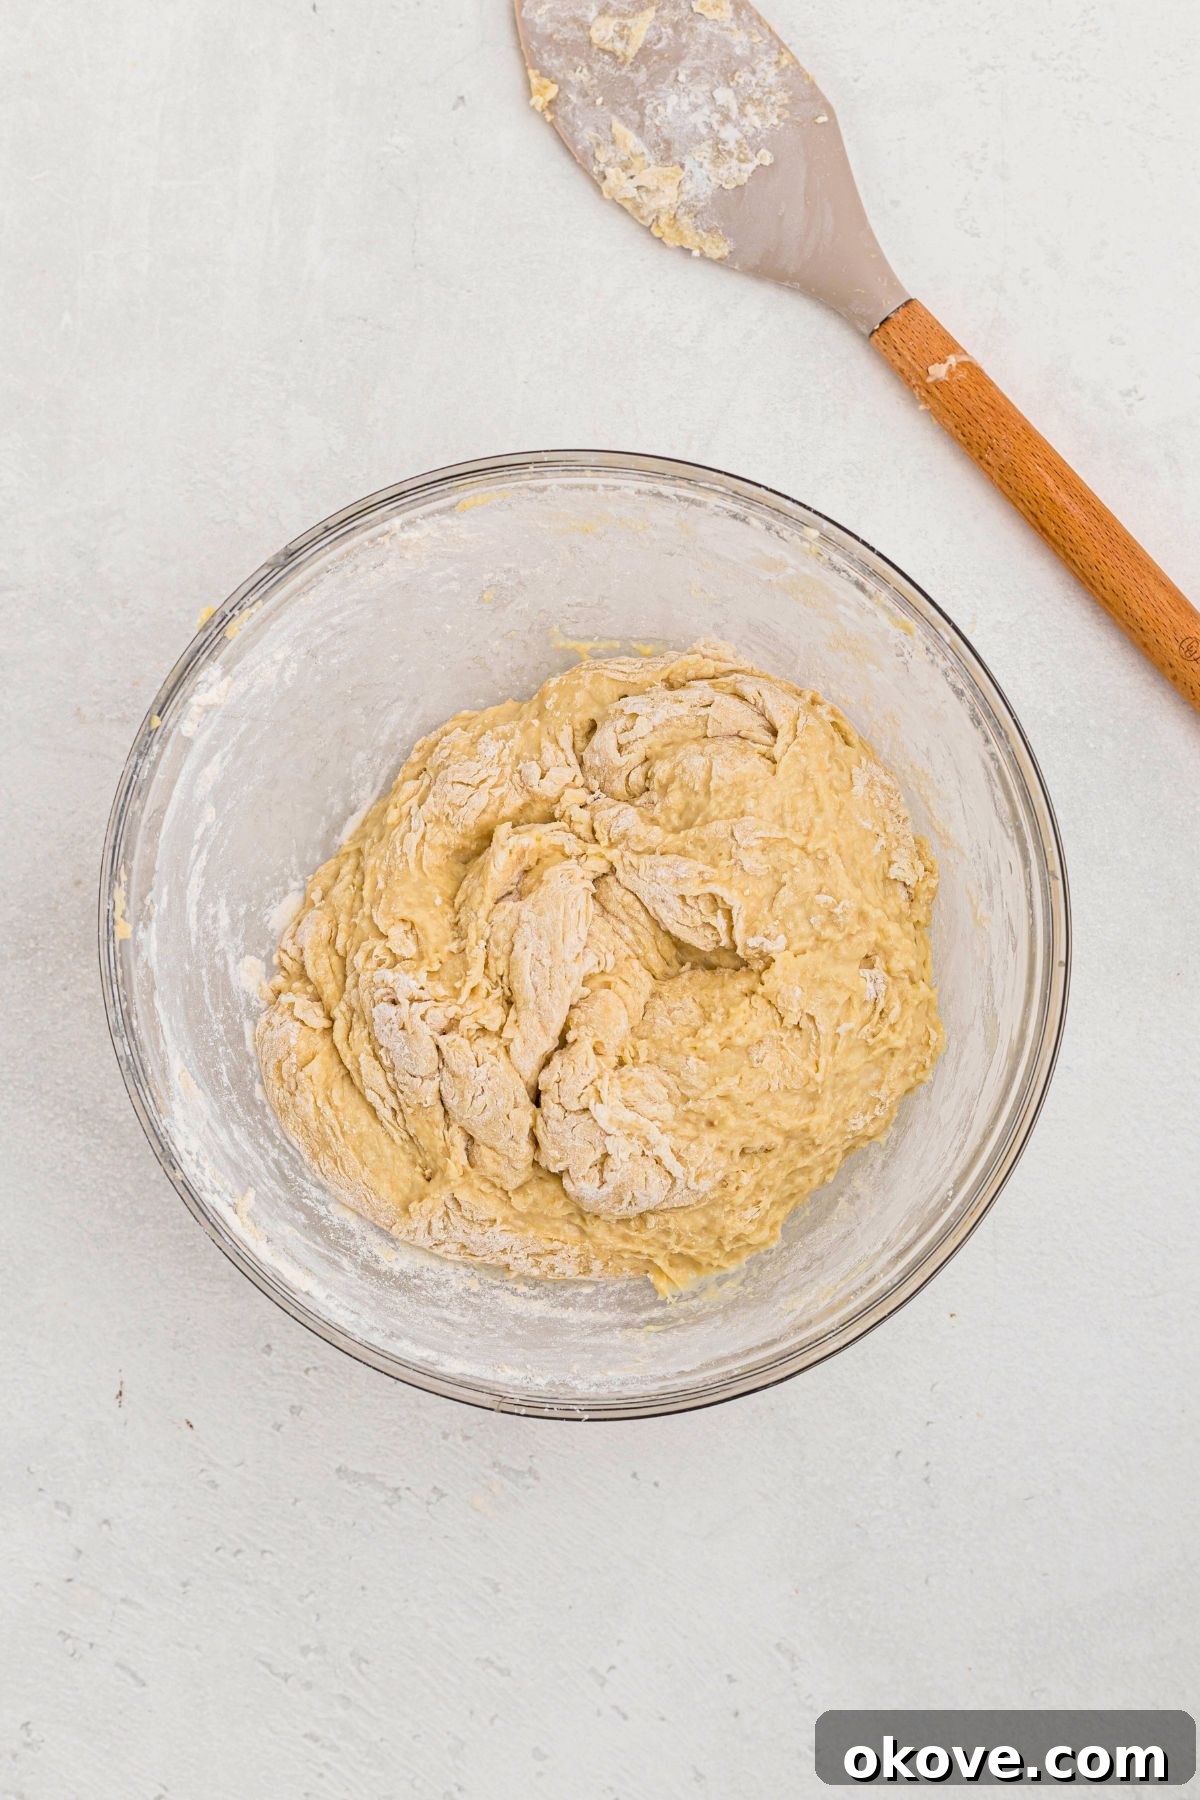
- Combine Wet and Dry Ingredients: Once the yeast mixture is actively bloomed, gently whisk in the room temperature large egg, the melted unsalted butter, and the kosher salt. Next, gradually incorporate the 2 1/2 cups of all-purpose flour, stirring continually with a sturdy spoon or spatula. Continue mixing until a soft, shaggy dough begins to form and all the flour is moistened. Avoid adding all the flour at once, as you might need slightly less or more depending on humidity.
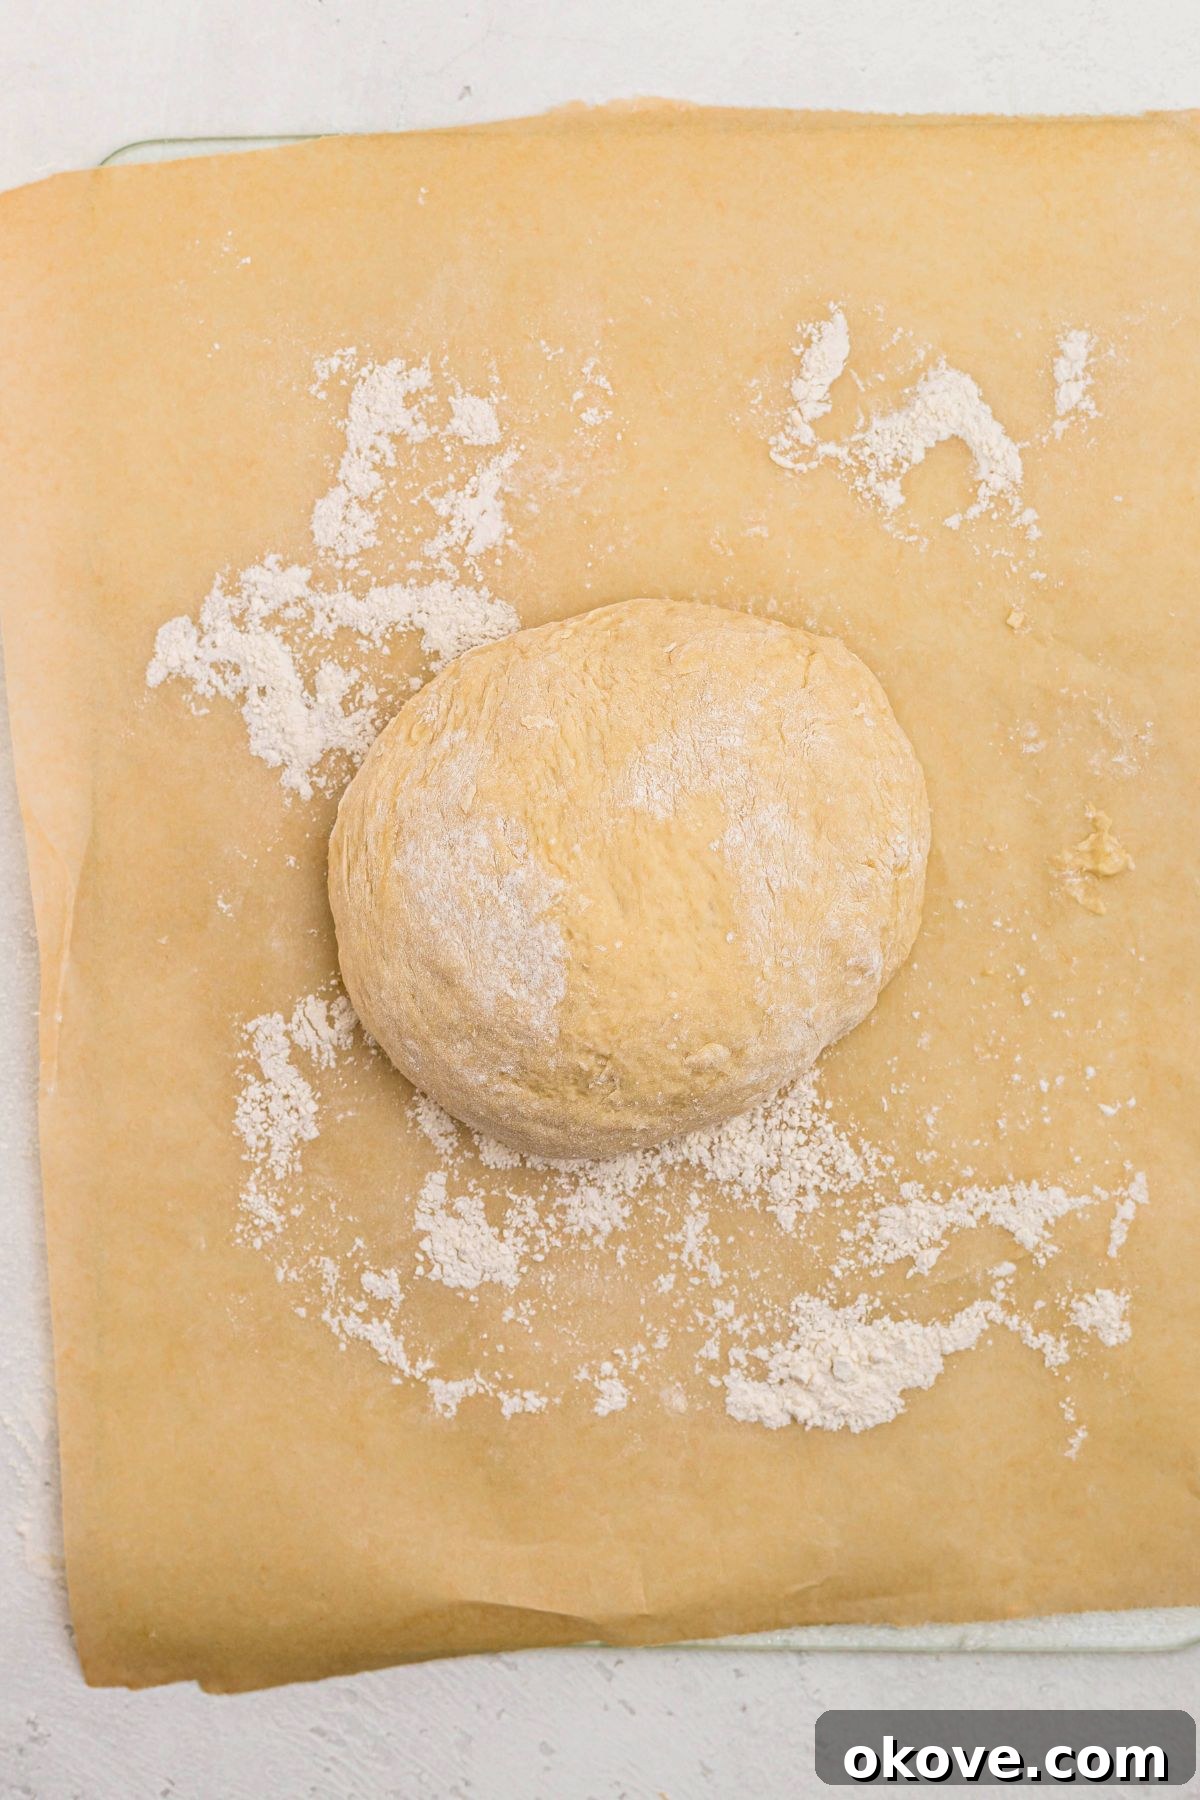
- Knead the Dough: Transfer the shaggy dough to a lightly floured surface. Knead the dough by hand for approximately 5-7 minutes. During kneading, add small amounts of the reserved 1/4-1/2 cup flour as needed, just enough to prevent the dough from sticking excessively to your hands or the surface, until it becomes smooth, elastic, and slightly tacky but no longer sticky. Alternatively, if you have a stand mixer, attach the dough hook and knead on medium-low speed for 2 to 3 minutes until it reaches the same smooth and cohesive consistency. Proper kneading develops the gluten, which is essential for creating light, fluffy rolls.
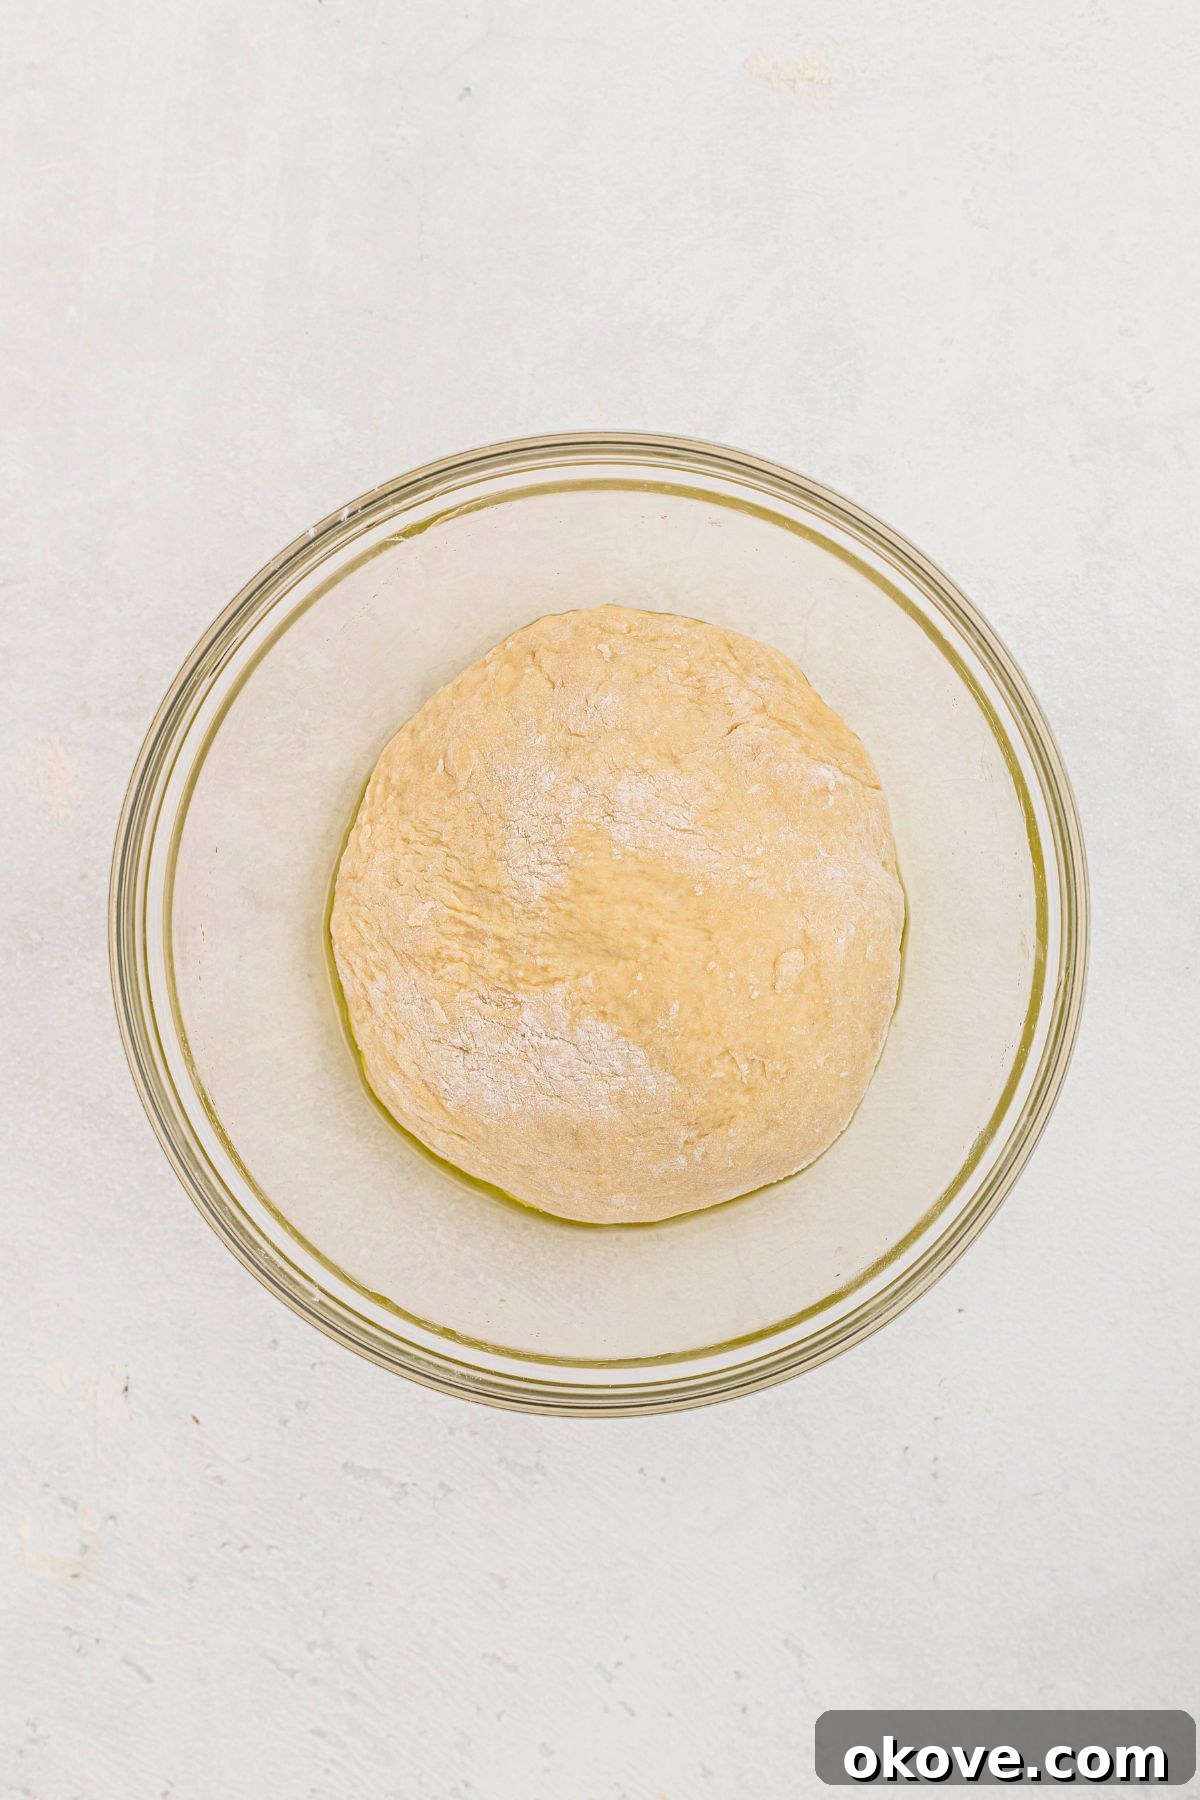
- First Rise (Bulk Fermentation): Lightly grease a clean, large bowl with a touch of vegetable oil or cooking spray. Place the kneaded dough ball into the greased bowl, turning it once to ensure it’s lightly coated. Cover the bowl securely with a clean kitchen towel or plastic wrap to prevent the dough from drying out. Allow the dough to rise in a warm, draft-free place for about 60 minutes, or until it has visibly doubled in size. This crucial first rise allows the flavors to deepen and the dough to become wonderfully airy.
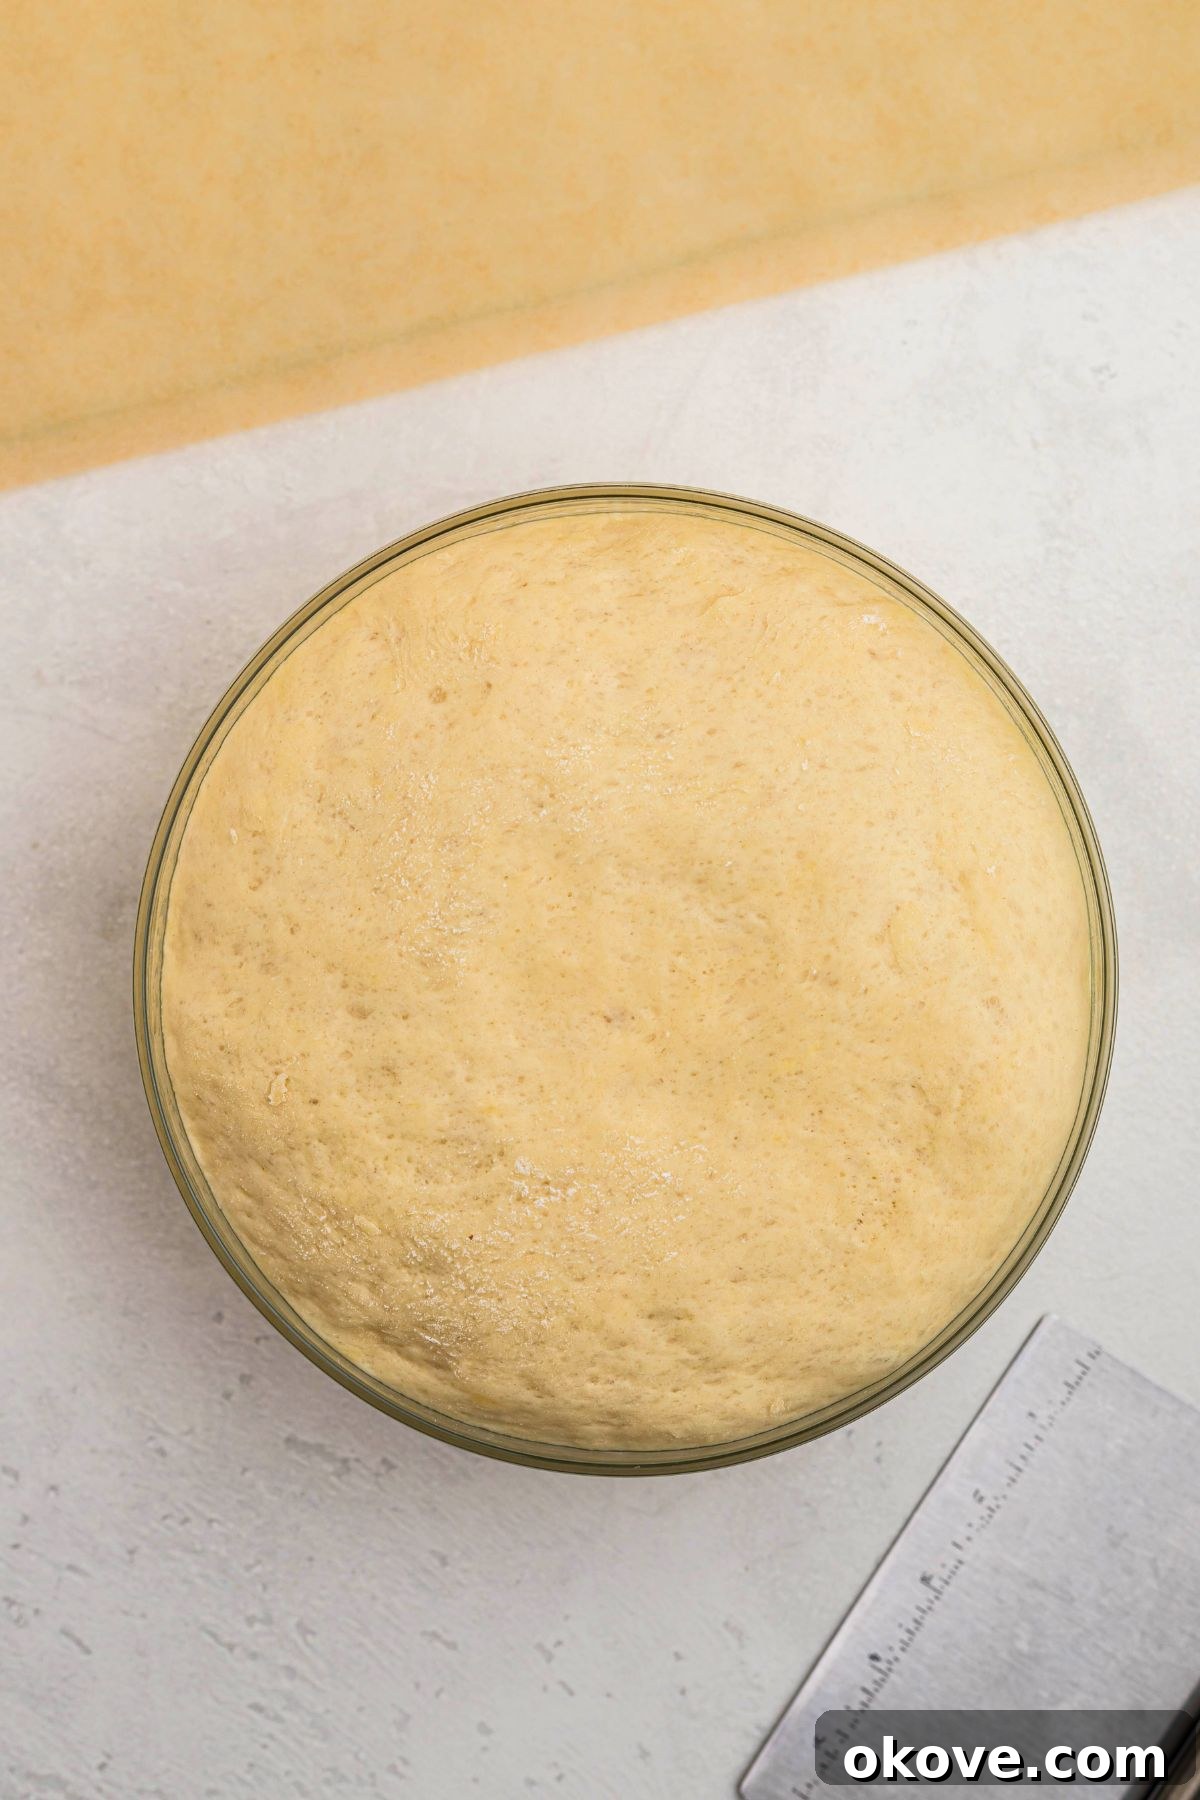
- Punch Down and Divide: Once the dough has proudly doubled in size, gently punch it down with your fist to release the trapped air. This step redistributes the yeast and helps create a finer crumb. Transfer the dough to a lightly floured surface and divide it into 12 equal pieces. For best results and consistent baking, you can use a kitchen scale to weigh each piece; they should be approximately two ounces each.
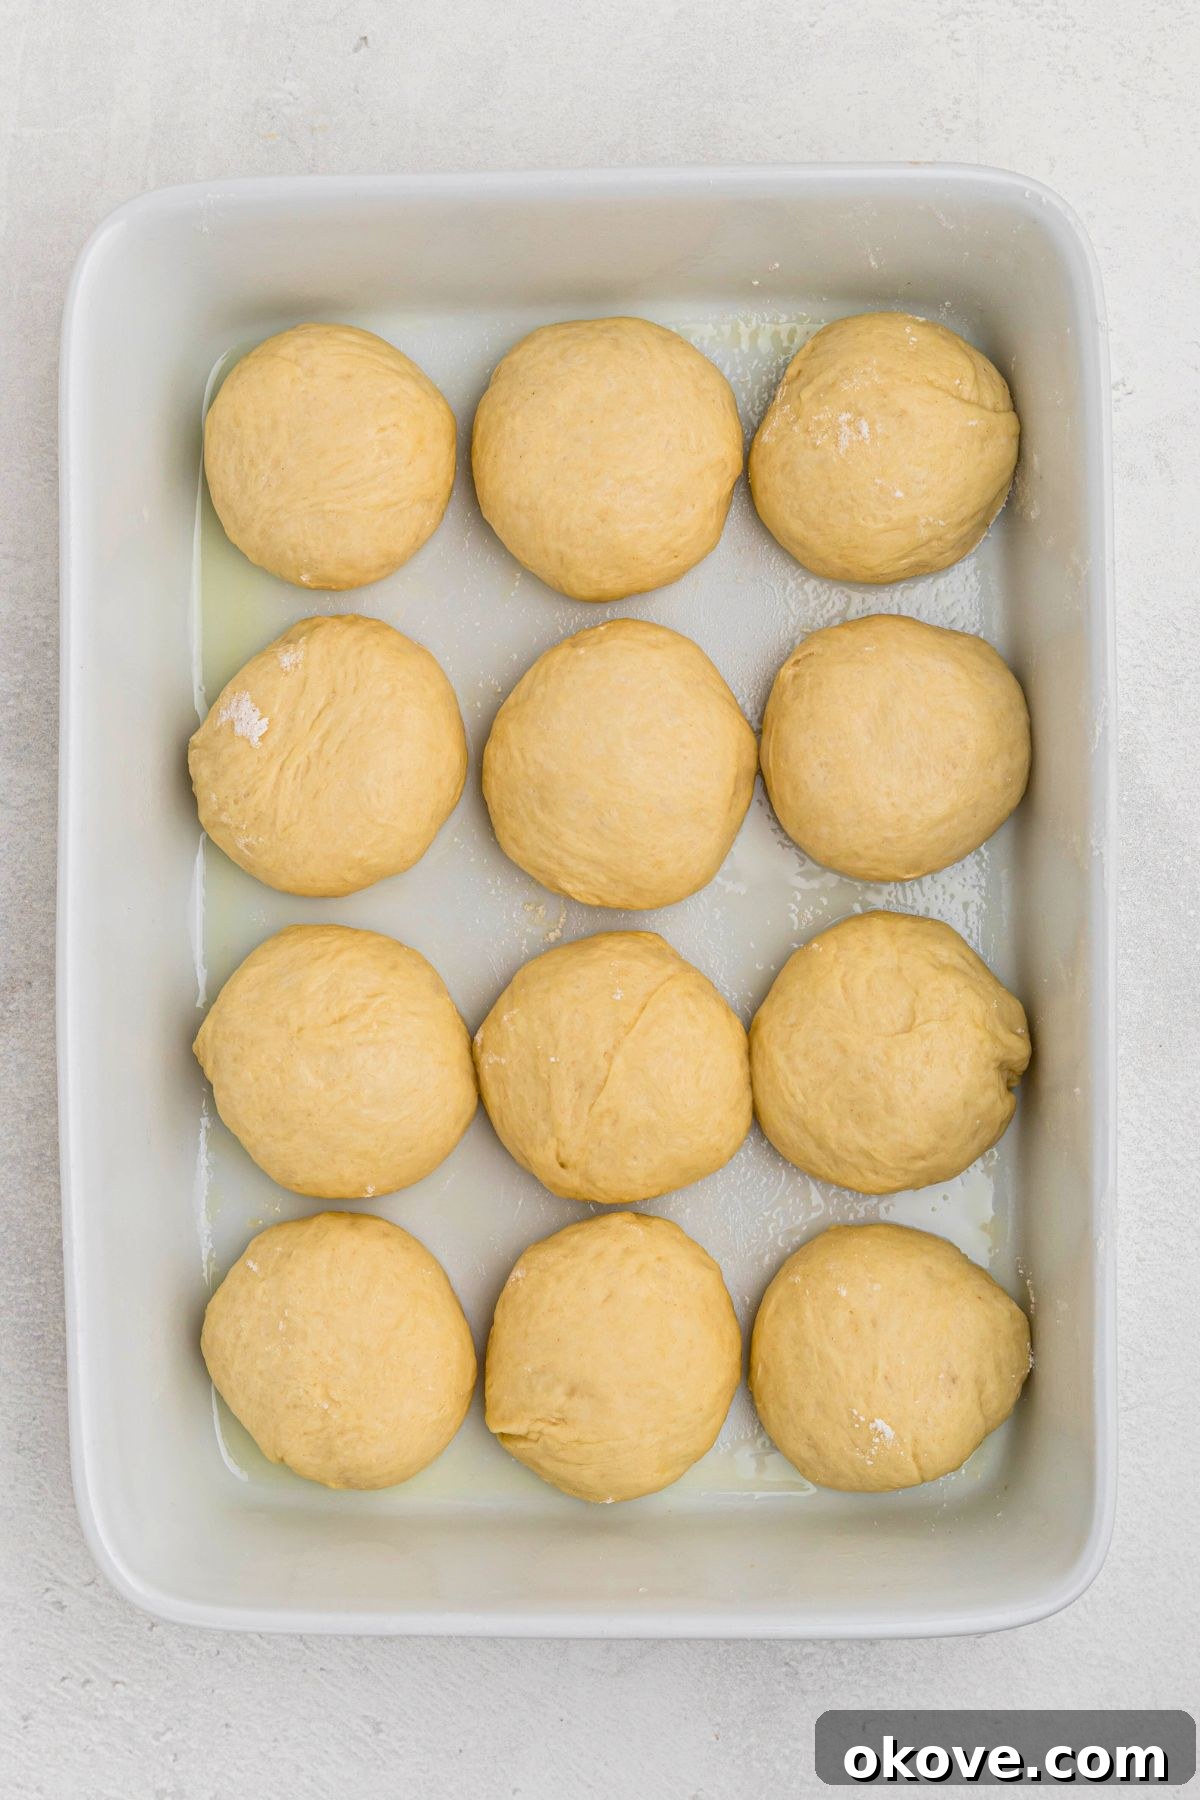
- Shape and Second Rise (Proofing): Shape each individual dough piece into a smooth, tight ball. You can do this by cupping the dough in your hand and rolling it against the counter to create tension on the surface. Arrange the shaped rolls in a greased 9×13 inch baking dish, leaving a small space between each roll to allow for expansion. Cover the dish again with a clean kitchen towel or plastic wrap. Allow the rolls to undergo their second rise for about 30 minutes in a warm, draft-free place. During this time, preheat your oven to 375°F (190°C), ensuring it’s fully ready when the rolls are.
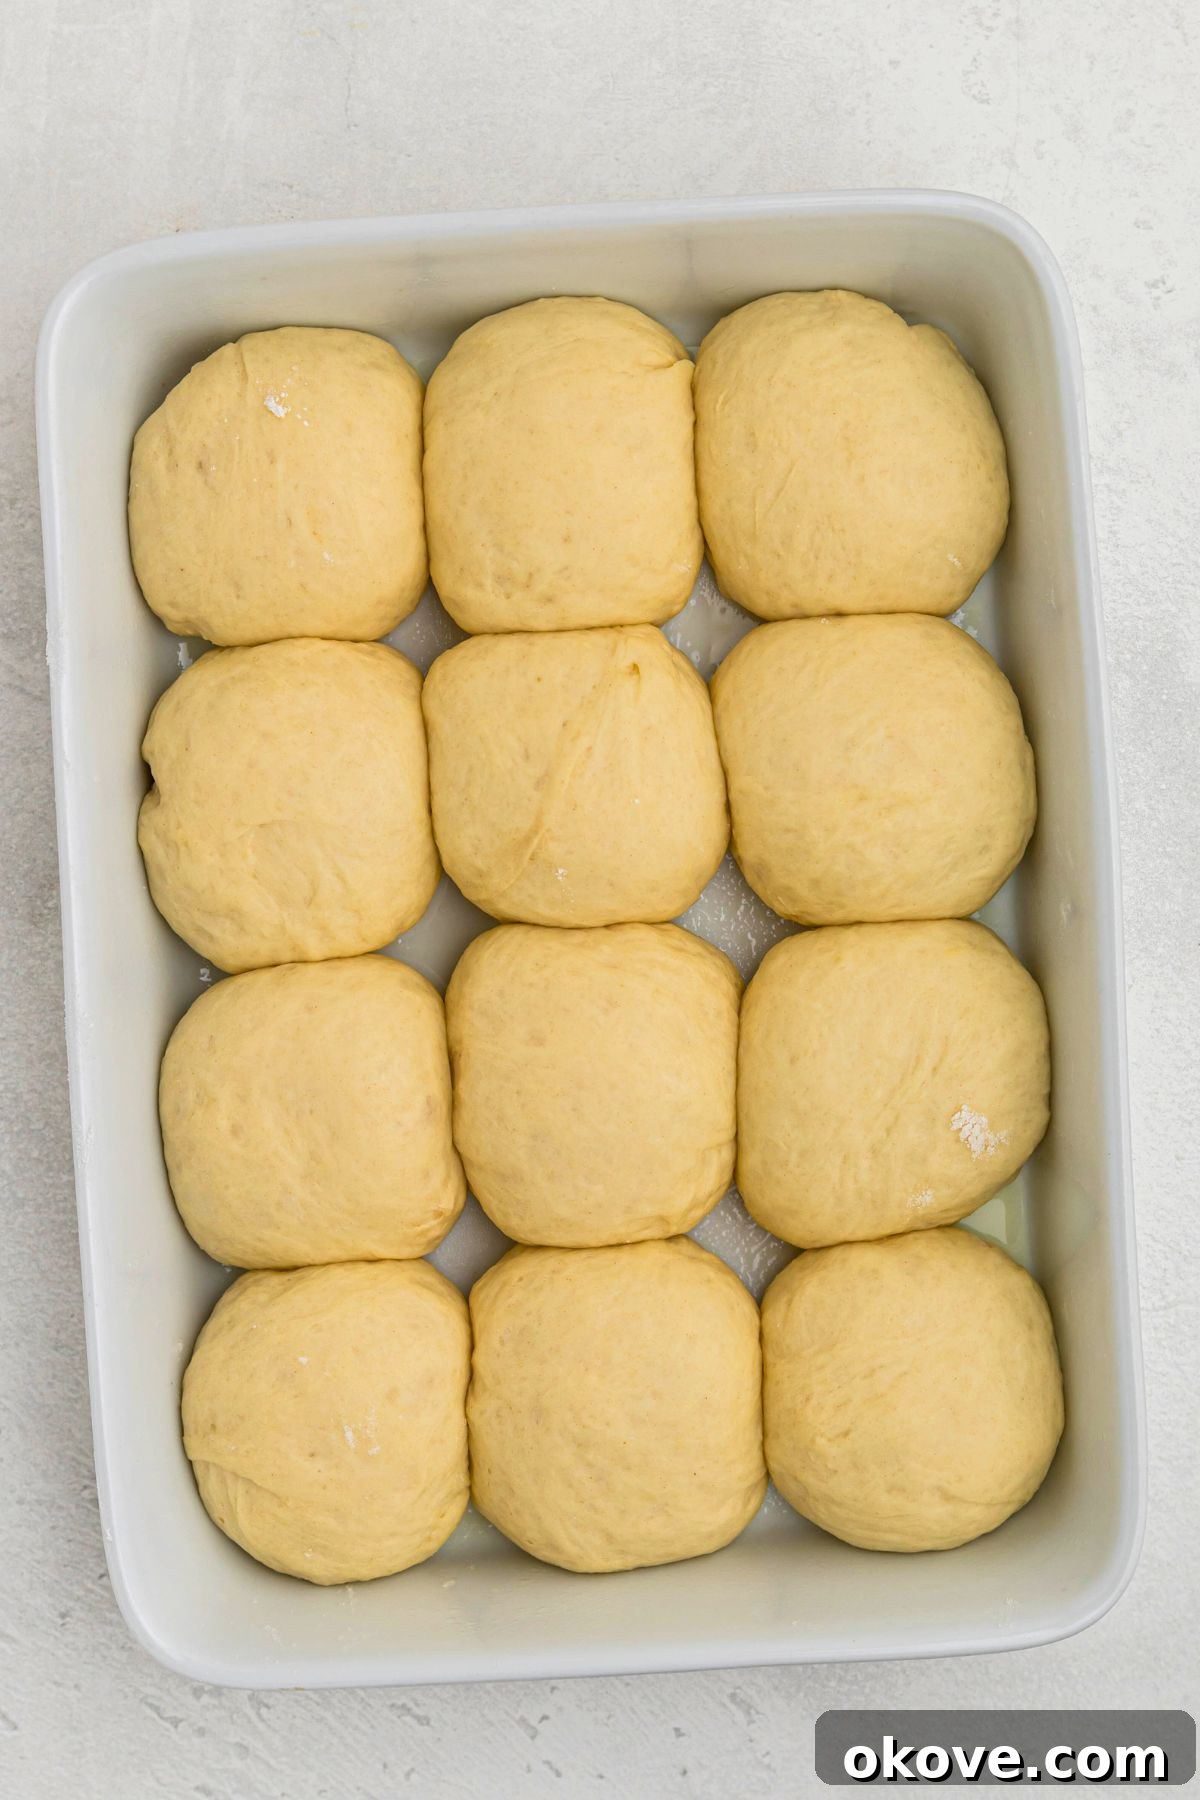
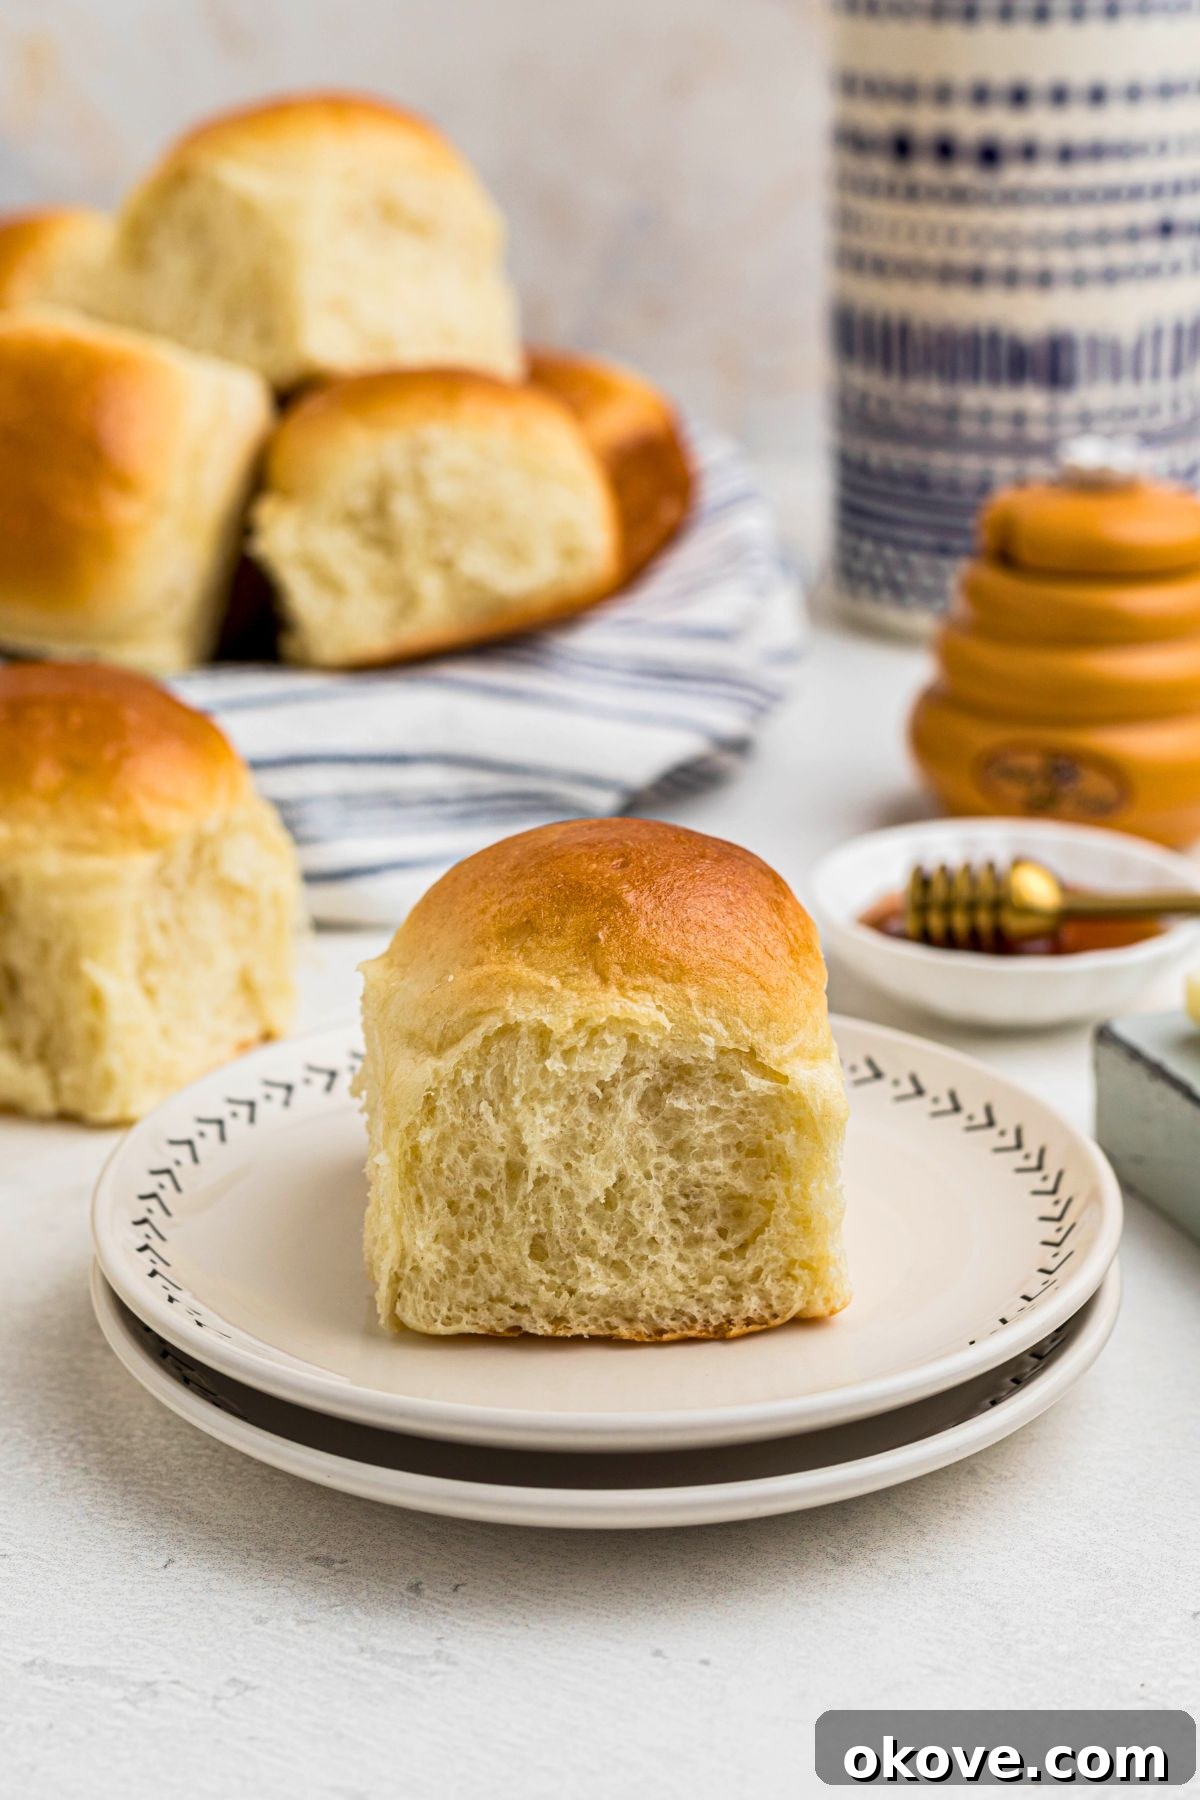
- Bake and Serve: Once the rolls have puffed up and nearly doubled in size again (they should look noticeably plump and airy), transfer the baking dish to the preheated oven. Bake for 15 to 18 minutes, or until the tops are beautifully golden brown and the internal temperature reaches around 200-210°F (93-99°C). Immediately after removing them from the oven, brush the tops with an optional tablespoon of melted butter for an extra shine, a delectable buttery flavor, and an even softer crust. Serve these delightful homemade dinner rolls warm and prepare for rave reviews!
Baking Success: Expert Tips for Dinner Rolls
Achieving bakery-quality, **soft and fluffy dinner rolls** at home is easier than you think, especially with a few insider tricks. These expert tips will help ensure your rolls turn out perfect every time, impressing everyone who tries them and making your baking process a joy:
- Perfecting Milk Temperature for Yeast: The temperature of your milk is paramount for successful yeast activation. Aim for a precise range between 105-115°F (40-46°C). Too cold, and the yeast won’t activate efficiently, leading to a slow or non-existent rise; too hot, and it will kill the delicate yeast cells entirely. A simple and effective method is to gently heat the milk in a microwave-safe bowl on high for approximately one minute. Always use a reliable kitchen thermometer to verify the temperature before adding the yeast for optimal results. It’s a small step that makes a huge difference in your dough’s vitality.
- Importance of Room Temperature Ingredients: Beyond just the milk, using other room temperature ingredients like eggs and butter is highly beneficial. Cold ingredients can shock and significantly slow down the yeast’s activity, hindering the proofing process. Allowing eggs and butter to come to room temperature ensures they incorporate smoothly and evenly into the dough, resulting in a more consistent emulsion and a ultimately more tender, uniform texture in your baked rolls. Plan ahead by taking them out of the refrigerator 30-60 minutes before you begin.
- Avoid Overworking the Dough: While kneading is crucial for developing the gluten structure that gives bread its chew and elasticity, there’s a fine line. Knead the dough just until it’s smooth, elastic, and passes the “windowpane test” (where a small piece of dough can be gently stretched thin enough to see light through it without tearing). Over-kneading can lead to overly developed, tight gluten, which results in tough, dense, and less enjoyable rolls. Stop kneading as soon as the desired smooth and supple consistency is achieved.
- Embrace a Longer First Rise for Ultimate Softness: While 60 minutes is a good baseline for the first rise, allowing the dough to rise for a slightly longer period – typically 1 to 1½ hours – can significantly enhance both the texture and flavor. A slower, more gradual rise allows for more complex flavor development through prolonged fermentation and contributes to an even fluffier, more tender crumb in the final baked rolls. Always go by visual cues (doubled in size) rather than strictly by time.
- Create a Warm, Draft-Free Environment for Rising: Yeast thrives in warmth and humidity. If your kitchen is cool or prone to drafts, finding an ideal spot for your dough to rise is essential. This could be inside a slightly warmed (but turned off) oven, near a sunny window, or in a microwave (again, turned off) with a cup of hot water alongside it to create a steamy, warm micro-environment. Avoid placing dough directly on a cold countertop or near an open window.
- Achieve Uniform Rolls for Even Baking: For consistent baking results and a beautifully presented batch, strive to make your rolls as uniform in size and shape as possible. Using a kitchen scale to weigh each portion of dough after punching it down is the most accurate way to ensure consistency. This prevents some rolls from over-baking and becoming dry while others are still cooking through. Consistent shaping also leads to a more professional-looking finished product.
- Brush with Butter Immediately After Baking: Don’t skip this simple yet impactful final step! Brushing the hot rolls with a little melted butter as soon as they emerge from the oven accomplishes several things: it adds an incredible, appealing shine, infuses them with a delectable buttery flavor, and crucially, helps to keep the crust wonderfully soft and tender.
Understanding Yeast: Active Dry versus Instant (Rapid Rise)
Yeast is the magical ingredient that transforms simple dough into light, airy bread. However, navigating the different types can sometimes be confusing for home bakers. For most home baking recipes, the primary distinction lies between active dry yeast and instant (or rapid rise) yeast. Understanding their differences will help you adapt recipes, troubleshoot issues, and achieve consistent, perfect results for your **homemade dinner rolls**.
Active Dry Yeast: This is the more traditional form of yeast, characterized by its larger, coarser granules. Active dry yeast requires a “blooming” or “proofing” step before being mixed with other ingredients. This means you need to dissolve it in a warm liquid (like the milk in this recipe, typically between 105-115°F or 40-46°C) along with a pinch of sugar. You then let it sit for 5-10 minutes. This process allows the dormant yeast cells to rehydrate and ensures they are alive and active, forming a foamy layer on the surface, before being incorporated into the rest of your dough. While it takes a bit more time due to this initial activation and generally requires a longer rise time for the dough itself, many experienced bakers believe active dry yeast contributes to a slightly deeper, more complex, and nuanced flavor in the final baked good due to its slower fermentation process.
Instant Yeast (Rapid Rise Yeast): Also known as rapid rise, quick-rise, or bread machine yeast, instant yeast features much finer granules compared to active dry. This finer texture allows it to dissolve and activate much more quickly, hence its name. The key advantage of instant yeast is that it does not require a separate blooming step. You can mix it directly with your dry ingredients (flour, sugar, salt) before adding any liquid. It also works faster, often cutting the dough’s rise time in half compared to active dry yeast. This makes it an excellent choice if you’re short on time, prefer a quicker baking process, or are using a bread machine.
Can You Substitute Between Active Dry and Instant Yeast? Yes, generally you can substitute active dry yeast for instant yeast and vice versa, but you’ll need to make a slight adjustment to the method and possibly the quantity:
- If using Instant Yeast in a recipe calling for Active Dry: You can typically use the same amount of instant yeast. The main change is that you can skip the blooming step. Simply mix the instant yeast directly with your dry ingredients (flour, sugar, salt), then proceed with the recipe as usual. Be aware that your dough might rise faster, so keep an eye on it.
- If using Active Dry Yeast in a recipe calling for Instant: You may need to use about 25% more active dry yeast to compensate for its slightly slower activity (e.g., if a recipe calls for 1 tsp instant, use 1.25 tsp active dry). Crucially, you *must* bloom the active dry yeast first in a portion of the recipe’s warm liquid (and a pinch of sugar) before adding this mixture to your dry ingredients. Be prepared for a potentially longer rise time.
While rapid rise yeast is a fantastic option for speeding up the bread-making process, keep in mind that the flavor profile of the rolls might be subtly different. The slower, more gradual fermentation of active dry yeast often allows for a richer development of flavor, which some purists prefer. For this **easy dinner rolls** recipe, we recommend active dry yeast to ensure that classic homemade taste and texture, but feel free to experiment with instant yeast if time is a constraint. Whichever you choose, ensure your yeast is fresh and stored properly for the best results.
Frequently Asked Questions About Dinner Rolls
The egg plays several important roles in crafting delicious dinner rolls. It adds significant richness and helps create an exceptionally softer and fluffier texture. Eggs contribute fat, moisture, and protein to the dough, enhancing its tenderness, improving its structure, and giving the rolls a slightly more golden interior and crust. While this recipe was originally tested without an egg and still yielded great results, including one truly elevates the rolls, making them even more tender, luxurious, and pillowy. You can omit it if you have dietary restrictions or don’t have one on hand, but for the best texture, it’s highly recommended.
Absolutely! Preparing dinner rolls in advance is a fantastic way to save time, especially for holiday meals or busy weeknights. You have a couple of options: You can shape the rolls into individual balls, place them in your greased baking dish, then cover them tightly with plastic wrap and refrigerate overnight (up to 12-18 hours). The next day, remove them from the refrigerator about 1-2 hours before you plan to bake, allowing them to come to room temperature and complete their second rise. They might take a bit longer to rise when cold, so allow ample time. Alternatively, you can bake the rolls completely, let them cool, and then freeze them. See the storage FAQ for more details on freezing.
Yes, you can easily substitute instant yeast for active dry yeast in this recipe. Since instant yeast has finer granules and activates more quickly, you can skip the initial “blooming” step with the warm milk and sugar. Simply mix the instant yeast directly with the flour and other dry ingredients before adding the wet ingredients. Keep all other measurements and instructions the same. You’ll still achieve wonderful, fluffy rolls, and the overall rising time might even be slightly shorter, so keep an eye on the dough’s progress.
While whole milk does contribute a richer flavor and a noticeably softer, more tender texture to the rolls due to its higher fat content, it’s not strictly necessary. You have flexibility here! You can certainly use 2% milk, skim milk, or even non-dairy alternatives like almond milk or oat milk if that’s what you have on hand or prefer. The most important factor is ensuring that whatever milk you choose is warmed to approximately 105-115°F (40-46°C) to properly activate the yeast. Rolls made with lower-fat or non-dairy milk might have a slightly less rich texture, but they will still turn out wonderfully soft and delicious, albeit perhaps a touch less decadent.
Leftover homemade dinner rolls are best stored in an airtight container or a large zip-top bag at room temperature for up to 2-3 days. To reheat and restore their delightful freshness, you can warm them in a preheated oven at 300°F (150°C) for about 5-7 minutes, or briefly microwave them for 10-15 seconds for a quick warm-up (though the oven method yields a better texture). For longer storage, allow cooled rolls to completely cool to room temperature, then place them in a freezer-safe bag or airtight container. They can be frozen for up to 2-3 months. Thaw frozen rolls at room temperature or reheat directly from frozen in the oven until warmed through.
If your rolls aren’t rising as expected, there are a few common culprits. The most frequent issue is the yeast itself. Ensure your yeast is fresh (always check the expiration date on the packet) and that your warm milk is at the correct temperature (105-115°F / 40-46°C). Milk that’s too hot will kill the yeast, rendering it inactive, while milk that’s too cold won’t activate it sufficiently. Another significant factor is the rising environment; a cold or drafty spot can significantly slow down or prevent yeast activity. Make sure your dough is placed in a warm, draft-free place for both rises. Lastly, too much flour can make the dough dense and inhibit rising, so always add flour gradually.
More Delicious Side Dish Recipes
Side Dish
Homemade Stuffing Recipe
Side Dish
Ambrosia Salad
Side Dish
Dinner Rolls
Side Dish
Roasted Green Beans
If you’ve had the pleasure of trying this wonderful recipe or any others from Celebrating Simply, we would be absolutely thrilled if you would leave a ⭐ star rating and share your delightful thoughts in the ✍️ comments below. Your valuable feedback means the world to us and helps our community grow!
Dinner Rolls
Rebecca
12
15 mins
15 mins
1 hr 30 mins
2 hrs
Equipment
-
Large Mixing Bowl
-
Microwave-Safe Bowl (for warming milk)
-
9×13 Inch Baking Dish
-
Kitchen Thermometer (optional, but highly recommended for milk temperature)
-
Whisk or Sturdy Spoon
-
Clean Kitchen Towel or Plastic Wrap
-
Kitchen Scale (optional, for uniform rolls)
Ingredients
- 2 1/4 teaspoons active dry yeast (equivalent to one standard packet)
- 1 cup warm milk (heated to 105-115°F / 40-46°C)
- 2 tablespoons granulated sugar
- 1 large egg (at room temperature)
- 3 tablespoons unsalted butter, melted and slightly cooled
- 1 teaspoon kosher salt
- 2 1/2 cups all-purpose flour, plus an additional 1/4-1/2 cup for dusting and kneading the dough.
Optional: For a glossy, extra buttery finish
- 1 tablespoon melted unsalted butter (for brushing tops of rolls immediately after baking)
Instructions
-
Activate the Yeast: In a large mixing bowl, combine the warm milk (verify temperature with a thermometer to be between 105-115°F / 40-46°C), granulated sugar, and active dry yeast. Stir gently to ensure the sugar and yeast are mostly dissolved in the milk.
-
Proof the Yeast: Let the mixture sit undisturbed for 5 to 10 minutes. It should become foamy and bubbly on the surface, indicating the yeast is active and alive. If no foam appears, your yeast may be old or the milk temperature was incorrect; it’s best to start again with fresh yeast and correct temperature.
-
Combine Ingredients: Once the yeast mixture is bloomed, gently whisk in the room temperature egg, the melted and slightly cooled unsalted butter, and the kosher salt. Gradually add the 2 1/2 cups of all-purpose flour, stirring continually with a sturdy spoon or spatula until a soft, shaggy dough begins to form. All the flour should be moistened.
-
Knead the Dough: Transfer the dough to a lightly floured surface. Knead by hand for approximately 5-7 minutes. Add small amounts of the reserved 1/4-1/2 cup flour as needed to prevent sticking, but avoid adding too much, which can make the rolls dry. Continue kneading until the dough is smooth, elastic, and slightly tacky but no longer sticky. Alternatively, use a stand mixer with a dough hook on medium-low speed for 2 to 3 minutes until smooth.
-
First Rise (Bulk Fermentation): Lightly grease a clean bowl. Place the kneaded dough in the bowl, turning it once to coat lightly. Cover the bowl with a clean kitchen towel or plastic wrap. Let the dough rise in a warm, draft-free place for about 60 minutes, or until it has visibly doubled in size. This step is crucial for flavor and texture development.
-
Punch Down and Divide: Once the dough has doubled, gently punch it down to release the air. Transfer it to a lightly floured surface and divide it into 12 equal pieces. For best uniformity, use a kitchen scale to ensure each piece weighs approximately 2 ounces. Shape each piece into a smooth, tight ball.
-
Shape and Second Rise (Proofing): Arrange the shaped rolls in a greased 9×13 inch baking dish, leaving a small space between each. Cover the dish with a clean kitchen towel or plastic wrap. Allow the rolls to undergo a second rise for 30 minutes in a warm place. During this time, preheat your oven to 375°F (190°C), ensuring it’s ready when the rolls are.
-
Bake and Serve: Once the rolls have puffed up and nearly doubled again, transfer the baking dish to the preheated oven. Bake for 15 to 18 minutes, or until the tops are beautifully golden brown. Immediately after removing them from the oven, brush the tops with an optional tablespoon of melted butter for an extra shine and a soft, rich crust. Serve these delightful homemade dinner rolls warm and enjoy!
Notes
Use room temperature ingredients: For optimal yeast activity and a smooth, consistent dough, ensure your milk and egg are at room temperature. Cold ingredients can slow down the yeast’s process, leading to a longer or less effective rise. Plan ahead by taking them out of the refrigerator 30-60 minutes before you begin baking.
Don’t overwork the dough: Kneading develops gluten, which gives rolls structure. However, over-kneading can make the gluten too tight, resulting in tough, dense rolls. Knead just until the dough is smooth and elastic. If using a stand mixer, 2-3 minutes is usually sufficient.
Longer first rise = softer rolls: While a 60-minute rise is sufficient, allowing the dough to rise for a slightly longer period (up to 1.5 hours) during the first proof can lead to even fluffier, more tender rolls with a richer flavor profile due to extended fermentation. Always observe the dough until it has truly doubled in size rather than strictly following the clock.
Troubleshooting a sticky dough: If your dough feels excessively sticky during kneading, add flour one tablespoon at a time, incorporating it fully until the dough becomes manageable. Avoid adding too much flour too quickly, as this can make the rolls dry and tough. The goal is a soft, pliable, and only slightly tacky dough.
Creating a warm rising environment: If your kitchen is chilly, you can create an ideal warm spot for rising. Place the covered dough in an oven that has been preheated to its lowest setting for just 1-2 minutes and then turned off. Alternatively, place it in a microwave (turned off) alongside a cup of hot water to create a steamy, warm environment.
Nutrition
Carbohydrates: 23g
Protein: 4g
Fat: 4g
Saturated Fat: 2g
Polyunsaturated Fat: 0.3g
Monounsaturated Fat: 1g
Trans Fat: 0.1g
Cholesterol: 25mg
Sodium: 209mg
Potassium: 71mg
Fiber: 1g
Sugar: 3g
Vitamin A: 143IU
Vitamin C: 0.002mg
Calcium: 32mg
Iron: 1mg
Nutrition information is automatically calculated and should only be used as an approximation. Actual values may vary based on ingredients, preparation methods, and exact serving sizes.
Additional Info
Breads & Rolls, Holidays, Side Dish
American, Comfort Food