
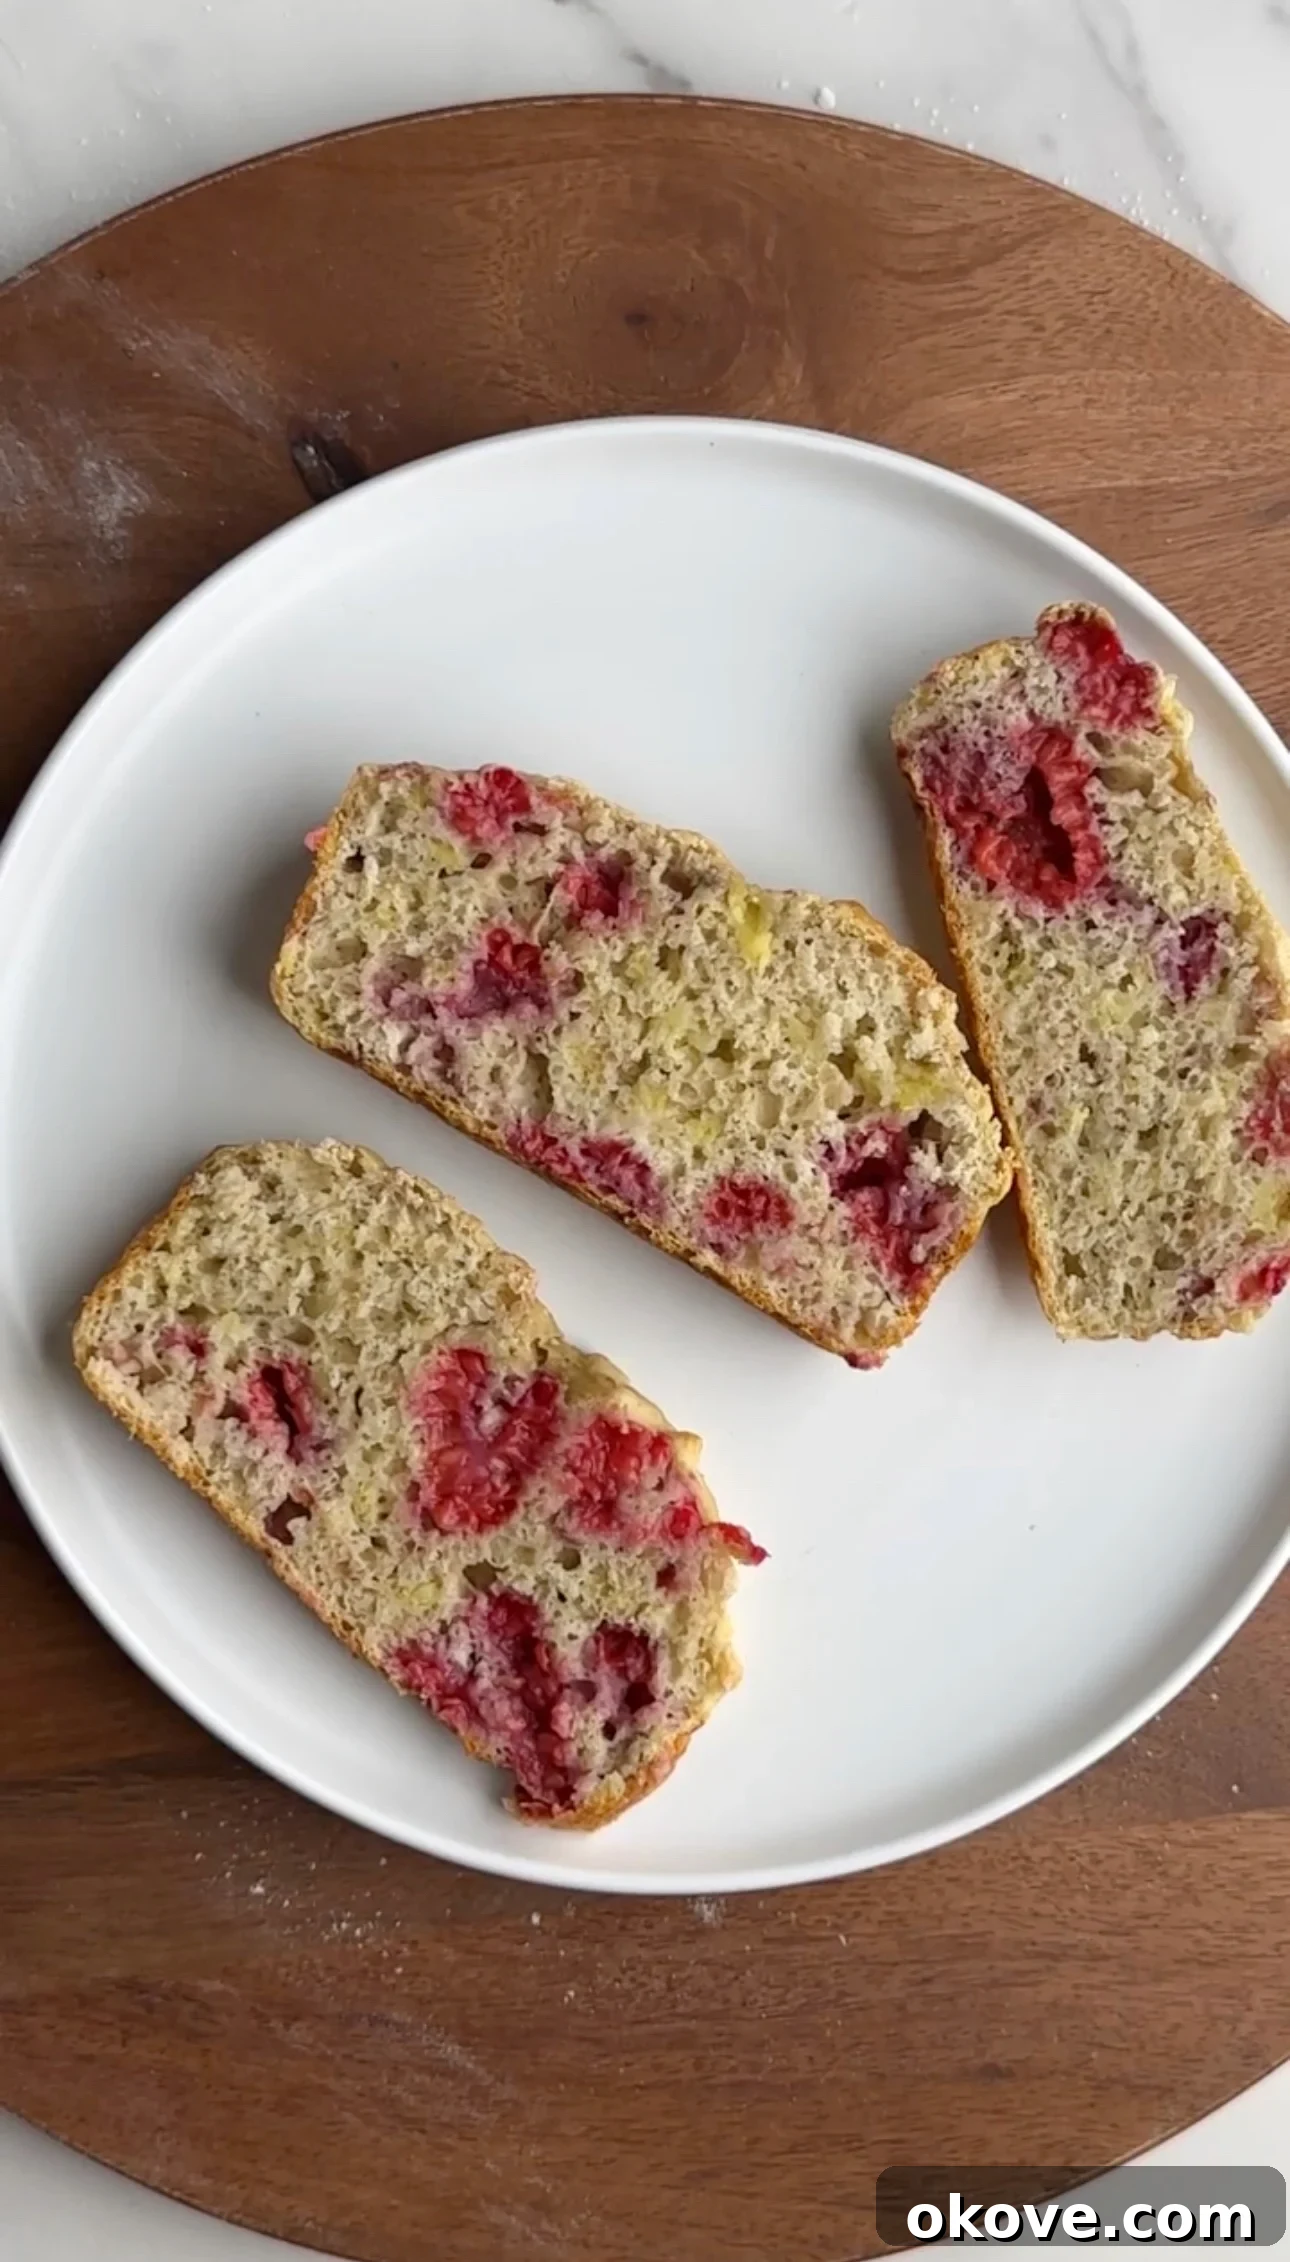
Welcome to the ultimate guide for creating the most delightful and nutritious Raspberry Banana Bread, a perfect treat designed with your little ones in mind. This recipe delivers a wonderfully soft, moist, and naturally sweet snack that toddlers and young children absolutely adore. Crafted from a blend of perfectly ripe bananas and vibrant, juicy raspberries, it requires just a handful of simple, wholesome ingredients – absolutely no refined sugar needed. What you get is a healthy banana bread with an incredibly tender texture, making it ideal for the littlest eaters. It’s a fantastic, fun, and flavorful way to incorporate more fruit into your toddler’s diet, presented in a form they’ll eagerly devour. Whether you’re slicing it for a quick and wholesome breakfast, packing it into a lunchbox for daycare, or offering it as an energizing afternoon snack, this kid-friendly banana bread stands out as a smart, healthy choice for even the busiest of days.
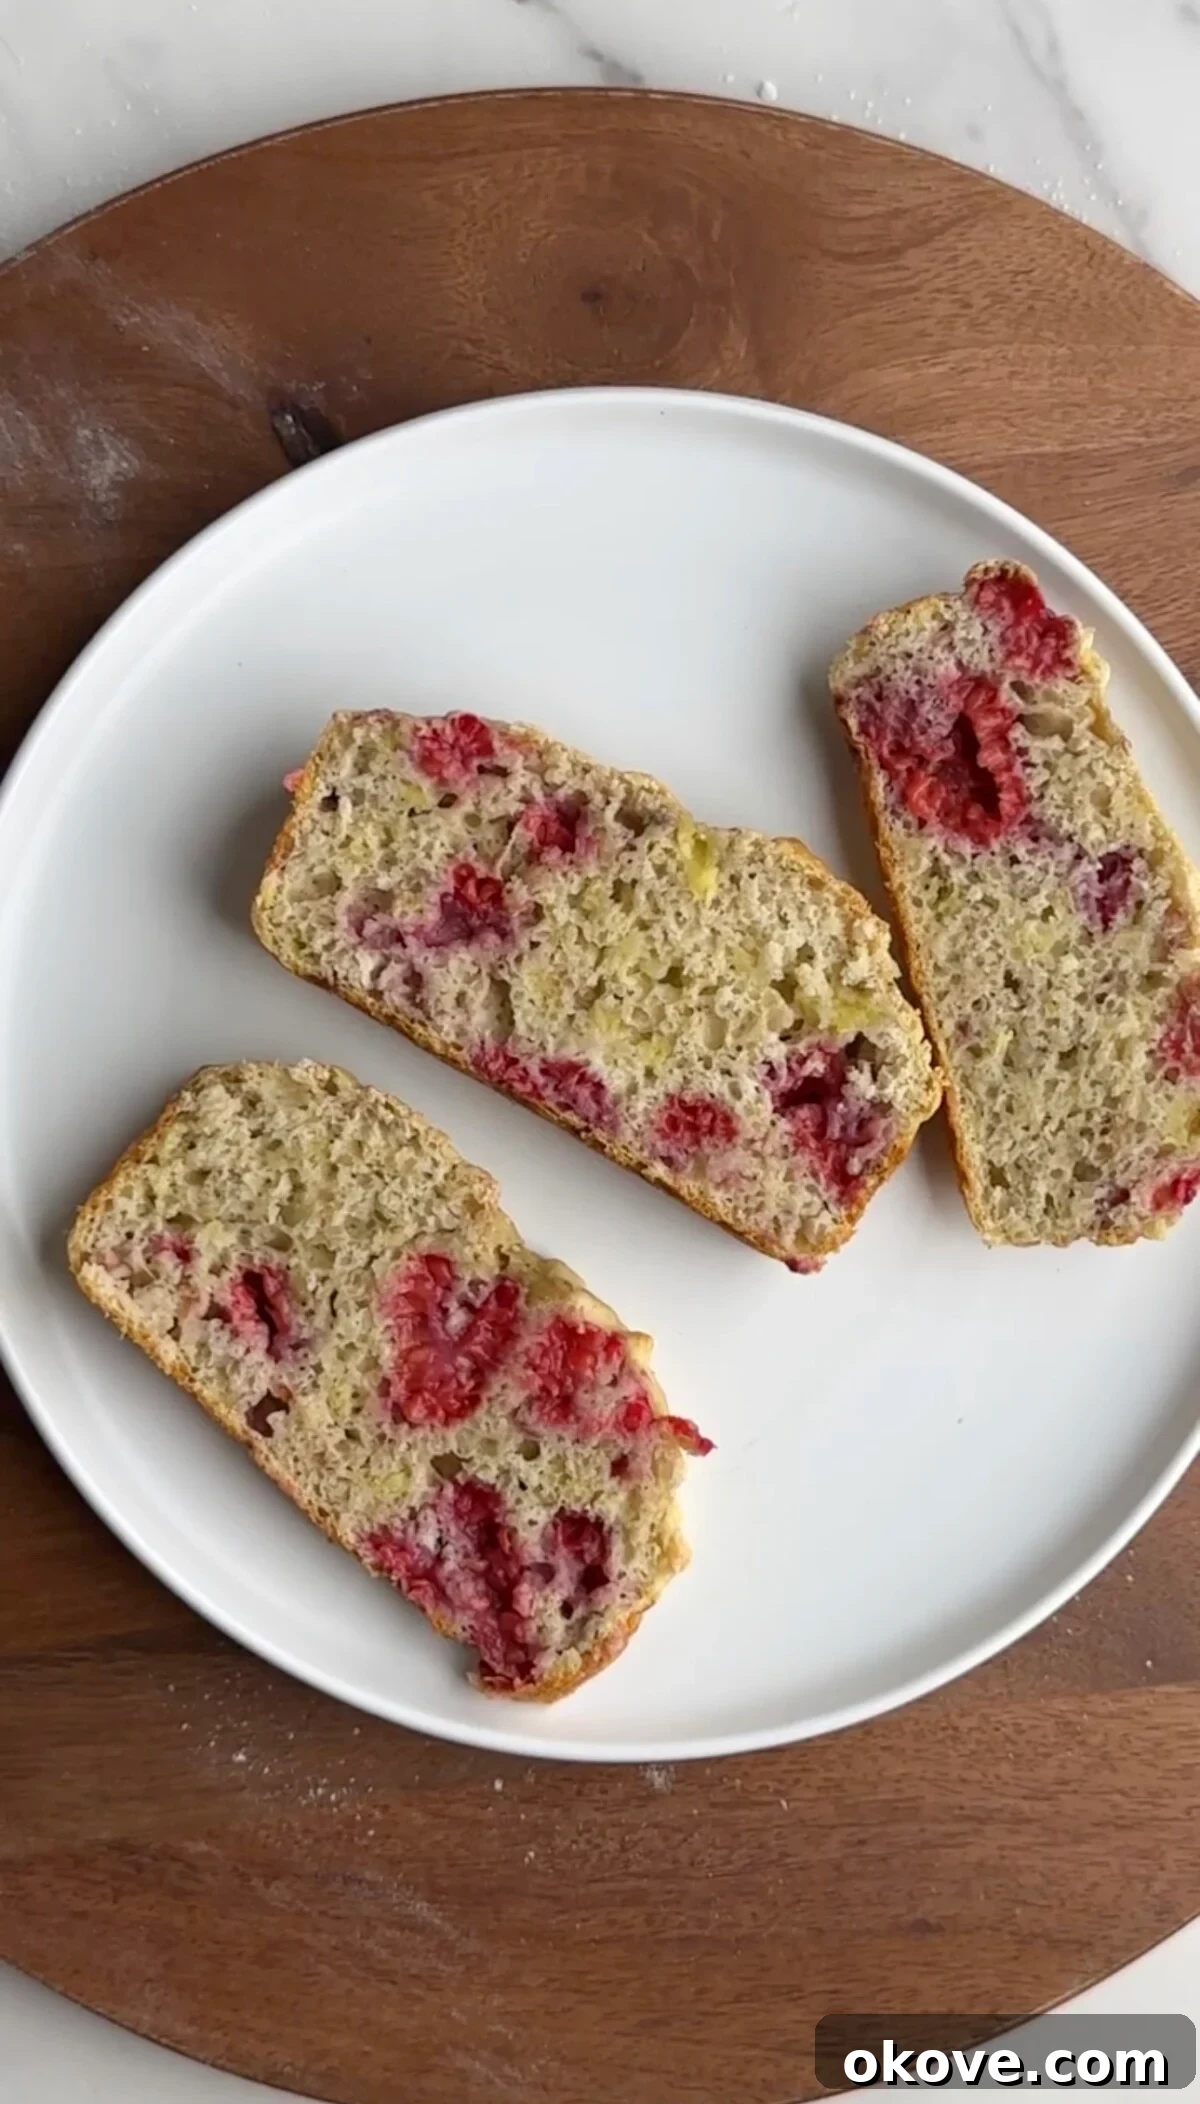
The Best Raspberry Banana Bread for Toddlers
Creating healthy and delicious snacks for toddlers can often feel like a challenge. You want something nutritious, easy to eat, and, most importantly, something they’ll actually enjoy! This Raspberry Banana Bread ticks all those boxes and more. It’s not just a tasty treat; it’s a thoughtfully designed snack that supports healthy growth and provides sustained energy for active little bodies. Let’s explore why this particular banana bread recipe is a game-changer for parents and a favorite for toddlers.
Why Raspberry Banana Bread is an Ideal Choice for Your Toddler
Choosing the right snacks for toddlers is crucial for their development and overall well-being. Our raspberry banana bread isn’t just a delicious option; it’s packed with benefits tailored for growing kids:
- Naturally Sweetened, No Added Refined Sugar: This recipe harnesses the natural sweetness found in ripe bananas and the delightful tartness of raspberries. By relying solely on these fruits, we eliminate the need for any refined sugars, making it a significantly healthier choice for your little one. Controlling sugar intake from an early age helps prevent sugar crashes and promotes healthier eating habits.
- Rich in Essential Fruits & Nutrients: With three mashed bananas and a generous portion of raspberries, this bread is brimming with vital vitamins, minerals, and dietary fiber. Bananas are excellent sources of potassium and Vitamin B6, essential for energy metabolism and nervous system health, while raspberries contribute Vitamin C, manganese, and antioxidants, supporting immunity and overall cellular health.
- Simple, Wholesome Ingredients: The beauty of this recipe lies in its simplicity. It calls for ingredients commonly found in most kitchen pantries, making it incredibly convenient and budget-friendly. You won’t need any obscure items, just everyday staples that combine to create something extraordinary.
- Irresistibly Kid-Approved Taste: The harmonious combination of naturally sweet bananas and bright, juicy raspberries creates a flavor profile that is almost universally loved by toddlers. It’s sweet enough to feel like a treat but balanced enough to be genuinely nutritious.
- Perfect Texture for Little Eaters: The resulting bread is incredibly soft, moist, and tender, which is perfect for developing teeth and gums. It’s easy for toddlers to chew and swallow, reducing choking hazards and making it suitable for baby-led weaning as well.
- Versatile and Convenient: This banana bread is incredibly versatile. It’s ideal for breakfast on the go, a nutritious snack between meals, a delightful addition to lunchboxes, or even a healthier dessert option. Its portability makes it an excellent choice for busy parents and active toddlers.
Essential Ingredients for Your Raspberry Banana Bread
Crafting this healthy and delicious raspberry banana bread requires only a few key ingredients. Each plays a vital role in achieving that perfect texture and flavor:
- 3 ripe mashed bananas: The riper the better! Look for bananas with plenty of brown spots, as these are naturally sweeter and easier to mash, contributing to the bread’s moistness and natural sweetness.
- 3/4 cup fresh or frozen raspberries: These berries add a burst of tart flavor and vibrant color. If using frozen, there’s no need to thaw them beforehand.
- 2 large eggs: Eggs act as a binder, helping to hold the bread together and contributing to its structure and richness.
- 1 teaspoon pure vanilla extract: Vanilla enhances the overall flavor profile, adding warmth and depth to the sweet fruit notes.
- 1 1/2 cups self-raising flour: This flour blend already contains a leavening agent and salt, making the baking process even simpler.
Note on Flour: If self-raising flour isn’t readily available in your pantry, don’t worry! You can easily create your own. Simply combine 1 1/2 cups of all-purpose (plain) flour with 2 1/4 teaspoons of baking powder and 1/4 teaspoon of fine salt. Sift them together thoroughly to ensure even distribution of the leavening agents.
Step-by-Step Guide: How to Bake the Perfect Raspberry Banana Bread
Making this delicious and healthy bread is incredibly simple, even for novice bakers. Follow these easy steps to achieve a perfectly moist and flavorful loaf every time:
- Preheat Your Oven and Prepare Your Pan: Begin by preheating your oven to 350°F (175°C). This ensures the oven is at the correct temperature when your batter is ready, promoting even baking. Lightly grease a standard 9×5-inch loaf pan with butter or cooking spray. For even easier removal and cleanup, you can line the pan with parchment paper, leaving an overhang on the sides.
- Prepare the Wet Ingredients: In a large mixing bowl, thoroughly mash the three ripe bananas using a fork or a potato masher until they are mostly smooth with only a few small lumps remaining. Lumps are fine and add texture! Next, crack in the two eggs and add the teaspoon of vanilla extract. Whisk these wet ingredients together until they are well combined and the mixture is uniform.
- Incorporate the Dry Ingredients: Now, add the 1 1/2 cups of self-raising flour (or your homemade all-purpose flour mixture) to the wet ingredients. Using a spatula or wooden spoon, gently stir until all the ingredients are just combined. Be careful not to overmix the batter; overmixing can develop the gluten in the flour, resulting in a tougher, denser bread. A few streaks of flour are perfectly acceptable.
- Gently Fold in the Raspberries: Carefully add the 3/4 cup of fresh or frozen raspberries to the batter. Using a gentle hand, fold them in just until they are evenly distributed. Overmixing here can cause the raspberries to break apart too much and color the entire batter, although a little bleeding adds a beautiful pink hue!
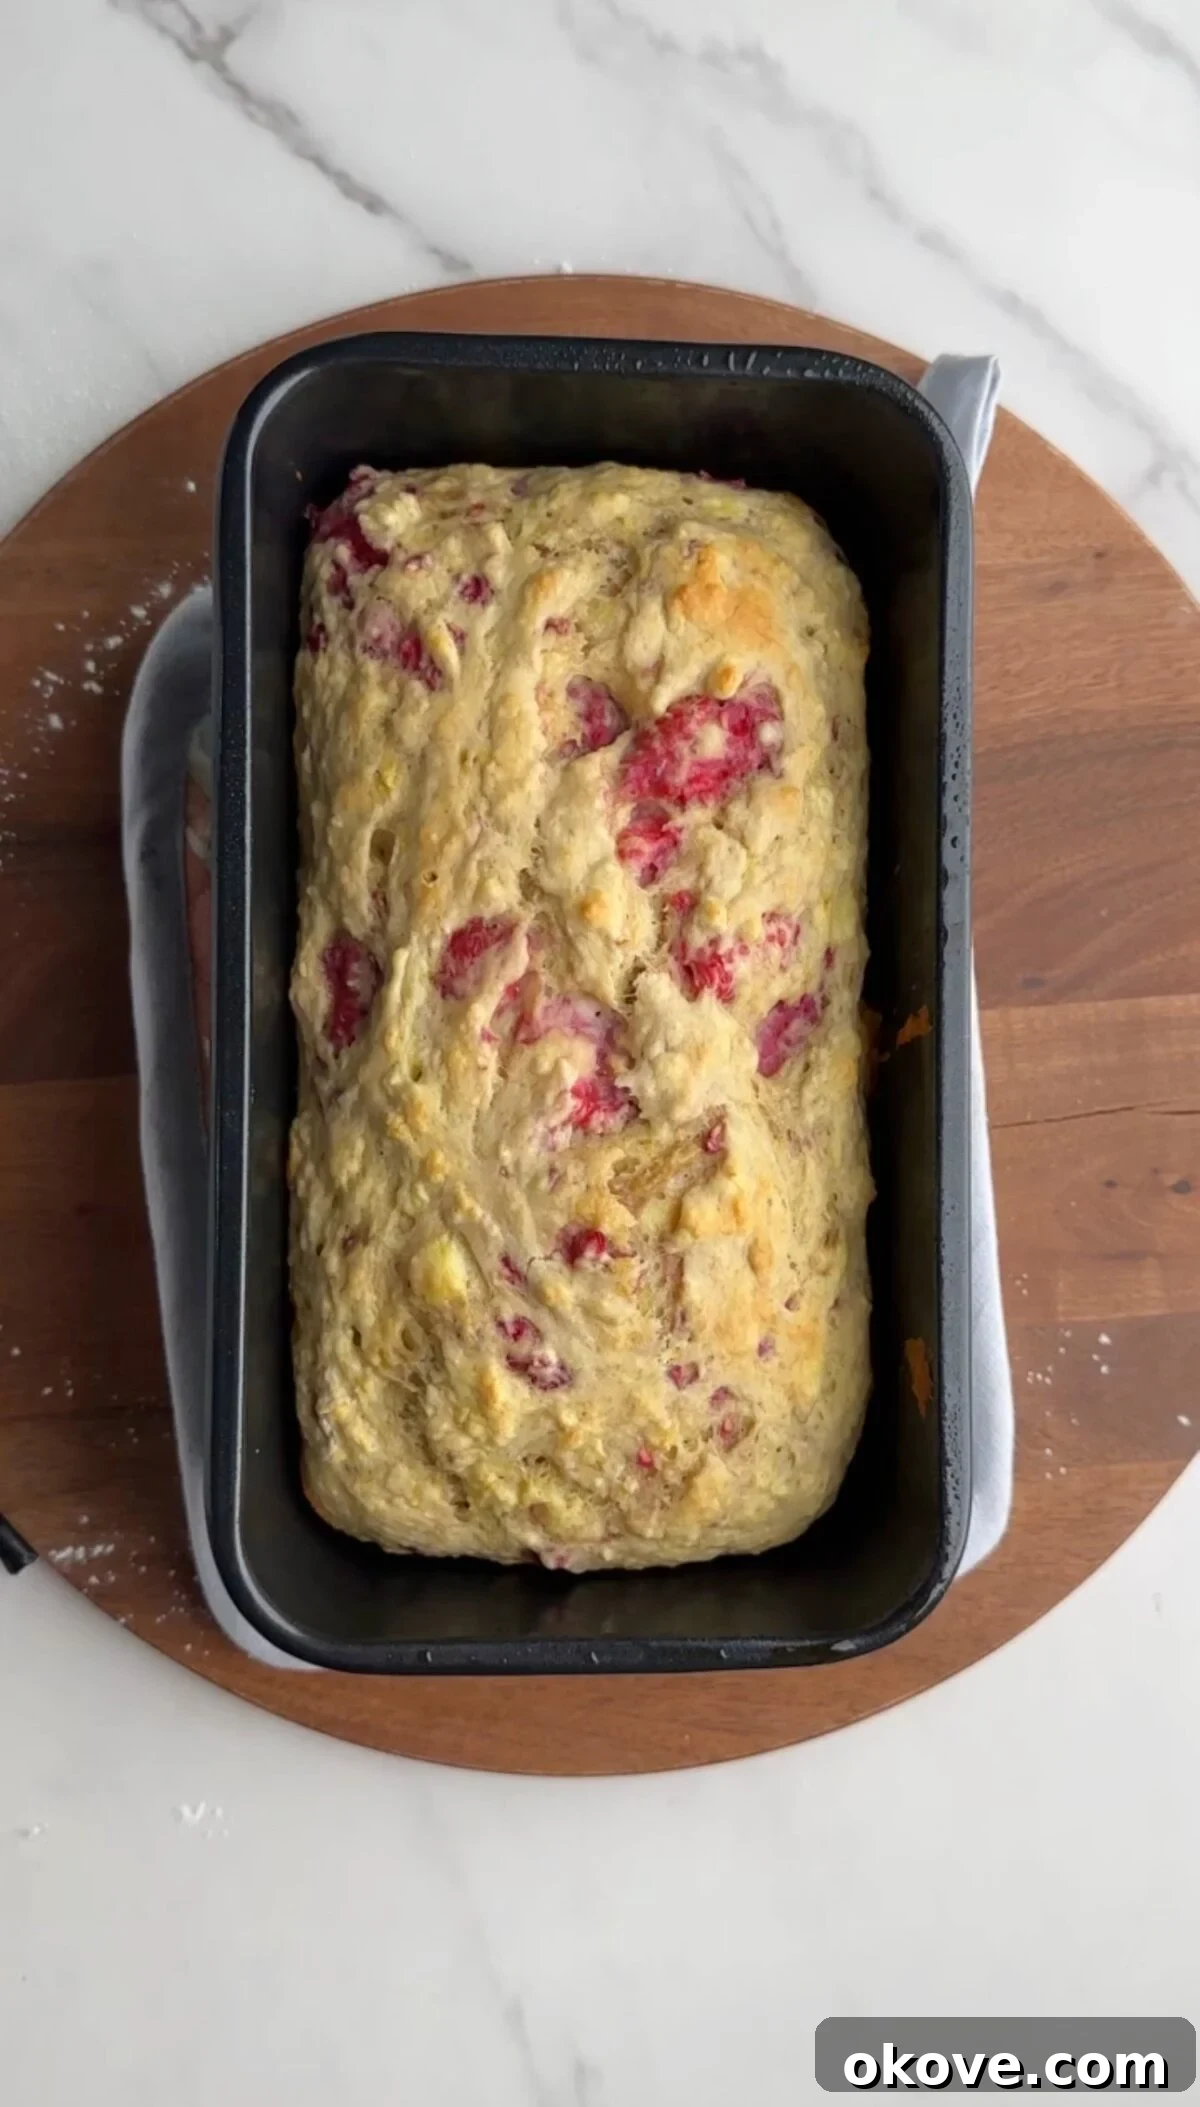
- Bake to Golden Perfection: Pour the prepared batter into your greased or parchment-lined loaf pan. Smooth the top with your spatula if needed. Place the pan in the preheated oven and bake for 30-35 minutes. To check for doneness, insert a toothpick into the center of the loaf. If it comes out clean or with only a few moist crumbs attached, your bread is ready. Keep in mind that baking times can vary slightly depending on your oven, so start checking a few minutes early.
- Cool and Serve: Once baked, remove the loaf pan from the oven and allow the Raspberry Banana Bread to cool in the pan for about 10-15 minutes. This crucial step allows the bread to set and makes it easier to remove without breaking. After this initial cooling, carefully transfer the loaf to a wire rack to cool completely. Cooling completely before slicing ensures a cleaner cut and helps retain moisture. Once fully cooled, slice and serve this delicious, healthy treat to your eagerly awaiting toddler.
Versatile Substitutions and Delightful Variations
One of the best things about this raspberry banana bread recipe is how adaptable it is. Feel free to experiment with different ingredients to suit your family’s preferences or dietary needs:
- Flour Alternatives:
- If you don’t have self-raising flour, as noted above, you can easily use all-purpose (plain) flour combined with baking powder and a pinch of salt to achieve the same leavening effect.
- For a **gluten-free** version, substitute the self-raising flour with an equal amount of your preferred gluten-free flour blend. Ensure your chosen blend contains xanthan gum or add 1/2 teaspoon per cup of flour for proper structure. Brands like Bob’s Red Mill 1-to-1 Baking Flour or King Arthur Gluten-Free All-Purpose Flour work wonderfully.
- You can also experiment with a blend of whole wheat flour and all-purpose flour for added fiber, though this might result in a slightly denser loaf.
- Berry Swaps:
- Raspberries are delicious, but other berries can be just as good! Feel free to swap them with 3/4 cup of fresh or frozen blueberries, chopped strawberries, or a mixed berry blend. Each will lend a unique flavor profile to the bread.
- For a fall-inspired twist, finely chopped apples or pears can also be used, perhaps with a sprinkle of cinnamon.
- Optional Add-ins for Flavor and Nutrition:
- Spices: A pinch of cinnamon or a tiny bit of nutmeg can add a comforting warmth.
- Chocolate Chips: For a slightly sweeter treat, especially for older toddlers or a special occasion, mini chocolate chips can be gently folded into the batter. Opt for dark chocolate chips for less sugar.
- Hidden Veggies: Finely grated zucchini or carrots (squeezed dry to remove excess moisture) can be added for an extra boost of nutrition without significantly altering the taste.
- Nut Butter: A tablespoon or two of almond or peanut butter (if no allergies) can be swirled into the batter for added protein and healthy fats.
Optimal Storage for Freshness
To ensure your delicious Raspberry Banana Bread stays fresh and moist for as long as possible, proper storage is key:
- Room Temperature (Short-Term):
- Once the bread has cooled completely, wrap it tightly in plastic wrap or aluminum foil.
- Store it on the countertop at room temperature for up to 2-3 days. Make sure it’s in a cool, dry place away from direct sunlight.
- Refrigeration (Mid-Term):
- For extended freshness, especially in warmer climates or if your home is humid, store the bread in the refrigerator.
- Place the wrapped bread in an airtight container or a large zip-top bag to prevent it from drying out or absorbing odors from other foods.
- It will stay fresh in the refrigerator for up to 3-4 days.
- Freezing (Long-Term):
- Freezing is an excellent option for meal prepping or saving portions for later.
- You can freeze the whole loaf or individual slices. For individual slices, wrap each slice tightly in plastic wrap, then place them in an airtight freezer bag or container. This allows you to thaw just what you need.
- For a whole loaf, wrap it thoroughly in plastic wrap, then in a layer of aluminum foil to prevent freezer burn.
- Frozen banana bread can be stored for up to 2-3 months.
- Thawing: To thaw, simply transfer slices or the whole loaf to the refrigerator overnight, or let them sit at room temperature for a few hours. For a quicker option, individual slices can be gently reheated in a microwave or toaster oven.
Common Questions About Raspberry Banana Bread
Can I use either fresh or frozen raspberries?
- Yes, absolutely! Both fresh and frozen raspberries work beautifully in this recipe. If you’re using frozen raspberries, there’s no need to thaw them beforehand. In fact, adding them to the batter while still frozen can help prevent them from bleeding too much color into the bread, keeping the batter’s color more consistent.
How can I make this banana raspberry bread gluten-free?
- To create a delicious gluten-free version, simply substitute the self-raising flour with a high-quality, all-purpose gluten-free flour blend. Look for blends that already contain a leavening agent like baking powder or xanthan gum, or add it separately as per the flour blend’s instructions. Ensure all other ingredients you use are also certified gluten-free.
Can I make this toddler-friendly bread into muffins?
- Yes, you certainly can! This recipe adapts perfectly to muffins. Just divide the batter evenly into a greased or lined standard muffin tin. Bake at 350°F (175°C) for a shorter duration, typically 20-25 minutes, or until a toothpick inserted into the center of a muffin comes out clean. Muffins are fantastic for portion control and on-the-go snacking!
What if my bananas aren’t ripe enough?
- For the best flavor and natural sweetness, very ripe bananas (with plenty of brown spots) are ideal. If your bananas are still green or firm, you can ripen them faster by placing them in a paper bag with an apple or by baking them on a baking sheet at 300°F (150°C) for 15-30 minutes until their peels turn black and shiny.
Can I add other fruits or vegetables?
- This recipe is quite forgiving for additions! Besides other berries, you can fold in finely grated zucchini (squeeze out excess moisture), shredded carrots, or even a handful of finely chopped apples or pears. These additions can boost nutrients and change the flavor subtly, making it great for picky eaters.
How do I know when the bread is perfectly baked?
- The most reliable test is the toothpick method: insert a toothpick or a thin skewer into the very center of the loaf. If it comes out clean or with only a few moist crumbs attached (no wet batter), the bread is done. The top should also be golden brown and the edges slightly pulled away from the pan.
More Healthy Toddler Breakfasts and Snacks to Explore
If your little ones enjoy this healthy raspberry banana bread, they’re sure to love these other nutritious and kid-friendly recipes:
Cottage Cheese Muffins – Packed with protein and boasting a naturally mild flavor, these Cottage Cheese Muffins are an excellent choice for a toddler snack or a quick breakfast. Their soft and fluffy texture makes them perfect for little hands, and they can be easily customized with finely diced veggies or a sprinkle of cheese for added appeal.
Pancake Muffins Made with Mix – Transform your go-to pancake mix into convenient, mess-free muffins! These bite-sized pancake muffins are fantastic for toddlers, offering a fun, portable, and easy-to-eat breakfast or snack solution.
Strawberry Waffles – Crafted with real strawberries, these waffles are wonderfully soft, bursting with fruity flavor, and perfectly portioned for toddlers. Serve them warm with a touch of yogurt, freeze them for future meals, or cut them into strips for an engaging self-feeding experience.
Chocolate Chip Banana Muffins – These soft, naturally sweet muffins are made with ripe bananas and a scattering of mini chocolate chips. A guaranteed toddler favorite, they’re ideal for breakfast, snack time, or packed into lunchboxes as a delightful surprise.
Banana Avocado Pancakes – Wholesome and incredibly soft, these pancakes are made with just three simple ingredients: banana, avocado, and egg. They provide a simple, highly nutritious breakfast for babies and toddlers who are learning to self-feed, offering healthy fats and essential vitamins.
We hope you and your little ones absolutely adore this healthy raspberry banana bread! Sharing your culinary creations brings us so much joy. If you’ve baked this recipe, we’d love to see your photos! Tag us on Instagram @reallittlemeals – happy baking!
Raspberry Banana Bread
A soft, moist banana bread made with sweet raspberries and no refined sugar. Perfect for toddlers, it’s easy to slice, freeze, and serve as a snack, breakfast, or lunchbox addition.
5 mins
30 mins
4
Review Recipe
Print Recipe
Ingredients
- 3 bananas, mashed
- 3/4 cup raspberries
- 2 eggs
- 1 tsp vanilla extract
- 1 1/2 cups self-raising flour, (if you don’t have self-raising flour, you can use 1 1/2 cups all-purpose flour, 2 1/4 tsp baking powder, and 1/4 tsp salt)
Instructions
-
Preheat the oven to 350 degrees F (175°C). Grease a standard loaf pan or line it with parchment paper for easy removal.
-
In a mixing bowl, mash the bananas. Add the eggs and vanilla extract and mix well. Then, add the self-raising flour and stir until just combined to form your batter. Gently fold in the raspberries.
-
Pour the batter into the prepared loaf pan. Bake in the preheated oven for 30-35 minutes, or until a toothpick inserted into the center comes out clean. Baking times may vary, so keep an eye on your bread in the last few minutes.
-
Allow to cool in the pan for 10-15 minutes, then transfer to a wire rack to cool completely before slicing and serving. Enjoy!
Notes
Batter Consistency: The batter should be thick but pourable. If it feels too thick, you can add a tablespoon of milk (dairy or non-dairy) to loosen it up slightly.
Mixing: Be careful not to overmix the batter once the flour is added, as this can lead to a tougher, denser bread. Mix just until the ingredients are combined.
Storage: Store any leftover bread in an airtight container at room temperature for up to 3 days, or refrigerate for up to a week. You can also freeze slices individually for up to 3 months for easy meal prep.
Nutrition
Carbohydrates: 57g,
Protein: 10g,
Fat: 3g,
Saturated Fat: 1g,
Polyunsaturated Fat: 1g,
Monounsaturated Fat: 1g,
Trans Fat: 0.01g,
Cholesterol: 82mg,
Sodium: 33mg,
Potassium: 430mg,
Fiber: 5g,
Sugar: 12g,
Vitamin A: 184IU,
Vitamin C: 14mg,
Calcium: 30mg,
Iron: 1mg
Nutrition information is automatically calculated, so should only be used as an approximation.
Additional Info
Mention @reallittlemeals or tag #reallittlemeals!